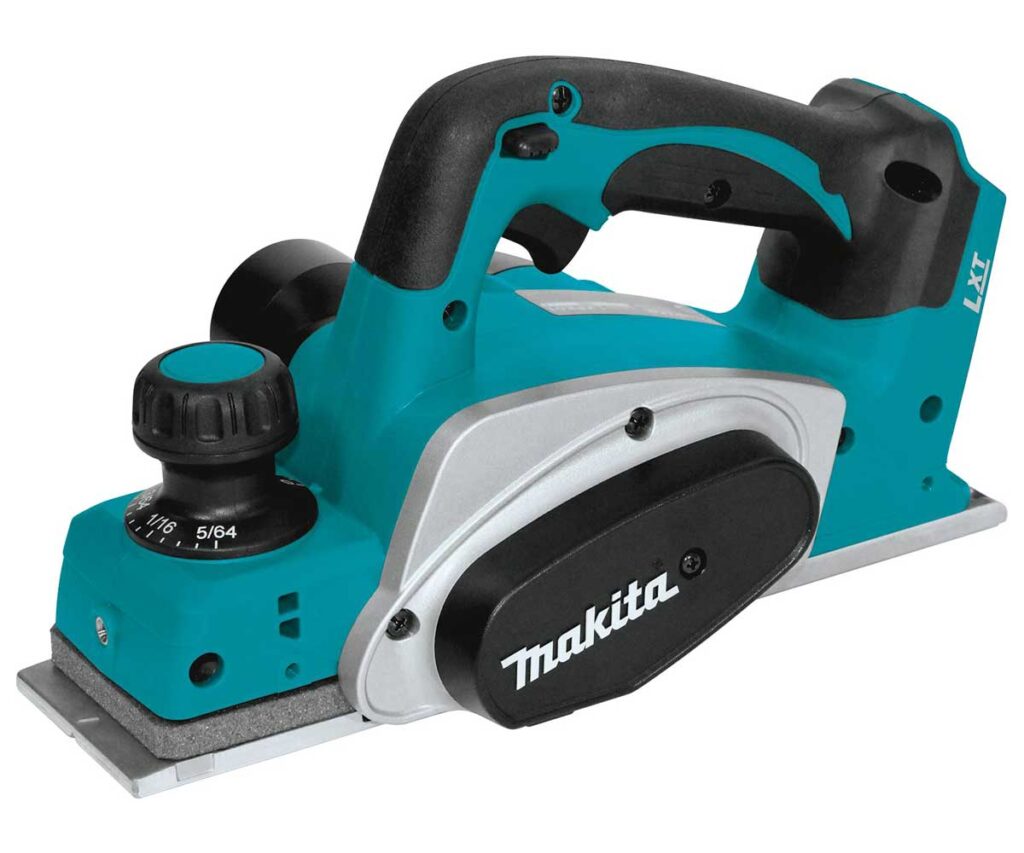
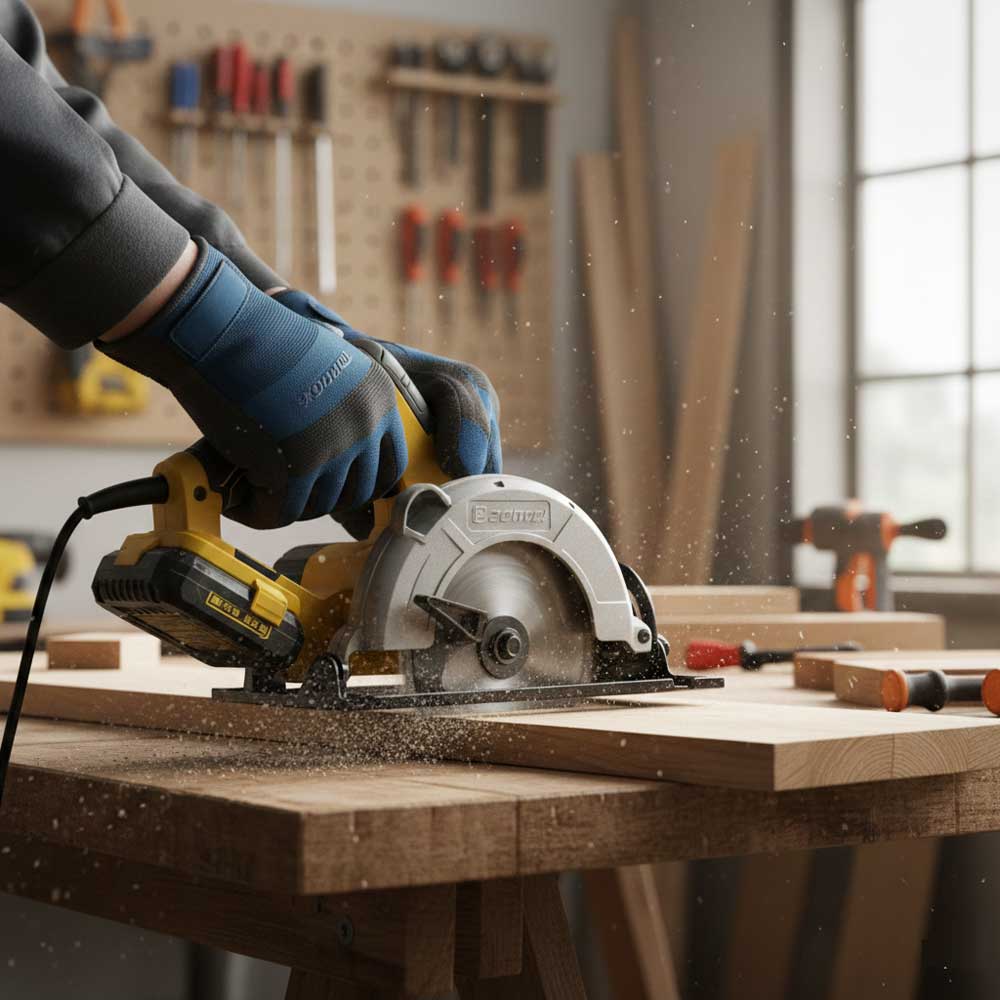
The porter cable biscuit joiner blades

There are many different types of porter cable biscuit joiner blades on the market. It can be difficult to decide which one is right for you. In this article, we will discuss the different types of blades available and help you decide which one is best for your needs. We will also talk about how to care for your blades and keep them in good condition.

Different types of porter cable biscuit joiner blades

The first type of blade is the standard blade. This blade is made of high-carbon steel and is designed for general purpose use. It is the most common type of blade used on porter cable biscuit joiners. Steel blades are less expensive but will need to be sharpened more frequently.

The second type of blade is the carbide-tipped blade. This blade is made of a harder material than the standard blade, and it is designed for more demanding applications. It is more expensive than the standard blade, but it will last longer and perform better in tougher situations. Carbide blades are more expensive but they hold their edge longer.

The third type of blade is the diamond-tipped blade. This blade is made of a very hard material, and it is designed for the most demanding applications. It is the most expensive type of blade, but it will last the longest and perform the best in the toughest situations.

Which type of blade is right for you? It depends on your needs. If you are doing general purpose work, the standard blade will be fine. If you need a blade that is tougher and more durable, the carbide-tipped or diamond-tipped blades would be a better choice.

Different sizes (inches) of porter cable biscuit joiner blades

There are many different sizes of biscuit joiner blades on the market. The most common sizes for porter cable biscuit joiner blades are two and four inches. The size of the blade you need will depend on the project you are working on. If you are working on a large project, you will need a larger blade. If you are working on a smaller project, you can use a smaller blade.

The size of the blade you need will depend on the type of wood you are working with. If you are cutting hardwoods, you will need a larger blade. For softer woods, a smaller blade will suffice.

Care of porter cable biscuit joiner blades

Porter cable biscuit joiner blades require special care in order to stay sharp and working properly. Here are a few tips on how to care for your blades:

  • Always store the blades in a dry place. Moisture can cause the blades to rust.
  • When not in use, cover the blades with a light oil to prevent rusting.
  • Be sure to clean the blades after each use. A build-up of sawdust can cause the blades to dull more quickly.

By following these simple tips, you can extend the life of your porter cable biscuit joiner blades and keep them working like new.

How do you change the blade on a Porter Cable plate joiner?

If you’re looking to change the blade on your Porter Cable plate joiner, there are a few things you need to know. First, make sure that you have the right size wrench for the bolts that hold the blade in place. Next, loosen the two screws that hold the blade in place. Be careful not to lose them! Finally, remove the old blade and insert the new one. Make sure that the new blade is tight before using the joiner again.

Changing the blade on your Porter Cable plate joiner is a simple process that anyone can do. With a little bit of know-how, you’ll be back to making perfect joints in no time!

Conclusion

Now that you know more about porter cable biscuit joiner blades, you can make an informed decision about which type is right for you. Be sure to consider all of the factors we have discussed before making your purchase. With a little research, you can find the perfect blade for your needs.

Porter Cable Biscuit Joiner: Everything You Need to Know

If you are in the market for a porter cable biscuit joiner, you have come to the right place. In this article, we will discuss everything you need to know about these handy tools before making your purchase. We will cover topics such as features, benefits, and what to look for when shopping for a porter cable biscuit jointer. By the end of this article, you will be an expert on porter cable biscuit joiners and will be able to make an informed purchase!

Porter cable biscuit joiners are a great tool for anyone who is looking to do some woodworking. These tools allow you to make strong, tight joints in wood without the use of nails or screws. Biscuit joiners are also very easy to use, which makes them a great choice for beginner woodworkers.

Porter cable biscuit joiner parts

The Porter Cable Biscuit Joiner comes with a number of different parts that all work together to help you make the perfect biscuit join. Each of these parts plays an important role in making sure that your biscuit join turns out perfectly. The main body of the machine is made up of the motor housing. The motor housing contains the motor and gears that drive the cutter. The baseplate provides a stable surface for you to work on. The fence ensures that your workpiece is held in place as you make your cut. And finally, the biscuit joiner cutter actually does the cutting.

With all of these parts working together, it’s no wonder that the Porter Cable Biscuit Joiner is such a popular choice for woodworkers.

Features to consider when shopping

There are many different features to consider when shopping for a porter cable biscuit joiner. Some of the most important things to look for include:

  1. A powerful motor: This is important because you want your biscuit joiner to be able to handle any type of wood you throw at it.
  2. An adjustable fence: This will allow you to adjust the biscuit joiner to fit the thickness of the wood you are working with.
  3. A dust collector: This is a must-have if you want to keep your work area clean.
  4. An easy-to-use guide: You want a biscuit joiner that is easy to set up and use.

Porter cable biscuit joiners are a great investment for anyone who enjoys woodworking. These tools are very versatile and can be used for a variety of projects. With so many different features to consider, you are sure to find the perfect porter cable biscuit joiner for your needs.

Porter cable biscuit joiners are available at most hardware stores and online retailers. When shopping for a porter cable biscuit joiner, it is important to compare prices and features of different models. By taking the time to do your research, you are sure to find the best deal on a porter cable biscuit joiner that meets your needs.

Uses of porter cable biscuit joiner

This tool is used to join two pieces of wood together using small, round wooden biscuits. The biscuit joiner cuts a shallow half-moon shaped hole in each piece of wood. A dry, powdered glue is then spread into the holes and the biscuits are inserted. The wood is then clamped together until the glue dries.

The biscuit joiner is a very versatile tool and can be used for a variety of different woodworking projects. Some of the most common uses for a biscuit joiner include:

  • Attaching countertops to cabinets
  • Making cabinet doors
  • Building shelves
  • Constructing frame and panel walls

Conclusion

The Porter Cable biscuit joiner is one of the most popular tools for joining wood. It’s a simple tool that anyone can use, and it’s very versatile. Here’s everything you need to know about the biscuit joiner.

10 Unique Facts About Woodworking Tape Measures

There are many interesting things about woodworking tape measures that you may not know. For starters, they come in a variety of different shapes and sizes. In addition, they can be made from a variety of materials, including plastic and metal. They also have different features, such as belt clips and locking mechanisms. In this article, we will discuss 10 unique facts about woodworking tape measures that you may not have known!

10 Unique Facts About Woodworking Tape Measures
CRAFTSMAN Tape Measure

Woodworking tape measures history

Woodworking tape measures have a long and interesting history. They were first invented in the 18th century by English carpenter John Michell. Michell’s design was based on a measuring device that had been used by surveyors. The first woodworking tape measure was made from brass and had a wooden handle.

Woodworking tape measures shapes and sizes

Woodworking tape measures come in a variety of different shapes and sizes. They can be round, square, or rectangular. They also come in different colors, such as black, blue, or red. In addition, they can be made from a variety of materials, including plastic and metal.

Woodworking tape measures length

One of the most interesting facts about woodworking tape measures is that they come in a variety of different lengths, ranging from six feet to 100 feet. The most common length is 25 feet, but they can also be found in lengths of 50 feet or even 100 feet. This makes them ideal for a variety of different projects, both big and small.

Woodworking tape measures Blade Material (alloy steel, fiberglass, stainless steel)

There are three main types of blade materials used in woodworking tape measures: alloy steel, fiberglass, and stainless steel.

Alloy steel is the most common type of blade material used in woodworking tape measures. It is durable and has a good balance between flexibility and rigidity.

Fiberglass is another popular type of blade material used in woodworking tape measures. It is very strong and rigid, but can be difficult to work with if you are not experienced.

Stainless steel is the third type of blade material used in woodworking tape measures. It is very strong and durable, but can be difficult to work with if you are not experienced.

The most common materials are steel and plastic. Steel is more durable than plastic, but it is also more expensive. Plastic is cheaper, but it is not as durable.

Woodworking tape measures lock type

Some woodworking tape measures have belt clips. Others have locking mechanisms. Some have both. And some don’t have either.

There are many different types of locking mechanisms on woodworking tape measures. Some have a thumb lock, while others have a push button. There are also some that have a release lever. Each type has its own advantages and disadvantages.

The thumb lock is the most common type of locking mechanism. It is easy to use and provides a good grip. However, it can be difficult to release the lock with one hand.

The push button locking mechanism is easier to release than the thumb lock. However, it can be difficult to keep the tape measure from slipping while you are using it.

The release lever is the most difficult type of locking mechanism to use. However, it is the most secure. It is also difficult to release with one hand.

How to read woodworking tape measures

Most tape measures have markings that indicate inches, with the biggest increments being in feet. There will also be a smaller line every 16th of an inch. In between each foot mark, there are hash marks that indicate half feet—these are represented by the symbol “-“ on most tape measures. Finally, some tape measures also have a mark for every quarter inch.

To read a woodworking tape measure, start by finding the zero-inch mark, which is usually located at the end of the tape. Then, hold the tape measure at the zero-inch mark and stretch it out to the desired measurement. The number that lines up with the zero-inch mark is the measurement in inches. For example, if you want to measure a board that is two feet long, you would stretch the tape measure out to 24 inches and read the number “24” on the tape measure.

To convert measurements from inches to feet, divide the number of inches by 12. For example, if you want to convert 24 inches to feet, you would divide 24 by 12, which equals two feet.

Tape measures are a vital part of any woodworker’s toolkit. With a little practice, you’ll be able to quickly and easily read a tape measure like a pro!

Woodworking tape measures accuracy

One of the most important aspects of a woodworking tape measure is its accuracy. This is especially true for professional woodworkers who rely on these tools to make precise measurements. There are a few things that can affect the accuracy of a tape measure, such as the type of material it’s made from and the width of the tape.

Another factor that can impact the accuracy of a woodworking tape measure is how it’s used. For example, if you’re using it to measure the length of a board, you’ll need to make sure that the board is level before taking your measurement. Otherwise, you might end up with an inaccurate reading.

Finally, keep in mind that even the best tape measures can lose their accuracy over time. This is why it’s important to check your tape measure regularly and calibrate it if necessary. By doing this, you can ensure that your measurements are always accurate.

Woodworking tape measures uses

Woodworking tape measures are used for a variety of tasks, including measuring dimensions and taking accurate measurements. In addition, they can be used to create precise cuts and markings on wood. They are also useful for marking out lines and patterns on wood.

What fraction is .35 inches?

Did you know that the standard markings on a woodworking tape measure are in fractions of an inch? For example, the mark for one-quarter inch is usually represented by a “¼” sign. So, if you see this symbol on your tape measure, you know that .35 inches is equal to three-quarters of an inch.

How do you read a 32nd tape measure?

The first thing you need to do is find the zero mark on the tape. This is usually located at the end of the blade. Once you have found the zero mark, you need to count the number of hash marks that are between the zero mark and the inch mark. Each hash mark represents one-thirty-second of an inch. So, if there are eight hash marks between the zero mark and the inch mark, that means the tape measure is reading eight-thirty-seconds of an inch, or one-quarter of an inch.

To read a metric tape measure, you need to find the zero mark on the blade and then count the number of centimeters between the zero mark and the end of the blade. Each centimeter represents ten millimeters. So, if there are eight centimeters between the zero mark and the end of the blade, that means the tape measure is reading eighty millimeters, or eight centimeters.

When you’re using a tape measure, it’s important to remember that the markings on the blade are only approximate. This is because the blade itself is flexible, so the markings will change slightly depending on how much pressure you’re applying to the tape. If you need an accurate measurement, it’s best to use a ruler or a measuring tape.

How do you read a 64th tape measure?

The first thing you need to do is identify the markings on the tape. The smallest increment on a standard tape measure is an inch, and each inch is divided into 16 smaller units called “marks.” These marks are usually represented by small lines or dashes. In between each inch mark, you’ll find four more marks that represent one-quarter, one-half, three-quarters, and one whole inch, respectively.

To read a 64th tape measure, you’ll need to identify the markings on the tape that represent 64ths of an inch. These markings are usually represented by small lines or dashes. In between each inch mark, you’ll find four more marks that represent one-quarter, one-half, three-quarters, and one whole inch, respectively. Each of these marks represents 16 64ths of an inch.

To measure something using a 64th tape measure, simply line up the beginning of the object you’re measuring with the 0 mark on the tape. Then, count the number of markings that fall within the length of the object you’re measuring. This will give you the measurement in 64ths of an inch. For example, if you’re measuring a piece of wood that’s two inches long, and four markings fall within that length, then your measurement would be 32 64ths of an inch (or two inches).

What is 25 on a 32nd tape measure?

This is a question that often comes up among woodworkers. The answer is that it is exactly one inch. This is because a 32nd tape measure has 32 divisions, so each division represents one-thirty-second of an inch. Therefore, the 25th division on a 32nd tape measure would be one inch.

You may have seen the markings “25 32” on a tape measure before, but what do they actually mean? These markings indicate that the tape measure is meant for use with 25-32 inch lumber. This is because the markings are placed at intervals of 16 inches, which is the standard width of lumber.

So, if you’re working with 25-32 inch lumber, make sure to use a tape measure that has these markings. It’ll make your life a lot easier!

Here are some additional facts about woodworking tape measures:

  • Most tape measures have markings on them that indicate inches and centimeters.
  • Some tape measures also have hooks or loops on the end, which can be used to measure around corners or other objects.
  • They are often stored in a case or holster when not in use.

There are many different brands of woodworking tape measures. Some of the more popular brands include Stanley, Craftsman, and Milwaukee. If you’re looking for a new woodworking tape measure, be sure to check out the selection at your local hardware store or online.

Conclusion on woodworking tape measures

As you can see, there are a lot of interesting things about woodworking tape measures that you may not have known. From their accuracy to their different features, these tools are essential for any woodworker. By understanding more about them, you can be sure that you’re always using the best tool for the job.

10 Unique Ways to Use a Woodworking Ruler in Your Next Project

There are many ways to use a woodworking ruler in your next project. In this article, we will discuss 10 unique ways that you can use this handy tool in your workshop. From measuring and marking cuts to creating joints and assemblies, the woodworking ruler is a versatile tool that every woodworker should have in their arsenal. Let’s take a closer look at some of the ways that you can put this tool to work for you!

10 Unique Ways to Use a Woodworking Ruler

History of woodworking ruler

The woodworking ruler is a versatile tool that has been used by woodworkers for centuries. Its origins can be traced back to the early days of carpentry, when it was used to measure and mark cuts. Today, the woodworking ruler is still an essential tool for any workshop. From measuring and marking cuts to creating joints and assemblies, the woodworking ruler is a versatile tool that every woodworker should have in their toolbox.

Kinds of woodworking ruler

There are many different types of woodworking rulers available on the market today. Each type has its own unique set of features and benefits that can be tailored to specific projects. Here are a few of the most popular types of woodworking rulers:

Standard Woodworking Ruler

This is the most basic type of woodworking ruler. It is typically made from aluminum or steel and has markings for inches and centimeters.

Folding Woodworking Ruler

This type of woodworking ruler is convenient for storage and transport. It is typically made from aluminum or steel and has markings for inches and centimeters.

There are many different brands and styles of folding rulers available, so it is important to choose one that will suit your needs. When selecting a folding ruler, consider the length, width, and thickness of the ruler. You will also want to consider the type of material that the ruler is made from. Some materials, such as aluminum, are more durable than others. Once you have selected the perfect folding ruler for your needs, there are a few different ways that you can use it in your next project.

Folding Woodworking Ruler
Rhino Rulers Folding Engineer’s Ruler

Angle Finder Woodworking Ruler

This type of woodworking ruler is used to find angles for cuts and joints. It is typically made from aluminum or steel and has markings for degrees.

Angle Finder Woodworking Ruler

T-Square Woodworking Ruler

This type of woodworking ruler is used to create perpendicular lines and cuts. It is typically made from aluminum or steel and has markings for inches and centimeters.

T-Square Woodworking Ruler
Johnson Level & Tool JTS1200 Aluminum Metric Drywall T-Square

Bevel Edge Woodworking Ruler

This type of woodworking ruler is used to create beveled edges on cuts and joints. It is typically made from aluminum or steel and has markings for degrees.

Each type of woodworking ruler has its own unique set of features that can be tailored to specific projects. When choosing a woodworking ruler, it is important to consider the type of project you will be working on and select a ruler that has the features best suited for that project.

What is the woodworking edge rule and what uses does it have?

The woodworking edge rule is a versatile tool that can be used for a variety of different tasks in the workshop. From measuring and marking cuts to creating joints and assemblies, the woodworking edge rule is an essential tool for any woodworker.

Woodworking triangle ruler

If you’re looking for a way to add precision to your next project, consider using a woodworking triangle ruler. This type of ruler is specially designed for use in woodworking, and can be used for tasks such as measuring and marking cuts, creating joints and assemblies, and more.

To use a woodworking triangle ruler, simply place it on your workpiece and align the ruler’s edge with the desired cutline. Then, use a pencil or other marking tool to trace along the edge of the ruler, creating a precise and accurate line.

Woodworking triangle ruler
SWANSON Tool Co S0101 7 Inch Speed Square

What set square for woodworking?

Most woodworkers are familiar with the standard ruler, but there are actually many different types of rulers available. The set square is one type of ruler that is commonly used in woodworking. This tool is used to measure and mark angles on a piece of wood.

Set squares come in a variety of sizes, but the most common size is the six-inch set square. This size is large enough to be used on most pieces of wood, but small enough to be easily maneuverable.

Set squares are made from a variety of materials, but the most common material is wood. Set squares can also be made from plastic or metal.

When using a set square, it is important to make sure that the blade is perpendicular to the edge of the wood. This will ensure that the markings are accurate.

Once the set square is in place, you can use it to mark a line on the wood. To do this, simply draw a line along the length of the blade.

You can also use the set square to mark angles on the wood. To do this, you will need to find the center point of the wood. Once you have found the center point, you can place the set square at that point and mark an angle on the wood.

There are many different ways to use a set square in your woodworking project. These are just a few of the most common ways that set squares are used.

What is flexible ruler?

A flexible ruler is a tool that every woodworker should have in their workshop. There are many uses for this type of ruler, from measuring and marking cuts to creating joints and assemblies.

One way to use a flexible ruler is to measure and mark cuts. This is a great way to ensure that your cuts are accurate. Another way to use this handy tool is to create joints and assemblies. By using the ruler to measure and mark the pieces that you need, you can create perfect joints every time.

Another great use for a flexible ruler is to create templates.

What is precision ruler woodworking

Precision rulers are an essential tool for any woodworker. From measuring and marking cuts to creating joints and assemblies, the woodworking ruler is a versatile tool that every woodworker should have in their workshop.

How to Use a Woodworking Ruler

One of the most obvious uses for a woodworking ruler is measuring. Whether you’re measuring for cuts or for assembly, a ruler is an essential tool for getting accurate measurements. You can also use your ruler to mark out lines and markings on your material – this can be helpful when creating joints or assembling pieces.

Another great use for a woodworking ruler is creating templates. If you need to create multiple identical pieces, a ruler can help you ensure that your pieces are all the same size and shape. This can be a huge time-saver, especially if you’re working on a larger project.

One of the less obvious uses for a woodworking ruler is as a straightedge. If you need to create a perfectly straight line, a ruler can help you get the job done quickly and easily. This is especially helpful when working with long boards or other materials that can be difficult to keep level.

Finally, a woodworking ruler can also be used as a clamp. If you need to secure two pieces of wood together, a ruler can provide the perfect amount of pressure to keep your pieces in place while you work. This can be extremely helpful when working on delicate projects or when trying to avoid damaging your material.

As you can see, there are many ways to put a woodworking ruler to good use in your next project. Whether you’re measuring, marking, or creating templates, this versatile tool can help you get the job done right. So, don’t be afraid to experiment and find new ways to use your woodworking ruler – you might be surprised at how helpful it can be!

Here are some other unique ways that you can use a woodworking ruler in your next project:

  • Marking and measuring cuts
  • Assembling pieces
  • Creating joints
  • Checking for squareness
  • Marking dovetails
  • Scribing lines
  • Making templates
  • Transferring measurements
  • Cutting miters.

What is a 90 degree ruler called?

A 90 degree ruler is also called a T-bevel, carpenter’s square, or try square. It is a handy tool that helps you mark and measure angles for your project. You can use it to create joints, assemblies, and cuts.

What is a scribing ruler called?

A scribing or bevel gauge is a tool used to transfer measurements from one workpiece to another, or to lay out lines at specific angles. It consists of two arms, joined at one end by a hinge, with a sharp point at the other end. The arms are adjustable so that they can be set to any desired width.

scribing ruler
Sara-u Aluminum Alloy Scale Metric Measure Scribing Ruler

Conclusion on woodworking ruler

The woodworking ruler is a versatile tool that every woodworker should have in their workshop. There are many different ways to use this handy tool, from measuring and marking cuts to creating joints and assemblies. In this article, we discussed ten unique ways that you can use a woodworking ruler in your next project. With these tips, you will be able to take on any woodworking project with confidence. Do you have any other tips for using a woodworking ruler? Share them with us in the comments below!

Woodworking Dovetail Saw the Ultimate Guide

If you’re into woodworking, then you know that a dovetail saw is an essential tool in your arsenal. This type of saw is perfect for making precise cuts, and it can be used for a variety of applications. In this article, we will take a look at the different types of dovetail saws available on the market, as well as the features that you should consider when making your purchase. We’ll also provide some tips on how to use a dovetail saw safely and effectively. So whether you’re a beginner or a seasoned pro, read on for all the info you need to choose the right dovetail saw!

History of dovetail saws

The first dovetail saws were created in the 18th century. These early saws were used by cabinetmakers and other woodworkers to create precise, clean cuts. The blade of a dovetail saw is set at an angle, which allows for more control when making cuts. The teeth on these early saws were also very sharp, which made them ideal for cutting through hardwoods.

In the 19th century, dovetail saws became more popular among woodworkers. These saws were used to create intricate designs and patterns. The blades of these saws were often decorated with engravings or other artwork.

Parts Of A Dovetail Saw

There are three main parts to a dovetail saw: the blade, the handle, and the guard. The blade is the most important part of the saw, as it is responsible for making the cuts. The handle is used to grip the saw and keep your hand from slipping. The guard is there to protect your fingers from being cut by the blade.

Types of dovetail saws

When it comes to woodworking, there are a few different types of dovetail saws that you can choose from. There are two main types of dovetail saws: Western and Japanese. Both types of saws can be used for various applications, but the Japanese saw is generally considered to be better for making delicate cuts.

Western dovetail saws

The most popular type is the Western-style dovetail saw, which is characterized by its long, straight blade with a pointed tip. This type of saw is perfect for making precise cuts, and it can also be used for a variety of other applications.

Japanese dovetail saws

Another type of dovetail saw that is becoming increasingly popular is the Japanese-style dovetail saw. This type of saw is shorter and has a curved blade with a rounded tip, which makes it perfect for making detailed cuts. The Japanese-style dovetail saw is also becoming more popular because it is easier to use than the Western-style saw.

How to choose a dovetail saw

When choosing a dovetail saw, you’ll want to consider the following factors:

Blade material

Most dovetail saws have a carbon steel blade, but you can also find blades made of stainless steel or high-carbon steel. Carbon steel is the most common type, as it is durable and relatively inexpensive. Stainless steel blades are more expensive, but they’re less likely to rust. High-carbon steel blades are the strongest and most durable option, but they’re also the most expensive.

Blade size

Dovetail saws typically have a blade length of between six and eight inches. If you’re looking for a saw that can handle tougher cuts, then you’ll want to choose a blade that is on the larger side. However, if you need a saw for more delicate work, then a smaller blade might be better.

Handle material

The handle of a dovetail saw is typically made of wood, plastic, or metal. When choosing a dovetail saw, it is important to select one with a comfortable handle that will not slip in your hand. Wood handles are the most comfortable to hold, but they’re also the most prone to damage. Plastic handles are less comfortable, but they’re more durable. Metal handles are the most durable option, but they can be uncomfortable to hold for long periods of time.

Teeth per inch (TPI) of a dovetail saw

The first thing you need to consider when purchasing a dovetail saw is the number of teeth per inch (TPI). This is an important factor because it will determine the accuracy of your cuts. If you’re looking for a saw that can make precise cuts, then you’ll want to choose one with a higher TPI. while a saw with fewer TPI will make rougher cuts.

There are a few different types of dovetail saws available on the market, and each one has a different TPI. The most common type is the standard dovetail saw, which has 14 TPI. This type of saw is perfect for general woodworking applications. If you’re looking for a more precise saw, then you’ll want to choose one with a higher TPI. The next type of dovetail saw is the Japanese dovetail saw, which has 16 TPI. This type of saw is perfect for making very precise cuts.

The last type of dovetail saw is the German dovetail saw, which has 18 TPI. This type of saw is the most precise of all the dovetail saws, and it’s perfect for making extremely intricate cuts.

Now that you know what to look for in a dovetail saw, let’s take a look at some of the best options on the market.

How to use a dovetail saw safely and effectively

Most woodworkers will agree that a dovetail saw is an essential tool in any woodworking shop. This type of saw is perfect for making precise, clean cuts – something that is crucial in any woodworking project. Whether you’re working on a piece of furniture or creating a wooden toys, having a good dovetail saw will make your life a lot easier. There are a few things to keep in mind when using a dovetail saw:

  1. Always make sure that the saw is properly secured before beginning your cut. This will help to prevent any accidents from happening.
  2. Take your time when making your cuts – rushing through the process will only lead to sloppy results.
  3. Always use a saw blade that is sharp and in good condition. A dull blade will make it more difficult to get clean cuts, and it can also be dangerous.
  4. If you’re making a crosscut, you would hold the saw at a 90-degree angle to the workpiece and make your cut. On the other hand, if you’re making a rip cut, you would hold the saw at a 45-degree angle to the workpiece.
  5. Additionally, you’ll want to make sure that you’re using the proper blade for the job. For example, a finer-toothed blade will be better suited for making delicate cuts, while a coarser-toothed blade will be better for making rougher cuts.

Best dovetail saw

One of the best dovetail saws on the market is the Stanley 16-inch FatMax Dovetail Saw. This saw has a blade made of high-carbon steel, which makes it durable and tough enough to handle even the most challenging cuts. The blade is also 16 inches long, which makes it ideal for tougher applications. The handle is made of metal, so it’s durable, but it can be uncomfortable to hold for long periods of time. The saw also has a TPI of 14, making it perfect for making precise cuts.

Another great option is the WEN 3621 16-Inch Variable Speed Scroll Saw. This saw has a blade made of carbon steel, which makes it durable and affordable. The blade is also 16 inches long, making it ideal for tougher applications. The handle is made of wood, so it’s comfortable to hold, but it’s not as durable as other options. The saw also has a variable speed feature, so you can adjust the speed depending on the type of cut you’re making. The TPI on this saw is 18, so it’s perfect for making precise cuts.

No matter what your budget or needs are, there’s a dovetail saw out there that’s perfect for you. So get out there and start woodworking!

How do you sharpen a dovetail saw?

There are a few different ways to sharpen a dovetail saw. You can use a file, which is the traditional method, or you can use a sharpening stone. If you decide to use a file, make sure that it is a triangular file. Start by filing the teeth on one side of the blade, and then move to the other side. Remember to file in the direction of the grain, and be careful not to file too deeply.

If you decide to use a sharpening stone, start by wetting the stone with water. Then, hold the saw at a 20-degree angle against the stone and sharpen each tooth individually. Move the saw back and forth across the stone until the teeth are evenly sharpened.

Once you have sharpened the saw, it is important to protect the blade by oiling it. This will help to prevent rust and keep the blade in good condition. Simply wipe a thin layer of oil onto the blade using a clean cloth.

Conclusion of woodworking dovetail saw

If you’re looking for a versatile and precise saw, then a dovetail saw is the ideal choice. With its sharp teeth and slim blade, it’s perfect for making clean cuts in a variety of materials. Plus, with proper care and maintenance, your dovetail saw will last for years to come. So don’t hesitate to add one to your woodworking arsenal today.

Carpenter tool box

Are you a woodworking enthusiast or just starting your journey in carpentry? A carpenter toolbox is an essential tool that every carpenter must-have. It’s like a treasure box that contains all the essential tools needed to make beautiful crafts and furniture. In this post, we’ll explore what a carpenter toolbox is, its components, types of boxes available in the market, and how to choose the right one for you. So let’s dive into this interesting topic!

Carpenter tool box

A carpenter’s tool box is a container that holds various tools and equipment that are used by carpenters to perform their work. It can come in different shapes and sizes and can be made of various materials, including metal, plastic, or wood.

The tools inside a carpenter’s tool box can vary depending on the type of carpentry work being done, but typically include items such as hammers, saws, chisels, screwdrivers, pliers, measuring tapes, levels, squares, clamps, drills, and more.

The different types of carpenter tool boxes

There are many different types of carpenter tool boxes available on the market, each designed for a specific purpose. Here are some of the most common types:

  1. The Standard Tool Box: This is the most basic type of carpenter tool box, and usually consists of one or two compartments for storing tools.
  2. The Portable Tool Box: These are small to medium-sized boxes that are easy to carry around and transport. They are usually made of durable plastic or metal. It typically has wheels and a handle for easy transportation.
  3. The Stackable Tool Box: This type of carpenter tool box is designed to be stacked on top of another tool box, creating a taller storage option.
  4. The Rolling Tool Box: This type of carpenter tool box has wheels and is designed to be rolled around a job site. It is often used in conjunction with a portable tool box.
  5. Chest tool boxes: These are large, heavy-duty boxes that are designed to hold a large number of tools. They usually have multiple compartments and drawers for organizing tools and are made of durable materials like metal.
  6. Workbench tool boxes: These tool boxes are designed to be integrated into a workbench, providing a storage area for tools underneath the work surface.
  7. Tool bags: These are soft-sided tool storage solutions that are made of durable fabric and have multiple pockets for organizing tools. They are lightweight and easy to carry around.
  8. Tool belts: These are wearable tool storage solutions that consist of a belt and various pouches and pockets for holding tools. They are designed to keep tools close at hand while leaving the user’s hands free.

The type of tool box a carpenter chooses will depend on their specific needs and preferences. A portable tool box or tool bag may be ideal for carpenters who need to carry their tools to different job sites, while a chest tool box or workbench tool box may be better suited for those who work in a fixed location.

What to look for when purchasing a carpenter tool box

When purchasing a carpenter tool box, there are several factors to consider to ensure that you choose the right one for your needs. Here are some things to look for:

  1. Size: Consider the size of the tool box and whether it will be able to accommodate all of your tools. You’ll want to choose a tool box that is large enough to hold everything you need but not so large that it becomes cumbersome to transport.
  2. Durability: Look for a tool box that is made of high-quality materials and is built to last. Metal tool boxes are usually more durable than plastic ones, but they can be heavier and more expensive.
  3. Portability: Consider whether you will need to transport your tool box frequently. If so, look for a tool box with wheels or a handle for easy transport.
  4. Organization: Look for a tool box that has compartments or drawers for organizing your tools. This will make it easier to find what you need when you need it.
  5. Security: Consider whether you need a tool box with a lock or other security features to prevent theft or unauthorized access.
  6. Price: Tool boxes can range in price from relatively inexpensive to very expensive. Consider your budget and choose a tool box that fits within it while still meeting your needs.
  7. Brand and Warranty: Choose a reputable brand with a good warranty to ensure that your tool box will be reliable and long-lasting.

Overall, choosing the right carpenter tool box is about finding the right balance between size, durability, portability, organization, security, and price to meet your specific needs.

The best carpenter tool boxes on the market

There are many different types of carpenter tool boxes on the market. Some are better than others. Here is a list of the best carpenter tool boxes on the market:

1. DeWalt ToughSystem DS450 22 in. Mobile Tool Box:

This is a heavy-duty tool box that is made of durable materials and has a capacity of 110 pounds. It features a telescoping handle and heavy-duty wheels for easy transport, and it can be stacked with other DeWalt ToughSystem modules. It also has a lot of compartments to store all of your tools.

2. Stanley 028001L 28-Inch Structural Foam Toolbox:

This is a lightweight yet durable tool box that is made of structural foam and has a capacity of 28 quarts. It features a removable tray and a built-in padlock eye for security.

3. Klein Tools 55452RTB Rolling Tool Bag:

his is a versatile tool bag that can hold up to 100 pounds of tools. It features a telescoping handle and wheels for easy transport and has a variety of pockets and compartments for organization.

4. Keter Master Pro Masterloader 17191709 Tool Trolley

The Keter New Masterloader Plastic Utility Tool Box is one of the best carpenter tool boxes on the market. It is made out of durable plastic and has a lot of compartments and trays to organize your tools.

5. Husky 230381 22 in. Connect Rolling System Tool Box

Husky 22 in. Connect Rolling System Tool Box: This is a modular rolling tool box that can be customized to meet your specific needs. It features a telescoping handle and wheels for easy transport and can be stacked with other Husky Connect System units.

Ultimately, the best carpenter tool box for you will depend on your specific needs and preferences. Consider factors such as size, durability, portability, organization, security, and price when choosing a tool box that meets your needs.

How to care for your carpenter tool box

Assuming you are referring to a tool box used by carpenters, here are some tips on how to care for it:

  • Keep the tool box clean and free of sawdust or other debris. This will help extend its life and prevent rusting.
  • Oil the hinges and locks: Use a lightweight oil such as WD-40 to lubricate the hinges and locks on your tool box. This will help keep them working smoothly and prevent rust.
  • Store the tool box in a cool, dry place when not in use. Heat and moisture can damage the tools and cause them to rust.
  • Don’t overload your tool box: Be careful not to overload your tool box with too many heavy tools or accessories. This can cause the tool box to become damaged or difficult to transport.
  • Use the right tool for the job: Avoid using your tool box as a workbench or stepping stool, as this can cause damage to the box and put unnecessary strain on the hinges and locks.
  • Check the tool box regularly for damage: Inspect your tool box regularly for signs of wear and tear or damage. If you notice any cracks, dents, or other damage, address it promptly to prevent further damage.

By following these tips, you can help ensure that your carpenter tool box lasts for years and keeps your tools in good condition.

Conclusion

A carpenter’s tool box is an essential item for any professional or amateur woodworker. It helps to keep tools organized and ready for use, as well as providing a portable solution that allows you to bring the correct tools wherever you go. With a wide range of sizes and styles available, there is sure to be a carpenter’s toolbox that meets your needs – no matter how large or small your projects may be!

Screwing into Plywood End Grain

When it comes to screwing into plywood, there are a few things you need to keep in mind. First of all, you need to make sure that you’re using the right type of screws. Second, you need to be careful not to over-tighten the screws, which can cause the plywood to split.

Finally, when screwing into the end grain of plywood, it’s important to predrill holes first so that the wood doesn’t split. With these tips in mind, let’s take a closer look at each one.

When you screw into the end grain of plywood, it’s important to use a pilot hole so that the screw doesn’t split the wood. You also want to countersink the screw so that the head is flush with the surface of the wood. To do this, you’ll need a drill and a countersink bit.

First, drill a pilot hole using a drill bit that is smaller than your screw. Next, insert your countersink bit into the drill and carefully drill into the center of your pilot hole until it reaches the desired depth. Finally, insert your screw into the pilot hole and tighten it until it is flush with the surface of the plywood.

How to screw insert into plywood perfectly

Can You Screw into End Grain Plywood?

No, you cannot screw into end grain plywood. The fibers in the plywood are oriented perpendicular to the surface of the plywood, making it very difficult to drive a screw into the wood. Additionally, the glue that holds the layers of plywood together is not as strong at the edges of the sheets, so screws tend to pull out more easily.

If you need to attach something to end grain plywood, try using nails or brads instead.

Can You Screw into End Grain?

When it comes to screwing into end grain, there are a few things you need to keep in mind. First of all, you need to make sure that you’re using the right type of screw. Second, you need to make sure that the screw is properly lubricated.

And third, you need to make sure that the screw is driven in at a slow and steady pace. If you’re using the wrong type of screw, then it’s likely that the head will stripped or the shaft will break. This is why it’s important to use screws that are specifically designed for end grain.

For example, some companies make specialised screws that have a shallower head and a stronger shaft. These types of screws are less likely to strip or break when used on end grain. It’s also important to make sure that the screw is properly lubricated before use.

This will help to prevent stripping and breaking, and will also make driving the screw in much easier. The best way to lubricate a screw is with beeswax or another similar substance. Simply rub a small amount of wax onto the threads of the screw before use.

Finally, it’s important to drive the screw in at a slow and steady pace. If you try to drive it in too quickly, then there’s a good chance that it will strip or break. Instead, take your time and turn the screw slowly until it’s fully seated in the wood.

Can I Screw in to Edge of Plywood?

It is not recommended to screw into the edge of plywood as it can cause the wood to split. It is better to predrill holes and then use screws that are long enough to go through the plywood and into the studs behind it.

How Well Do Screws Hold in Plywood?

While screws are not the only method of attaching plywood, they are one of the most popular. This is because they are relatively easy to use and can provide a very strong hold. There are, however, some things to keep in mind when using screws to attach plywood.

First, it is important to choose the right type of screw. There are many different types of screws available, but not all of them will work well for attaching plywood. For example, drywall screws are not meant for attaching plywood and will likely strip out easily.

Instead, look for decking or construction screws that are specifically designed for attaching plywood. These will have a sharper point and a stronger hold. Second, be sure to predrill holes before driving in the screws.

This will help prevent splitting and ensure that the screw goes in straight. It is also a good idea to countersink the holes so that the heads of the screws sit flush with the surface of the plywood. Finally, remember that even with pre-drilling and countersinking, it is still possible to split thin pieces of plywood if you’re not careful.

To avoid this problem altogether, use longer screws (3 inches or longer) and/or washer-head screws whenever possible. By following these tips, you can ensure that your Screws will provide a strong hold in your plywood project!

Screwing into Plywood End Grain

Credit: makezine.com

Nailing into Plywood Edge

If you’re working with plywood, you know that one of the most important parts of the process is nailing into the edge. This can be a tricky task, but with a little bit of know-how, you can make it much easier on yourself. Here are some tips for nailing into plywood edge:

1. Use a nail set. This will help ensure that your nails are driven in at the correct angle and depth. 2. Pre-drill your holes.

This will make it much easier to drive the nails in without splitting the wood. 3. Use finishing nails. These are thinner than regular nails and won’t split the wood as easily.

4. Counter sink your nails slightly below the surface of the wood. This will give them a nice, finished look once they’re painted or stained overtop.

How to Screw into Thin Plywood

If you’re looking to screw into thin plywood, there are a few things you need to keep in mind. First, make sure you have the right type of drill bit. A standard twist drill bit will work fine for most screws, but if you’re using a large or long screw, you may need a pilot hole first.

Second, use a lower speed when drilling and be careful not to overheat the bit or damage the wood. Finally, when driving the screw, use moderate pressure and go slowly at first to avoid stripping the head. With these tips in mind, screwing into thin plywood should be a breeze!

Screwing into End Grain

When it comes to screwing into end grain, there are a few things that you need to keep in mind. First of all, you need to make sure that you’re using the right type of screws. Second, you need to make sure that the screws are properly lubricated.

And finally, you need to be careful not to over-tighten the screws. If you’re not using the right type of screws, then you could end up doing more harm than good. For example, if you use drywall screws or wood screws, then they’re likely to strip out the end grain and leave your project in a worse state than it was before.

Instead, use decking screws or construction screws – these are designed specifically for screwing into end grain and won’t strip out as easily. Once you’ve got the right type of screw, it’s important to lubricate them properly. This will help them go in more smoothly and also prevent them from stripping out the end grain.

You can use any kind of lubricant – WD-40 is a popular choice – but make sure that it’s compatible with whatever finish you’re using on your project. Finally, don’t over-tighten the screws. Just like with any other joint, if you overtighten the screws then they’re likely to strip out or break completely.

So take your time and snug them up just enough so that they’re secure without being overly tight. By following these simple tips, you should be able to successfully screw into end grain without any problems!

Best Way to Fasten Plywood Together

One of the most common questions we get here at The Home Depot is, “What is the best way to fasten plywood together?” There are several ways to do this, but we always recommend using screws. Here’s why:

When you use nails to join plywood, the nails can eventually work their way out and loosen the joint. This is especially true if you’re nailing into end grain. Screws create a much more secure connection that won’t loosen over time.

Another advantage of using screws is that they allow you to disassemble the plywood if you need to. This can be handy if you ever need to make repairs or changes down the road. With nails, once they’re in, they’re in for good.

Finally, screws just look nicer than nails. They create a cleaner finished product that will be more aesthetically pleasing in your space. So there you have it!

Our recommendation for the best way to fasten plywood together is with screws.

Screw Or Nail into End Grain

End grain is the term used for the exposed cuts of wood on the ends of boards. When you look at a piece of lumber, end grain is the part of the wood that was cut perpendicular to the tree’s growth rings. To get a better understanding of what end grain looks like, imagine cutting a log in half lengthwise.

The cut surface that runs along the log’s length is called its face or flat grain, while the newly exposed cross sections are referred to as its end grain. There are two different ways to join two pieces of wood together using screws or nails: with their respective grains running in the same direction (called an edge-to-edge joint), or with one screw or nail driven into each piece’s end grain (an end-to-end joint). While both methods will create a strong connection, there are some key differences between these two types of joints that should be considered when deciding which method to use.

One advantage of using screws or nails in an edge-to-edge joint is that it allows for slight misalignments between the two pieces being joined. This can be helpful when working with less than perfectly straight lumber. However, because screws and nails rely on friction to hold things together, this type of joint is not ideal for applications where there will be significant movement or vibration (such as in furniture).

Additionally, it can be difficult to drive screws or nails into hardwoods without splitting them, so this method is usually only suitable for softer woods. In contrast, an end-to-end joint provides greater holding power and stability than an edge-to-edge connection since each fastener is driven into solid wood (rather than just relying on friction). This makes them ideal for outdoor projects or any situation where there may be some movement or vibration.

And since no two pieces of wood are exactly alike, driving screws or nails into their end grain also helps to create a more visually appealing and unique finished project.

Confirmat Screws for Plywood

If you’re working with plywood, you know that traditional screws can be a real pain. They tend to split the wood, making for a frustrating and time-consuming project. Confirmat screws are specifically designed for use with plywood, and they make the job much easier.

These screws have a wide, flat head that pulls the plywood together as it’s being driven in. This prevents splitting and makes for a much stronger joint. The threads on Confirmat screws are also very sharp, so they grip the wood tightly and don’t slip out.

Confirmat screws come in a variety of lengths to suit your project needs, and they’re available at most hardware stores. If you’re working with plywood, make your life easier by using Confirmat screws – you won’t regret it!

How Close to the Edge of Plywood Can You Drill

When it comes to drilling holes in plywood, there is no definitive answer as to how close to the edge you can drill. It really depends on the type of plywood and the bit that you are using. For example, if you are using a spade bit, then you will be able to get closer to the edge than if you were using a forstner bit.

In general though, it is best to avoid drilling too close to the edge as this could cause the plywood to split or crack.

Can You Screw into Plywood

When it comes to screwing into plywood, there are a few things you need to keep in mind. First, the type of screw you use will make a difference. For example, if you’re using a drywall screw, it’s not going to grip as well as a deck screw would.

Second, the thickness of the plywood will also affect how well the screw holds. Thicker plywood is better for holding screws than thinner plywood. Finally, pre-drilling your holes can help prevent splitting and make it easier to get the screws started.

With these tips in mind, let’s take a look at how to actually screw into plywood. The first step is to determine what type of screw you’ll be using. As mentioned before, different screws have different levels of gripping power.

If possible, try to find a deck screw or another type of heavy duty screw specifically designed for wood projects. Once you’ve got your screws, predrill your holes if you can. This will help prevent the plywood from splitting when you put the screws in later on.

Now it’s time to start putting in those screws! Begin by lining up your drill bit with the hole you drilled earlier (or skipping this step if you didn’t drill any holes). Slowly start driving the drill into the wood until the tip of the drill bit disappears inside completely – don’t overdo it or else you might split the wood!

Conclusion

If you’ve ever tried to screw into plywood end grain, you know it can be a frustrating experience. The screws tend to slip and strip out the wood, making it difficult to get a tight fit. There are a few tricks you can use, however, to make the process easier.

First, predrill your holes with a smaller drill bit. This will help keep the screw from slipping. Second, use a countersink bit to create a pilot hole for the screw head.

This will also help prevent stripping. Finally, use deck screws or construction adhesive instead of drywall screws; they’re stronger and less likely to strip out the wood. With these tips in mind, you should be able to successfully screw into plywood end grain without any problems.

The Best Combination Square for Woodworking: A Comprehensive Guide

A combination square is an indispensable tool for woodworkers of all levels of experience. However, with so many different models and brands on the market, it can be difficult to determine which one is right for you. In this article, we will take a comprehensive look at some of the best combination squares available, and help you decide which one is right for your needs. Whether you are a beginner or a seasoned pro, there is sure to be a model that fits your needs!

History of the combination square

The combination square has its origins in ancient Egypt, where it was used for measuring pyramids and other structures. The tool eventually made its way to Greece and Rome, where it was used by carpenters and stonemasons. In the Middle Ages, the combination square was introduced to Europe, where it became an essential tool for builders and craftsmen.

Today, the combination square is used by woodworkers of all levels of experience and is an indispensable tool for any workshop.

Parts of the combination square

The combination square has three main parts: the head, the blade, and the stock.

The head is the part of the square that contains the rulers or measuring scales. The most common types of heads are those with one straight edge and one ruler, and those with two rulers at 90-degree angles to each other.

The blade is the part of the square that is attached to the head. It is usually made of steel or aluminum, and it is what you use to make your measurements.

The stock is the part of the square that attaches the blade to the head. It is usually made of wood or plastic, and it provides a sturdy base for the blade.

There are also a few other parts that are often found on combination squares, such as a level bubble and a scribe. The level bubble is used to ensure that your square is level, while the scribe can be used to mark lines on your workpiece.

Types of the combination square

There are several types of combination squares available on the market, each with its own advantages and disadvantages. Here is a quick overview of the most popular types:

-Traditional combination square: This type of square is the most basic and simple to use. It consists of a steel ruler with a 90-degree angle at one end, and a head that can be attached at either end of the ruler. This type of square is great for simple tasks such as measuring and marking 90-degree angles, but it is not very precise.

-Digital combination square: This type of square is more expensive than a traditional one, but it is much more precise. It consists of a digital display that shows the measurements, and a head that can be attached at either end of the ruler. This type of square is great for more precise tasks such as measuring small angles and marking very precise lines.

-Folding combination square: This type of square is similar to a traditional one, but it has a folding head that allows for more versatility. It is great for tasks such as measuring inside and outside corners, and marking lines at any angle.

Now that you know the different types of combination squares available, you can decide which one is right for your needs. If you are just starting out in woodworking, a traditional square will suffice. However, if you need more precision, a digital or folding square would be a better choice. Whichever type you choose, make sure to get one that is made from high-quality materials and is durable. With the right combination square, you will be able to tackle any woodworking project with ease!

Combination square uses

There are a few different ways that you can use a combination square:

-marking out lines: you can use the head of the combination square to mark out lines on your wood. This is useful for marking out cutting lines, or for drawing lines that you need to follow when shaping your wood.

-measuring angles: the combination square can also be used to measure angles. This is useful for ensuring that your cuts are at the correct angle, or for checking the angle of existing joints.

-checking for square: finally, you can use the combination square to check whether two pieces of wood are perfectly square. This is essential for ensuring that your project will be stable and look good.

Choosing a combination square

With so many different models and brands on the market, it can be difficult to determine which one is right for you. One of the most important things to consider when choosing a combination square is the blade. The blade is the part of the tool that actually makes contact with your workpiece, so it is important to choose one that is made from high-quality materials. Look for a blade that is made from stainless steel or another durable material. Additionally, make sure that the blade is properly hardened and tempered, as this will help ensure a long lifespan.

Another thing to consider is the handle. The handle is what you will grip when using the tool, so it is important to choose one that is comfortable for you. Some handles are made from wood, while others are made from plastic or metal. Consider how the tool will feel in your hand, and choose a model with a handle that is comfortable for you.

Finally, consider the price. Combination squares are available at a wide range of prices, so it is important to find one that fits your budget. However, remember that the quality of the tool is more important than the price. If you are only going to use the tool occasionally, you may not need to spend as much as someone who is going to use it on a daily basis. However, if you plan on using the tool frequently, it is worth investing in a higher-quality model.

Conclusion

No matter what your needs are, there is sure to be a combination square that is right for you. With so many different models available, it is easy to find one that fits your budget and your needs. By considering the factors discussed above, you can be sure to find the perfect model for your woodworking shop! Have you ever used a combination square? What are your thoughts on them? Let us know in the comments below!

The Best Way to Use a Digital Sliding Bevel Gauge

There are many tools that woodworkers use on a regular basis, and the digital sliding bevel gauge is one of them. This tool is used to measure angles, and it can be very helpful in a variety of situations. In this article, we will discuss the best way to use a digital sliding bevel gauge. We will also provide some tips for getting the most out of this tool!

7 best uses digital sliding bevel gauge

There are many ways to use a digital sliding bevel gauge, but here are seven of the best ways:

First, when you’re trying to get an accurate measurement, using a digital sliding bevel gauge is one of the most effective methods. This is because unlike vernier or dial calipers, the digital readout on a digital sliding bevel gauge is extremely precise. This tool can measure angles within one degree. If you need to make precise cuts or measurements, this is the tool for you.

Second, when you need to make measurements in difficult or tight spaces, a digital sliding bevel gauge can be invaluable. This is because the digital readout on the gauge allows you to take measurements without having to physically touch the object you’re measuring.

Third, if you’re working with materials that are difficult to measure with traditional methods, a digital sliding bevel gauge can be the perfect solution. This is because the digital readout on the gauge is not affected by things like heat or cold, which can throw off traditional measurements.

Fourth, when you need to take multiple measurements in quick succession, a digital sliding bevel gauge can be a lifesaver. This is because the digital readout on the gauge ensures that you’re taking accurate measurements each and every time.

Fifth, if you are working with a piece of wood that is not perfectly straight, you may need to make some adjustments to the digital sliding bevel gauge. You can do this by loosening or tightening the screws on the side of the tool. This will allow you to adjust the angle of the gauge so that it is level with the surface of the wood.

Sixth, when using a digital sliding bevel gauge, it is important to remember that you should always start at zero. This will ensure that you are taking accurate measurements. If you start at any other angle, you may not be able to get an accurate reading.

Finally, when you need to make sure that your measurements are consistent, a digital sliding bevel gauge is the way to go. This is because the digital readout on the gauge means that you can take measurements that are identical every time, which is essential for ensuring accuracy.

Digital sliding bevel gauges are an extremely versatile tool, and these are just five of the best ways to use them. If you’re looking for a reliable, accurate way to take measurements, a digital sliding bevel gauge should be at the top of your list.

3 best digital sliding bevel gauges on the market

There are a few different digital sliding bevel gauges on the market, and it can be difficult to decide which one is right for you. In this section, we will discuss three of the best digital sliding bevel gauges on the market. We hope that this will help you make a decision about which gauge is right for you!

1. General Tools T-Bevel Gauge & Protractor #828

The first digital sliding bevel gauge on our list is the General Tools T-Bevel Gauge & Protractor #828. The blade of this gauge is made from stainless steel, and it is very lightweight. It also has a large LCD display, which makes it easy to read. The General Tools T-Bevel Gauge & Protractor 828 has four large control buttons that provide five functions, including power on/off, reading hold, read reverse angle, flip display, and clear readout. It comes with an automatic shut-off feature that preserves the battery life.

2. General Tools ANGLE-IZER T-Bevel Gauge & Protractor with Bubble #928

The next digital sliding bevel gauge on our list is the General Tools ANGLE-IZER T-Bevel Gauge & Protractor with Bubble #928. This gauge is made from stainless steel, and it is very durable. It also has a large LCD display, which makes it easy to read. The General Tools ANGLE-IZER T-Bevel Gauge also has a built-in level, which can help you ensure that your measurements are accurate.

3. Husky Digital Sliding T-Bevel

The third and final digital sliding bevel gauge on our list is the Husky Digital Sliding T-Bevel. This gauge is made from stainless steel, and it is very durable. It also has a large LCD display, which makes it easy to read.

Conclusion

Overall, the digital sliding bevel gauge is a great tool for any woodworker. It is accurate, easy to use, and perfect for making precise cuts or measurements. If you follow the tips above, you should have no trouble getting the most out of this tool! We hope that this article has helped you learn about the best way to use a digital sliding bevel gauge. We have also provided you with some tips for getting the most out of this tool. Do you have any tips for using a digital sliding bevel gauge or any other questions? Please share them with us in the comments below!

How to Use a Card Scraper for Woodworking: Tips and Tricks

Do you have a card scraper but don’t know how to use it? In this blog post, we will teach you how to use this handy tool for woodworking. A card scraper is a great way to smooth out your woodworking projects and get rid of any unwanted blemishes. We will provide some tips and tricks on how to get the most out of your card scraper. So, whether you are a beginner or an experienced woodworker, read on for more information!

What is a card scraper and what can it be used for in woodworking projects?

A card scraper is a small hand tool that is used to smooth and finish wood surfaces. It consists of a thin blade that is mounted on a wooden or metal handle. The blade is usually made from carbon steel or high-speed steel. Card scrapers are available in a variety of sizes, but the most common size has a blade that is about two inches wide.

Card scrapers are primarily used to remove small imperfections from wood surfaces. They can also be used to create a smooth surface prior to applying a finish. When using a card scraper, it is important to hold the tool at the correct angle. The blade should be held at a 45-degree angle to the wood surface. If the blade is not held at the correct angle, it will not cut properly and may damage the wood surface.

It is also important to use firm and even pressure when using a card scraper. This will ensure that the blade cuts evenly across the surface of the wood. If you apply too much pressure, the blade may dig into the wood and cause damage.

When you are finished using the card scraper, it is important to clean the tool properly. This will help to prevent rusting and keep the blade in good condition. To clean the card scraper, simply wipe it down with a dry cloth.

Now that you know what a card scraper is and how to use it, you can put it to good use on your next woodworking project! Just remember to hold the tool at the correct angle and apply firm, even pressure when using it. And, of course, don’t forget to clean the scraper after each use. With these tips in mind, you’ll be well on your way to creating beautiful, smooth woodworking projects!

How to hold the card scraper for optimum results

When using a card scraper, it is important to hold the tool at the correct angle. The blade should be held at a 45-degree angle to the wood surface. If the blade is not held at the correct angle, it will not cut properly and may damage the wood surface.

How to sharpen the card scraper for best performance

To keep the card scraper in good condition, it is important to sharpen the blade on a regular basis. The best way to sharpen the blade is with a honing stone. First, soak the honing stone in water for about 15 minutes. Then, hold the scraper at a 45-degree angle and run the blade across the honing stone.

It is important to use light pressure when sharpening the scraper. If you use too much pressure, you may damage the blade. Once the blade is sharpened, wipe it down with a dry cloth to remove any metal shavings.

Tips on using the card scraper on different types of wood surfaces

The card scraper can be used on a variety of different wood surfaces. However, there are a few things to keep in mind when using the tool on different types of wood.

First, softer woods such as pine and fir are more susceptible to damage from the card scraper. If you are working with these types of woods, it is important to use light pressure when using the scraper.

Second, harder woods such as maple and oak are less likely to be damaged by the card scraper. However, it is still important to use firm, even pressure when using the tool.

Finally, if you are working with delicate wood surfaces such as veneer, it is important to use extra care when using the card scraper. The veneer is very thin and can be easily damaged by the scraper. To avoid damaging the veneer, it is best to use light pressure and make sure that the blade is sharpened before each use.

Troubleshooting common problems using a card scraper

If you are having trouble using the card scraper, there are a few things you can do to troubleshoot the problem.

First, make sure that the blade is sharpened. If the blade is not sharp, it will not cut properly and may damage the wood surface.

Second, make sure that you are holding the scraper at the correct angle. The blade should be held at a 45-degree angle to the wood surface.

Third, make sure that you are using firm, even pressure when using the scraper. If you apply too much pressure, the blade may dig into the wood and cause damage.

Finally, if you are still having trouble, try using a different type of scraper. There are many different types of scrapers available, so you may find one that works better for your particular project.

With these tips in mind, you should be able to use the card scraper with ease and produce beautiful results on your next woodworking project!

Conclusion

In conclusion, the card scraper is a versatile tool that can be used on a variety of wood surfaces. It is important to hold the scraper at the correct angle and use firm, even pressure when using the tool. The blade should also be kept sharpened for best results. With these tips in mind, you will be well on your way to creating beautiful woodworking projects! Thanks for reading!

If you have any further questions about using a card scraper, please feel free to post them in the comments section below! Happy woodworking!