Benchtop router tables are a great addition to any workshop. They allow you to easily and accurately rout wood pieces, and they are a lot easier to use than a handheld router. However, with so many different models on the market, it can be difficult to know which one is right for you. In this article, we will discuss the key factors you need to consider when choosing a benchtop router table, and we will recommend some of the best models on the market. Let’s get started!
Benchtop router table uses
There are many different uses for a benchtop router table. Some of the most popular uses include:
-Routing wood pieces for cabinets or other woodworking projects
-Trimming door or window casings
-Cutting molding and trim
-Making raised panel doors
If you are a woodworker, a benchtop router table is a great addition to your workshop. It can make many tasks much easier and more accurate.
First and foremost, you need to think about the size of the router table. If you have a small workshop, then you will obviously need to choose a smaller model. However, even if you have a large workshop, you might not want to choose the biggest router table on the market. That’s because bigger is not always better when it comes to router tables. You need to think about how much space you have, and how often you will be using the router table. If you only plan on using it occasionally, then a smaller model might be a better option.
Next, you need to think about the features that are important to you. Some router tables come with built-in dust collection systems, which can be very useful. Others come with built-in lighting, which can also be helpful. And some router tables even come with storage shelves, so you can keep your bits and accessories organized. Decide what features are most important to you, and then narrow down your choices accordingly.
Finally, you need to think about price. Router tables can range in price from around $100 to over $1000. Obviously, you will want to choose a model that is within your budget. However, don’t make the mistake of choosing the cheapest model you can find. In many cases, you get what you pay for with router tables. It’s better to spend a little extra and get a high-quality router table that will last for years.
Now that you know the key factors to consider when choosing a benchtop router table, let’s take a look at some of the best models on the market. The first model we recommend is the Kreg PRS2100, which is a great option for both beginners and experienced woodworkers. It has a large work surface, an easy-to-use fence, and built-in dust collection. It also comes with a one-year warranty, so you can be sure it’s a high-quality product.
If you’re looking for a more affordable option, the Skil RAS900 is a great choice. It doesn’t have as many features as the Kreg PRS2100, but it’s still a very capable router table. It has a large work surface, an easy-to-use fence, and built-in dust collection. Plus, it comes with a two-year warranty, so you can be sure it’s a high-quality product.
Finally, if you need a router table that is easy to transport, the Bosch RA1181 is a great option. It’s compact and lightweight, but it still has a large work surface and an easy-to-use fence. Plus, it comes with built-in dust collection and a one-year warranty.
No matter what your needs are, there is a benchtop router table that is perfect for you. Just remember to consider the factors we discussed in this article, and you’re sure to find the perfect model for your workshop. Happy routing!
If you enjoyed this article, please share it with your friends or family. And if you have any questions about choosing the perfect benchtop router table, please feel free to ask in the comments section below. Thanks for reading!
When it comes to woodworking, a benchtop router table is an extremely versatile and convenient tool to have in your workshop. Not only does it allow you to rout wood pieces with ease and accuracy, but it’s also a lot easier to use than a handheld router. However, with so many different models on the market, it can be difficult to know which one is right for you. In this article, we’ll discuss the key factors to consider when choosing a benchtop router table. By the end of this article, you’ll know exactly which router table is perfect for your workshop.
Conclusion
If you’re looking for a benchtop router table that will give you the versatility and accuracy you need, then this guide is for you. We’ll go over everything you need to consider before making your purchase, from the size of the table to the type of router bit you’ll be using. By the end of this guide, you’ll know exactly which benchtop router table is the perfect fit for your workshop.
A hand vice is an important tool for any woodworker. It can be used for a variety of tasks, such as holding pieces of wood in place while you work on them, or clamping two pieces of wood together. In this blog post, we will discuss five unique ways to use a hand vice in your woodworking projects!
What is a woodworking hand vice?
A hand vice is a small clamp that is used to hold pieces of wood in place while you work on them. It can also be used to clamp two pieces of wood together. Vices are an important tool for any woodworker, as they provide a way to secure your workpiece and keep it from moving around while you work.
Hand vice parts
If you’re new to woodworking, or even if you’ve been doing it for awhile, you may not know all of the different parts of a hand vice. Here’s a quick rundown:
-The body is the main part of the hand vice. It’s what you grip when you use it, and it houses all of the other parts.
-The screw is the part that you turn to open and close the hand vice.
-The jaws are the two metal plates that come together to hold your wood in place. They’re usually made of steel or aluminum.
-The handle is the part that you grip when you turn the screw. It’s usually made of wood or plastic.
Now that you know the parts of a hand vice, let’s move on to the five unique ways you can use it!
5 Unique Ways to Use woodworking hand vice
The hand vice is an important tool for any woodworker. It can be used for a variety of tasks. Here we will discuss five unique ways to use a hand vice in your woodworking projects!
One way to use a hand vice is to clamp two pieces of wood together. This is especially useful when you are gluing or nailing two pieces of wood together. The hand vice will hold the pieces in place while you work, ensuring that they are aligned properly.
Another way to use a hand vice is to hold a piece of wood in place while you work on it. This is especially useful when you are sawing or sanding a piece of wood. The hand vice will hold the wood securely, preventing it from moving around and making it easier for you to work on.
A hand vice can also be used to clamp a piece of wood to a work surface. This is useful when you are working on a piece of wood that is not flat, such as a board that is warped or cupped. By clamping the piece of wood to a work surface, you can ensure that it is flat and level before you begin working on it.
A hand vice can also be used to hold a workpiece in place while you drill a hole in it. This is useful when you are working with small pieces of wood, or when you need to drill a precise hole. The hand vice will hold the workpiece securely, preventing it from moving around and making it easier for you to drill the hole.
Finally, a hand vice can be used to clamp a workpiece to a drill bit. This is useful when you are drilling a large hole in a piece of wood. The hand vice will hold the workpiece securely, preventing it from moving around and making it easier for you to drill the hole.
How to choose the right hand vice for your needs?
There are a few things to consider when purchasing a hand vice for your woodworking projects. The most important factor is the size of the hand vice. You will want to choose a hand vice that is comfortable for you to hold and use. Another important factor to consider is the type of jaws on the hand vice. There are two types of jaws on hand vices: flat and round. Flat jaws are best for holding flat pieces of wood, while round jaws are better for holding round or irregularly shaped pieces of wood. Finally, you will want to consider the quality of the hand vice. You want to choose a hand vice that is made from high-quality materials and that is built to last. With these factors in mind, you will be sure to find the perfect hand vice for your needs!
Conclusion| woodworking hand vice
There are many different types of hand vices available on the market, but they all serve the same basic purpose. Vices come in a variety of sizes, so you can choose one that is appropriate for the task at hand. So there you have it! Five unique ways to use a hand vice in your woodworking projects. Be sure to add a hand vice to your toolkit today! Do you have any other creative ways to use a hand vice? Let us know in the comments below! Thanks for reading!
There are many different woodworking wrench tools on the market, and it can be difficult to decide which ones you need for your workshop. In this article, we will discuss the different types of wrenches and how they can be used in woodworking projects. We will also recommend some of the best wrenches for the job, so you can make the most of your workshop!
There are many different types of wrenches, each with their own unique capabilities. Some wrenches are designed for specific tasks, while others can be used for a variety of purposes. When choosing the right wrench for your woodworking project, it is important to consider the type of material you will be working with and the size of the project.
Some of the most popular wrenches for woodworking include:
-The Claw Hammer: This type of wrench is one of the most versatile tools you can have in your workshop. It can be used for a variety of tasks, such as pounding nails, pulling nails, and even shaping wood.
-The Coping Saw: This type of wrench is specifically designed for cutting curves in wood. It can also be used to create intricate designs and patterns.
-The Jigsaw: This type of wrench is perfect for making straight or curved cuts in wood. It can also be used to create holes and openings in wood.
If you’re a woodworker, then you know the importance of having sharp chisels. Dull chisels can be frustrating to use and can lead to poor results. In this article, we will show you how to sharpen your chisels using a woodworking chisel sharpening jig. We’ll also discuss the different types of jigs available and which one is best for you. So whether you’re a beginner or an experienced woodworker, stay tuned for some helpful tips on how to sharpen your chisels like a pro!
Types of chisel sharpening jigs
There are three main types of chisel sharpening jigs: honing guides, bevel-edged chisels, and standard chisels. Honing guides are the simplest type of jig and can be used with either a honing stone or diamond sharpening stone. They are the most popular type of jig and are great for beginners. Bevel-edged chisels require a more complex jig, but they offer a more consistent edge. Standard chisels can be sharpened with either type of jig, but the process is more difficult and requires more skill.
Which type of jig you use will depend on your level of skill and the type of chisel you’re using. If you’re just starting out, we recommend going with a honing guide. Honing guides are easier to use and will help you get the hang of sharpening your chisels. Once you’re more comfortable with the process, you can move on to a bevel-edge guide.
How to use chisel sharpening jig
Now that you know which type of jig to choose, let’s talk about how to use it. First, you’ll need to attach the jig to your workbench. Next, clamp your chisel in place and make sure it’s securely held. Then, use a honing stone or diamond file to sharpen the beveled edge of your chisel. Start with a coarse grit stone and then move to a finer grit stone. Finally, use a strop to polish the edge of your chisel and remove any burrs.
Now that you know how to sharpen your chisels using a woodworking chisel sharpening jig, put your new skills to the test! And don’t forget to check out our selection of jigs to find the perfect one for your needs. Happy woodworking!
Some helpful tips for sharpening your chisels are:
Chisel sharpening is an important skill for any woodworker. By using a chisel sharpening jig, you can ensure that your chisels are always sharp and ready to use.
-Always use a jig to ensure a consistent angle.
-Start with a coarse grit stone
Best chisel sharpening jig
There are many different types of chisel sharpening jigs available on the market, but which one is best? It really depends on your needs and preferences. If you’re looking for a basic jig that will get the job done, then we recommend the Tormek T-Sharpener. This jig is easy to use and will quickly sharpen your chisels.
If you’re looking for a more versatile jig, then we recommend the Veritas Mk.II Sharpening System. This jig can be used to sharpen not only chisels, but also plane irons and other edge tools. It’s a great option for those who want a single sharpening solution for all of their edge tools.
Whichever jig you choose, make sure to follow the manufacturer’s instructions carefully. With a little practice, you’ll be able to quickly and easily sharpen your chisels and get back to woodworking!
How to sharpen a chisels
If you’re a woodworker, then you know the importance of having sharp chisels. Dull chisels can be frustrating to use and can lead to poor results. In this article, we will show you how to sharpen your chisels using a woodworking chisel sharpening jig. We’ll also discuss the different types of jigs available and which one is best
Chisel sharpening jigs parts
There are three different parts to a chisel sharpening jig: the base, the clamp, and the guide. The base is the bottom part of the jig that you attach to your workbench. The clamp is used to hold the chisel in place while you sharpen it. The guide is what you use to actually sharpen the chisel.
Do you know what biscuit joint glue is? If not, you’re in for a treat! In this article, we will discuss the history and manufacture of biscuit joint glue, as well as its many benefits. Biscuit joint glue is a unique adhesive that has been used for centuries to join wood boards together. It is made from natural ingredients, and it is non-toxic and environmentally friendly. Biscuit joint glue is also very strong and durable, making it the perfect choice for any woodworking project.
History
Biscuit joint glue has a long and fascinating history. It was first used by the Egyptians, who developed it as a way to join two pieces of wood together. The early Egyptians were also the first to use animal hide glue, which is another type of adhesive that is still used today. Biscuit joint glue was later used by the Greeks and Romans, who used it to build ships and other structures.
How to make Biscuit joint glue
Biscuit joint glue is made from a variety of natural ingredients, including flour, water, and animal hide glue. The hide glue is made by boiling the skin, tendons, and bones of animals. This process breaks down the collagen fibers in the animal tissue, which are then used to make the hide glue. The hide glue is then mixed with flour and water to create the biscuit joint glue.
Is biscuit joint glue non-toxic or environmentally friendly?
Biscuit joint glue is made from natural ingredients and is therefore non-toxic. It is also environmentally friendly because it does not release any harmful chemicals into the atmosphere. It is also biodegradable, making it an environmentally friendly choice for woodworking projects.
Biscuit jointers are becoming more popular among woodworkers as they allow for strong, lasting joints without the use of nails or screws. Biscuit jointers can be used on a variety of different woods, making them a versatile tool for any woodworker.
If you are looking for an alternative to traditional wood glue, biscuit joint glue is an excellent choice.
How to glue biscuit joint
Biscuit joint glue is a unique adhesive that has been used for centuries to join wood boards together. The process is simple: two pieces of wood are placed together and biscuit joint glue is applied to the surface. A biscuit is then inserted into the hole and the joint is clamped until the glue dries.
Best glue for biscuit joints
Biscuit joint glue is the best adhesive for joining wood boards together. The process is simple and the results are strong and lasting. Biscuit joint glue is also resistant to heat and moisture, making it ideal for use in a variety of situations.
If you’re looking for an adhesive that will give you the best possible results, biscuit joint glue is the way to go.
Biscuit joint glue is a great choice for a variety of projects, including:
– Joining wood boards together
– Creating strong and lasting joints
– Resisting heat and moisture damage
So if you’re looking for an adhesive that can handle any project you throw its way, biscuit joint glue is the perfect choice.
Benefits of biscuit joint glue
The benefits of biscuit joint glue are many. It is non-toxic and environmentally friendly, it is very strong and durable, and it is easy to use. Biscuit joint glue is the perfect choice for any woodworking project. If you are looking for a strong, durable, and environmentally friendly adhesive, biscuit joint glue is the perfect choice for you. Thanks for reading! I hope you found this article interesting and informative. Please feel free to share it with your friends and family.
Conclusion
Biscuit joint glue is an amazing product with a long and fascinating history. If you’re looking for a strong, durable, and environmentally friendly adhesive, biscuit joint glue is the perfect choice for you.
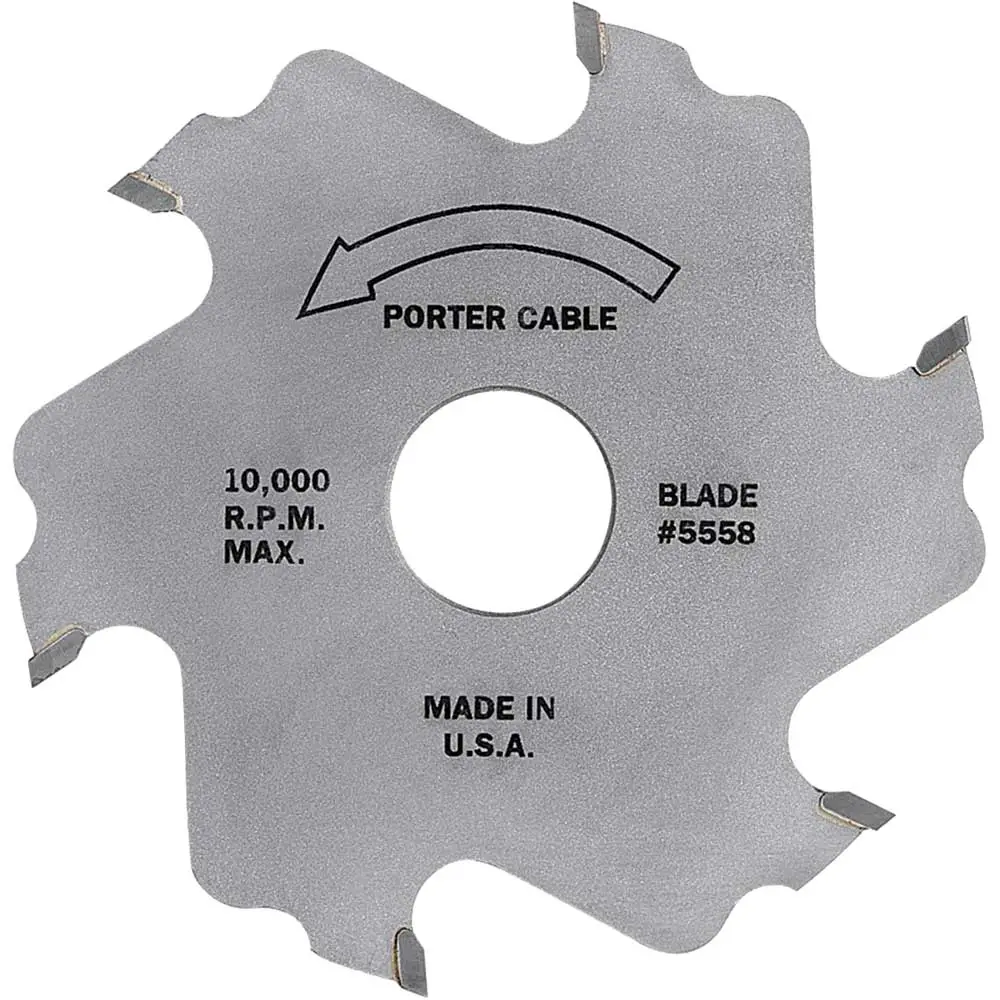
There are many different types of porter cable biscuit joiner blades on the market. It can be difficult to decide which one is right for you. In this article, we will discuss the different types of blades available and help you decide which one is best for your needs. We will also talk about how to care for your blades and keep them in good condition.
Different types of porter cable biscuit joiner blades
The first type of blade is the standard blade. This blade is made of high-carbon steel and is designed for general purpose use. It is the most common type of blade used on porter cable biscuit joiners. Steel blades are less expensive but will need to be sharpened more frequently.
The second type of blade is the carbide-tipped blade. This blade is made of a harder material than the standard blade, and it is designed for more demanding applications. It is more expensive than the standard blade, but it will last longer and perform better in tougher situations. Carbide blades are more expensive but they hold their edge longer.
The third type of blade is the diamond-tipped blade. This blade is made of a very hard material, and it is designed for the most demanding applications. It is the most expensive type of blade, but it will last the longest and perform the best in the toughest situations.
Which type of blade is right for you? It depends on your needs. If you are doing general purpose work, the standard blade will be fine. If you need a blade that is tougher and more durable, the carbide-tipped or diamond-tipped blades would be a better choice.
Different sizes (inches) of porter cable biscuit joiner blades
There are many different sizes of biscuit joiner blades on the market. The most common sizes for porter cable biscuit joiner blades are two and four inches. The size of the blade you need will depend on the project you are working on. If you are working on a large project, you will need a larger blade. If you are working on a smaller project, you can use a smaller blade.
The size of the blade you need will depend on the type of wood you are working with. If you are cutting hardwoods, you will need a larger blade. For softer woods, a smaller blade will suffice.
Care of porter cable biscuit joiner blades
Porter cable biscuit joiner blades require special care in order to stay sharp and working properly. Here are a few tips on how to care for your blades:
Always store the blades in a dry place. Moisture can cause the blades to rust.
When not in use, cover the blades with a light oil to prevent rusting.
Be sure to clean the blades after each use. A build-up of sawdust can cause the blades to dull more quickly.
By following these simple tips, you can extend the life of your porter cable biscuit joiner blades and keep them working like new.
How do you change the blade on a Porter Cable plate joiner?
If you’re looking to change the blade on your Porter Cable plate joiner, there are a few things you need to know. First, make sure that you have the right size wrench for the bolts that hold the blade in place. Next, loosen the two screws that hold the blade in place. Be careful not to lose them! Finally, remove the old blade and insert the new one. Make sure that the new blade is tight before using the joiner again.
Changing the blade on your Porter Cable plate joiner is a simple process that anyone can do. With a little bit of know-how, you’ll be back to making perfect joints in no time!
Conclusion
Now that you know more about porter cable biscuit joiner blades, you can make an informed decision about which type is right for you. Be sure to consider all of the factors we have discussed before making your purchase. With a little research, you can find the perfect blade for your needs.
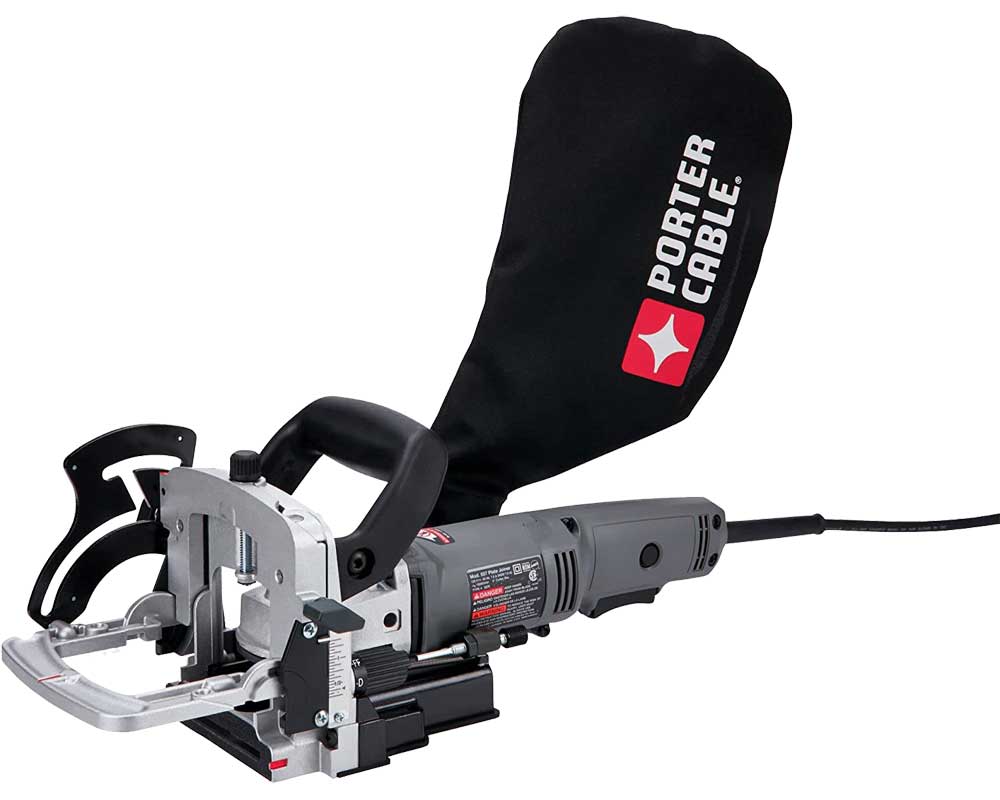
If you are in the market for a porter cable biscuit joiner, you have come to the right place. In this article, we will discuss everything you need to know about these handy tools before making your purchase. We will cover topics such as features, benefits, and what to look for when shopping for a porter cable biscuit jointer. By the end of this article, you will be an expert on porter cable biscuit joiners and will be able to make an informed purchase!
Porter cable biscuit joiners are a great tool for anyone who is looking to do some woodworking. These tools allow you to make strong, tight joints in wood without the use of nails or screws. Biscuit joiners are also very easy to use, which makes them a great choice for beginner woodworkers.
Porter cable biscuit joiner parts
The Porter Cable Biscuit Joiner comes with a number of different parts that all work together to help you make the perfect biscuit join. Each of these parts plays an important role in making sure that your biscuit join turns out perfectly. The main body of the machine is made up of the motor housing. The motor housing contains the motor and gears that drive the cutter. The baseplate provides a stable surface for you to work on. The fence ensures that your workpiece is held in place as you make your cut. And finally, the biscuit joiner cutter actually does the cutting.
With all of these parts working together, it’s no wonder that the Porter Cable Biscuit Joiner is such a popular choice for woodworkers.
Features to consider when shopping
There are many different features to consider when shopping for a porter cable biscuit joiner. Some of the most important things to look for include:
A powerful motor: This is important because you want your biscuit joiner to be able to handle any type of wood you throw at it.
An adjustable fence: This will allow you to adjust the biscuit joiner to fit the thickness of the wood you are working with.
A dust collector: This is a must-have if you want to keep your work area clean.
An easy-to-use guide: You want a biscuit joiner that is easy to set up and use.
Porter cable biscuit joiners are a great investment for anyone who enjoys woodworking. These tools are very versatile and can be used for a variety of projects. With so many different features to consider, you are sure to find the perfect porter cable biscuit joiner for your needs.
Porter cable biscuit joiners are available at most hardware stores and online retailers. When shopping for a porter cable biscuit joiner, it is important to compare prices and features of different models. By taking the time to do your research, you are sure to find the best deal on a porter cable biscuit joiner that meets your needs.
Uses of porter cable biscuit joiner
This tool is used to join two pieces of wood together using small, round wooden biscuits. The biscuit joiner cuts a shallow half-moon shaped hole in each piece of wood. A dry, powdered glue is then spread into the holes and the biscuits are inserted. The wood is then clamped together until the glue dries.
The biscuit joiner is a very versatile tool and can be used for a variety of different woodworking projects. Some of the most common uses for a biscuit joiner include:
Attaching countertops to cabinets
Making cabinet doors
Building shelves
Constructing frame and panel walls
Conclusion
The Porter Cable biscuit joiner is one of the most popular tools for joining wood. It’s a simple tool that anyone can use, and it’s very versatile. Here’s everything you need to know about the biscuit joiner.
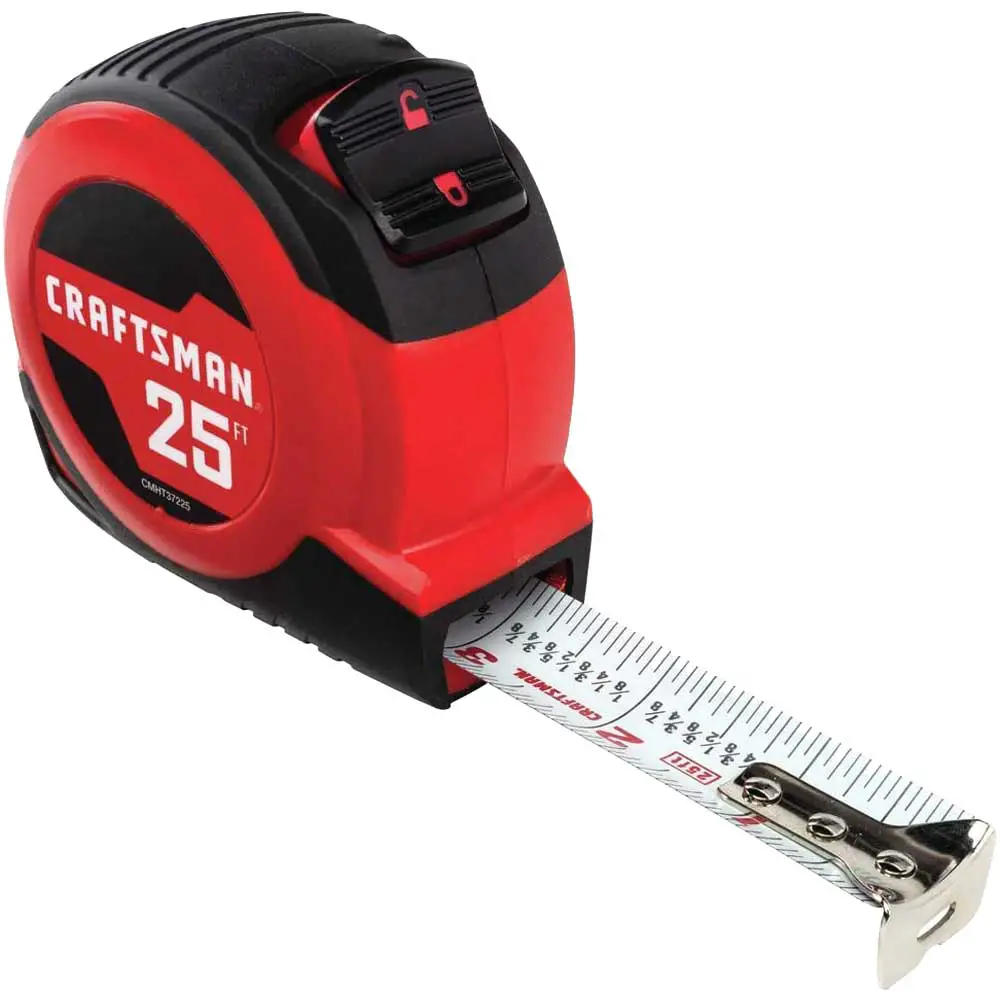
There are many interesting things about woodworking tape measures that you may not know. For starters, they come in a variety of different shapes and sizes. In addition, they can be made from a variety of materials, including plastic and metal. They also have different features, such as belt clips and locking mechanisms. In this article, we will discuss 10 unique facts about woodworking tape measures that you may not have known!
Woodworking tape measures have a long and interesting history. They were first invented in the 18th century by English carpenter John Michell. Michell’s design was based on a measuring device that had been used by surveyors. The first woodworking tape measure was made from brass and had a wooden handle.
Woodworking tape measures shapes and sizes
Woodworking tape measures come in a variety of different shapes and sizes. They can be round, square, or rectangular. They also come in different colors, such as black, blue, or red. In addition, they can be made from a variety of materials, including plastic and metal.
Woodworking tape measures length
One of the most interesting facts about woodworking tape measures is that they come in a variety of different lengths, ranging from six feet to 100 feet. The most common length is 25 feet, but they can also be found in lengths of 50 feet or even 100 feet. This makes them ideal for a variety of different projects, both big and small.
Woodworking tape measures Blade Material (alloy steel, fiberglass, stainless steel)
There are three main types of blade materials used in woodworking tape measures: alloy steel, fiberglass, and stainless steel.
Alloy steel is the most common type of blade material used in woodworking tape measures. It is durable and has a good balance between flexibility and rigidity.
Fiberglass is another popular type of blade material used in woodworking tape measures. It is very strong and rigid, but can be difficult to work with if you are not experienced.
Stainless steel is the third type of blade material used in woodworking tape measures. It is very strong and durable, but can be difficult to work with if you are not experienced.
The most common materials are steel and plastic. Steel is more durable than plastic, but it is also more expensive. Plastic is cheaper, but it is not as durable.
Woodworking tape measures lock type
Some woodworking tape measures have belt clips. Others have locking mechanisms. Some have both. And some don’t have either.
There are many different types of locking mechanisms on woodworking tape measures. Some have a thumb lock, while others have a push button. There are also some that have a release lever. Each type has its own advantages and disadvantages.
The thumb lock is the most common type of locking mechanism. It is easy to use and provides a good grip. However, it can be difficult to release the lock with one hand.
The push button locking mechanism is easier to release than the thumb lock. However, it can be difficult to keep the tape measure from slipping while you are using it.
The release lever is the most difficult type of locking mechanism to use. However, it is the most secure. It is also difficult to release with one hand.
How to read woodworking tape measures
Most tape measures have markings that indicate inches, with the biggest increments being in feet. There will also be a smaller line every 16th of an inch. In between each foot mark, there are hash marks that indicate half feet—these are represented by the symbol “-“ on most tape measures. Finally, some tape measures also have a mark for every quarter inch.
To read a woodworking tape measure, start by finding the zero-inch mark, which is usually located at the end of the tape. Then, hold the tape measure at the zero-inch mark and stretch it out to the desired measurement. The number that lines up with the zero-inch mark is the measurement in inches. For example, if you want to measure a board that is two feet long, you would stretch the tape measure out to 24 inches and read the number “24” on the tape measure.
To convert measurements from inches to feet, divide the number of inches by 12. For example, if you want to convert 24 inches to feet, you would divide 24 by 12, which equals two feet.
Tape measures are a vital part of any woodworker’s toolkit. With a little practice, you’ll be able to quickly and easily read a tape measure like a pro!
Woodworking tape measures accuracy
One of the most important aspects of a woodworking tape measure is its accuracy. This is especially true for professional woodworkers who rely on these tools to make precise measurements. There are a few things that can affect the accuracy of a tape measure, such as the type of material it’s made from and the width of the tape.
Another factor that can impact the accuracy of a woodworking tape measure is how it’s used. For example, if you’re using it to measure the length of a board, you’ll need to make sure that the board is level before taking your measurement. Otherwise, you might end up with an inaccurate reading.
Finally, keep in mind that even the best tape measures can lose their accuracy over time. This is why it’s important to check your tape measure regularly and calibrate it if necessary. By doing this, you can ensure that your measurements are always accurate.
Woodworking tape measures uses
Woodworking tape measures are used for a variety of tasks, including measuring dimensions and taking accurate measurements. In addition, they can be used to create precise cuts and markings on wood. They are also useful for marking out lines and patterns on wood.
What fraction is .35 inches?
Did you know that the standard markings on a woodworking tape measure are in fractions of an inch? For example, the mark for one-quarter inch is usually represented by a “¼” sign. So, if you see this symbol on your tape measure, you know that .35 inches is equal to three-quarters of an inch.
How do you read a 32nd tape measure?
The first thing you need to do is find the zero mark on the tape. This is usually located at the end of the blade. Once you have found the zero mark, you need to count the number of hash marks that are between the zero mark and the inch mark. Each hash mark represents one-thirty-second of an inch. So, if there are eight hash marks between the zero mark and the inch mark, that means the tape measure is reading eight-thirty-seconds of an inch, or one-quarter of an inch.
To read a metric tape measure, you need to find the zero mark on the blade and then count the number of centimeters between the zero mark and the end of the blade. Each centimeter represents ten millimeters. So, if there are eight centimeters between the zero mark and the end of the blade, that means the tape measure is reading eighty millimeters, or eight centimeters.
When you’re using a tape measure, it’s important to remember that the markings on the blade are only approximate. This is because the blade itself is flexible, so the markings will change slightly depending on how much pressure you’re applying to the tape. If you need an accurate measurement, it’s best to use a ruler or a measuring tape.
How do you read a 64th tape measure?
The first thing you need to do is identify the markings on the tape. The smallest increment on a standard tape measure is an inch, and each inch is divided into 16 smaller units called “marks.” These marks are usually represented by small lines or dashes. In between each inch mark, you’ll find four more marks that represent one-quarter, one-half, three-quarters, and one whole inch, respectively.
To read a 64th tape measure, you’ll need to identify the markings on the tape that represent 64ths of an inch. These markings are usually represented by small lines or dashes. In between each inch mark, you’ll find four more marks that represent one-quarter, one-half, three-quarters, and one whole inch, respectively. Each of these marks represents 16 64ths of an inch.
To measure something using a 64th tape measure, simply line up the beginning of the object you’re measuring with the 0 mark on the tape. Then, count the number of markings that fall within the length of the object you’re measuring. This will give you the measurement in 64ths of an inch. For example, if you’re measuring a piece of wood that’s two inches long, and four markings fall within that length, then your measurement would be 32 64ths of an inch (or two inches).
What is 25 on a 32nd tape measure?
This is a question that often comes up among woodworkers. The answer is that it is exactly one inch. This is because a 32nd tape measure has 32 divisions, so each division represents one-thirty-second of an inch. Therefore, the 25th division on a 32nd tape measure would be one inch.
You may have seen the markings “25 32” on a tape measure before, but what do they actually mean? These markings indicate that the tape measure is meant for use with 25-32 inch lumber. This is because the markings are placed at intervals of 16 inches, which is the standard width of lumber.
So, if you’re working with 25-32 inch lumber, make sure to use a tape measure that has these markings. It’ll make your life a lot easier!
Here are some additional facts about woodworking tape measures:
Most tape measures have markings on them that indicate inches and centimeters.
Some tape measures also have hooks or loops on the end, which can be used to measure around corners or other objects.
They are often stored in a case or holster when not in use.
There are many different brands of woodworking tape measures. Some of the more popular brands include Stanley, Craftsman, and Milwaukee. If you’re looking for a new woodworking tape measure, be sure to check out the selection at your local hardware store or online.
Conclusion on woodworking tape measures
As you can see, there are a lot of interesting things about woodworking tape measures that you may not have known. From their accuracy to their different features, these tools are essential for any woodworker. By understanding more about them, you can be sure that you’re always using the best tool for the job.
There are many ways to use a woodworking ruler in your next project. In this article, we will discuss 10 unique ways that you can use this handy tool in your workshop. From measuring and marking cuts to creating joints and assemblies, the woodworking ruler is a versatile tool that every woodworker should have in their arsenal. Let’s take a closer look at some of the ways that you can put this tool to work for you!
History of woodworking ruler
The woodworking ruler is a versatile tool that has been used by woodworkers for centuries. Its origins can be traced back to the early days of carpentry, when it was used to measure and mark cuts. Today, the woodworking ruler is still an essential tool for any workshop. From measuring and marking cuts to creating joints and assemblies, the woodworking ruler is a versatile tool that every woodworker should have in their toolbox.
Kinds of woodworking ruler
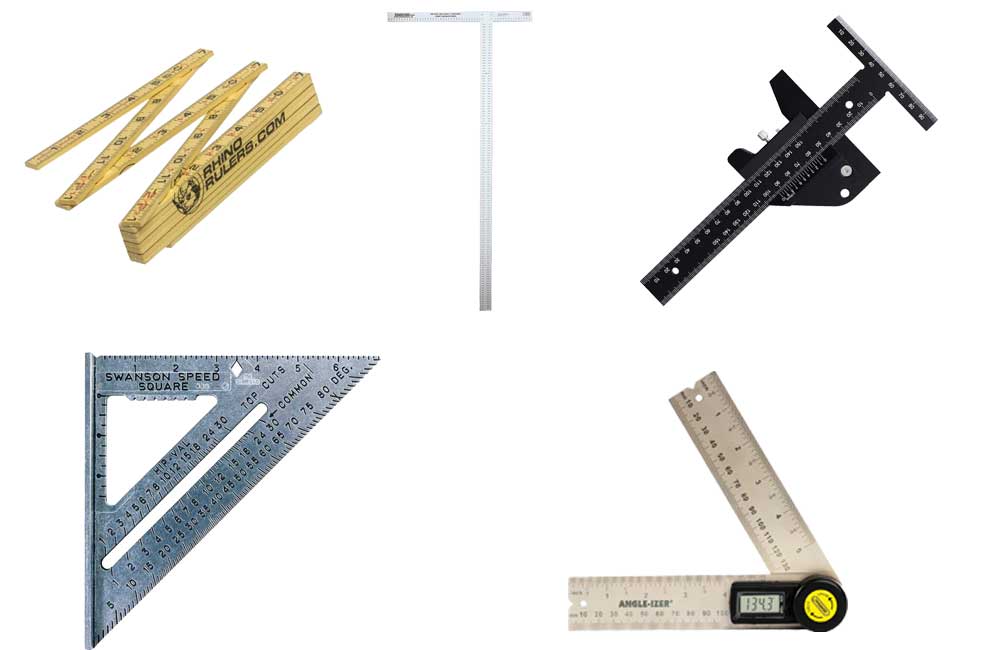
There are many different types of woodworking rulers available on the market today. Each type has its own unique set of features and benefits that can be tailored to specific projects. Here are a few of the most popular types of woodworking rulers:
Standard Woodworking Ruler
This is the most basic type of woodworking ruler. It is typically made from aluminum or steel and has markings for inches and centimeters.
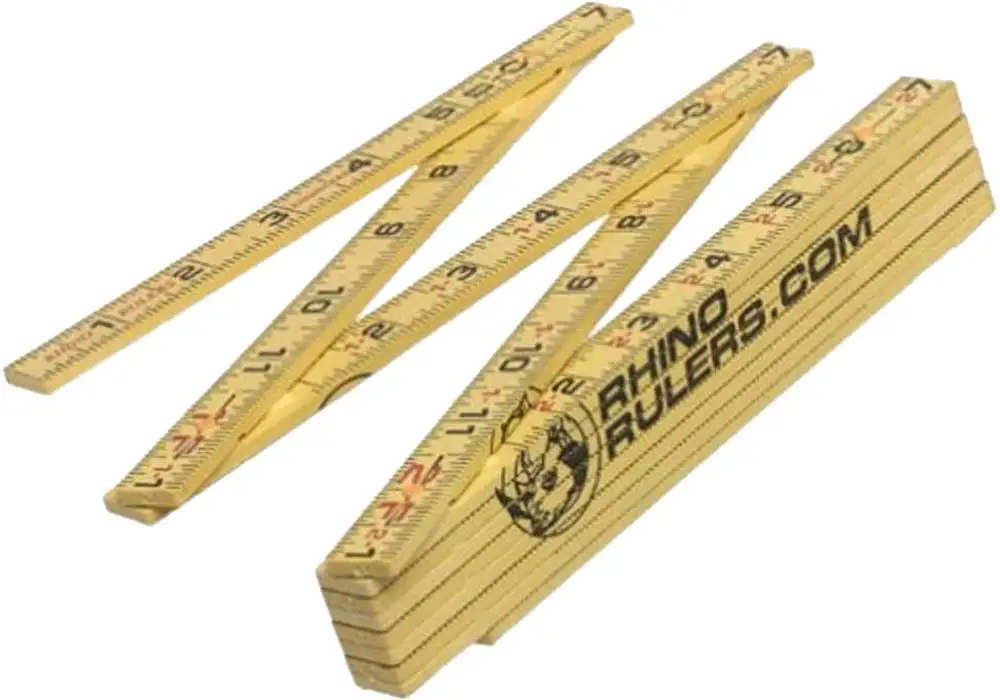
Folding Woodworking Ruler
This type of woodworking ruler is convenient for storage and transport. It is typically made from aluminum or steel and has markings for inches and centimeters.
There are many different brands and styles of folding rulers available, so it is important to choose one that will suit your needs. When selecting a folding ruler, consider the length, width, and thickness of the ruler. You will also want to consider the type of material that the ruler is made from. Some materials, such as aluminum, are more durable than others. Once you have selected the perfect folding ruler for your needs, there are a few different ways that you can use it in your next project.
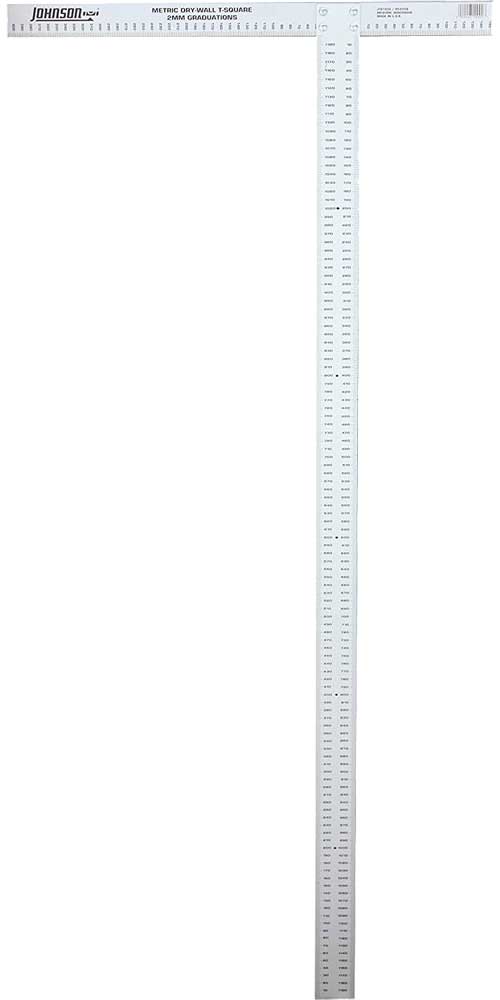
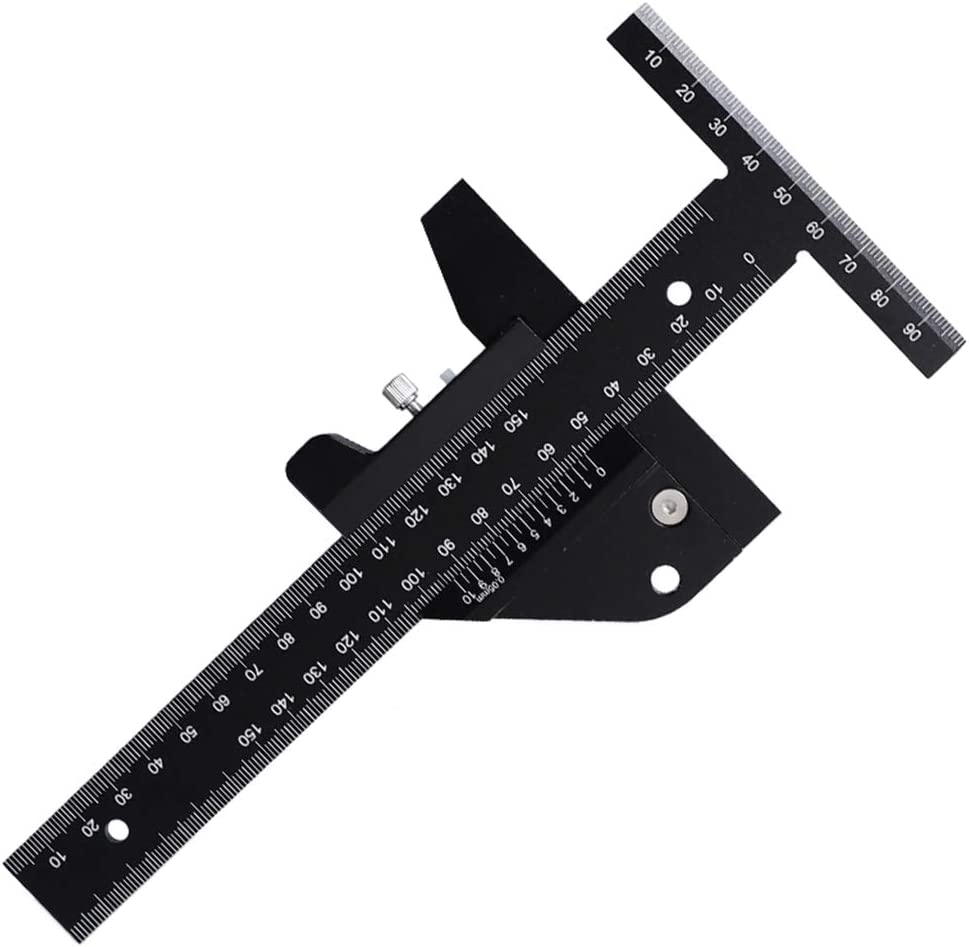
This type of woodworking ruler is used to create perpendicular lines and cuts. It is typically made from aluminum or steel and has markings for inches and centimeters.
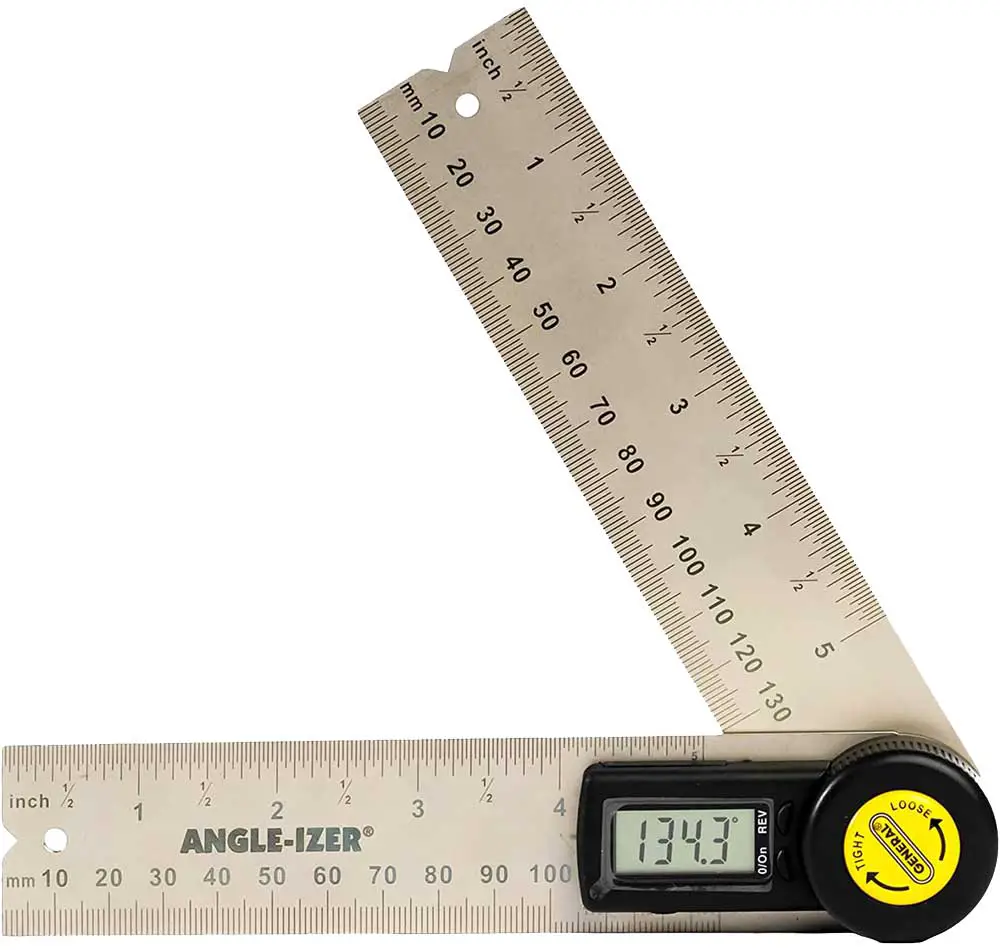
This type of woodworking ruler is used to create beveled edges on cuts and joints. It is typically made from aluminum or steel and has markings for degrees.
Each type of woodworking ruler has its own unique set of features that can be tailored to specific projects. When choosing a woodworking ruler, it is important to consider the type of project you will be working on and select a ruler that has the features best suited for that project.
What is the woodworking edge rule and what uses does it have?
The woodworking edge rule is a versatile tool that can be used for a variety of different tasks in the workshop. From measuring and marking cuts to creating joints and assemblies, the woodworking edge rule is an essential tool for any woodworker.
Woodworking triangle ruler
If you’re looking for a way to add precision to your next project, consider using a woodworking triangle ruler. This type of ruler is specially designed for use in woodworking, and can be used for tasks such as measuring and marking cuts, creating joints and assemblies, and more.
To use a woodworking triangle ruler, simply place it on your workpiece and align the ruler’s edge with the desired cutline. Then, use a pencil or other marking tool to trace along the edge of the ruler, creating a precise and accurate line.
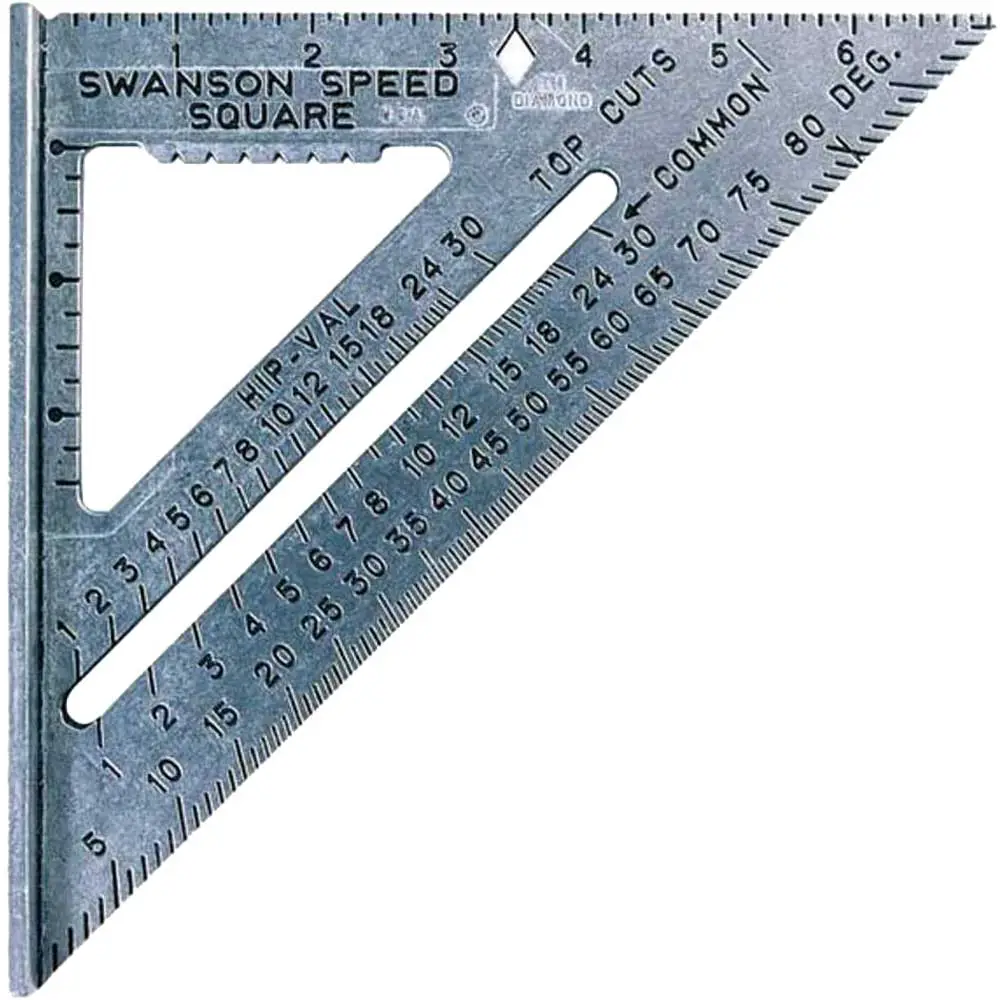
Most woodworkers are familiar with the standard ruler, but there are actually many different types of rulers available. The set square is one type of ruler that is commonly used in woodworking. This tool is used to measure and mark angles on a piece of wood.
Set squares come in a variety of sizes, but the most common size is the six-inch set square. This size is large enough to be used on most pieces of wood, but small enough to be easily maneuverable.
Set squares are made from a variety of materials, but the most common material is wood. Set squares can also be made from plastic or metal.
When using a set square, it is important to make sure that the blade is perpendicular to the edge of the wood. This will ensure that the markings are accurate.
Once the set square is in place, you can use it to mark a line on the wood. To do this, simply draw a line along the length of the blade.
You can also use the set square to mark angles on the wood. To do this, you will need to find the center point of the wood. Once you have found the center point, you can place the set square at that point and mark an angle on the wood.
There are many different ways to use a set square in your woodworking project. These are just a few of the most common ways that set squares are used.
What is flexible ruler?
A flexible ruler is a tool that every woodworker should have in their workshop. There are many uses for this type of ruler, from measuring and marking cuts to creating joints and assemblies.
One way to use a flexible ruler is to measure and mark cuts. This is a great way to ensure that your cuts are accurate. Another way to use this handy tool is to create joints and assemblies. By using the ruler to measure and mark the pieces that you need, you can create perfect joints every time.
Another great use for a flexible ruler is to create templates.
What is precision ruler woodworking
Precision rulers are an essential tool for any woodworker. From measuring and marking cuts to creating joints and assemblies, the woodworking ruler is a versatile tool that every woodworker should have in their workshop.
How to Use a Woodworking Ruler
One of the most obvious uses for a woodworking ruler is measuring. Whether you’re measuring for cuts or for assembly, a ruler is an essential tool for getting accurate measurements. You can also use your ruler to mark out lines and markings on your material – this can be helpful when creating joints or assembling pieces.
Another great use for a woodworking ruler is creating templates. If you need to create multiple identical pieces, a ruler can help you ensure that your pieces are all the same size and shape. This can be a huge time-saver, especially if you’re working on a larger project.
One of the less obvious uses for a woodworking ruler is as a straightedge. If you need to create a perfectly straight line, a ruler can help you get the job done quickly and easily. This is especially helpful when working with long boards or other materials that can be difficult to keep level.
Finally, a woodworking ruler can also be used as a clamp. If you need to secure two pieces of wood together, a ruler can provide the perfect amount of pressure to keep your pieces in place while you work. This can be extremely helpful when working on delicate projects or when trying to avoid damaging your material.
As you can see, there are many ways to put a woodworking ruler to good use in your next project. Whether you’re measuring, marking, or creating templates, this versatile tool can help you get the job done right. So, don’t be afraid to experiment and find new ways to use your woodworking ruler – you might be surprised at how helpful it can be!
Here are some other unique ways that you can use a woodworking ruler in your next project:
Marking and measuring cuts
Assembling pieces
Creating joints
Checking for squareness
Marking dovetails
Scribing lines
Making templates
Transferring measurements
Cutting miters.
What is a 90 degree ruler called?
A 90 degree ruler is also called a T-bevel, carpenter’s square, or try square. It is a handy tool that helps you mark and measure angles for your project. You can use it to create joints, assemblies, and cuts.
What is a scribing ruler called?
A scribing or bevel gauge is a tool used to transfer measurements from one workpiece to another, or to lay out lines at specific angles. It consists of two arms, joined at one end by a hinge, with a sharp point at the other end. The arms are adjustable so that they can be set to any desired width.
The woodworking ruler is a versatile tool that every woodworker should have in their workshop. There are many different ways to use this handy tool, from measuring and marking cuts to creating joints and assemblies. In this article, we discussed ten unique ways that you can use a woodworking ruler in your next project. With these tips, you will be able to take on any woodworking project with confidence. Do you have any other tips for using a woodworking ruler? Share them with us in the comments below!
If you’re into woodworking, then you know that a dovetail saw is an essential tool in your arsenal. This type of saw is perfect for making precise cuts, and it can be used for a variety of applications. In this article, we will take a look at the different types of dovetail saws available on the market, as well as the features that you should consider when making your purchase. We’ll also provide some tips on how to use a dovetail saw safely and effectively. So whether you’re a beginner or a seasoned pro, read on for all the info you need to choose the right dovetail saw!
The first dovetail saws were created in the 18th century. These early saws were used by cabinetmakers and other woodworkers to create precise, clean cuts. The blade of a dovetail saw is set at an angle, which allows for more control when making cuts. The teeth on these early saws were also very sharp, which made them ideal for cutting through hardwoods.
In the 19th century, dovetail saws became more popular among woodworkers. These saws were used to create intricate designs and patterns. The blades of these saws were often decorated with engravings or other artwork.
Parts Of A Dovetail Saw
There are three main parts to a dovetail saw: the blade, the handle, and the guard. The blade is the most important part of the saw, as it is responsible for making the cuts. The handle is used to grip the saw and keep your hand from slipping. The guard is there to protect your fingers from being cut by the blade.
Types of dovetail saws
When it comes to woodworking, there are a few different types of dovetail saws that you can choose from. There are two main types of dovetail saws: Western and Japanese. Both types of saws can be used for various applications, but the Japanese saw is generally considered to be better for making delicate cuts.
Western dovetail saws
The most popular type is the Western-style dovetail saw, which is characterized by its long, straight blade with a pointed tip. This type of saw is perfect for making precise cuts, and it can also be used for a variety of other applications.
Japanese dovetail saws
Another type of dovetail saw that is becoming increasingly popular is the Japanese-style dovetail saw. This type of saw is shorter and has a curved blade with a rounded tip, which makes it perfect for making detailed cuts. The Japanese-style dovetail saw is also becoming more popular because it is easier to use than the Western-style saw.
How to choose a dovetail saw
When choosing a dovetail saw, you’ll want to consider the following factors:
Blade material
Most dovetail saws have a carbon steel blade, but you can also find blades made of stainless steel or high-carbon steel. Carbon steel is the most common type, as it is durable and relatively inexpensive. Stainless steel blades are more expensive, but they’re less likely to rust. High-carbon steel blades are the strongest and most durable option, but they’re also the most expensive.
Blade size
Dovetail saws typically have a blade length of between six and eight inches. If you’re looking for a saw that can handle tougher cuts, then you’ll want to choose a blade that is on the larger side. However, if you need a saw for more delicate work, then a smaller blade might be better.
Handle material
The handle of a dovetail saw is typically made of wood, plastic, or metal. When choosing a dovetail saw, it is important to select one with a comfortable handle that will not slip in your hand. Wood handles are the most comfortable to hold, but they’re also the most prone to damage. Plastic handles are less comfortable, but they’re more durable. Metal handles are the most durable option, but they can be uncomfortable to hold for long periods of time.
Teeth per inch (TPI) of a dovetail saw
The first thing you need to consider when purchasing a dovetail saw is the number of teeth per inch (TPI). This is an important factor because it will determine the accuracy of your cuts. If you’re looking for a saw that can make precise cuts, then you’ll want to choose one with a higher TPI. while a saw with fewer TPI will make rougher cuts.
There are a few different types of dovetail saws available on the market, and each one has a different TPI. The most common type is the standard dovetail saw, which has 14 TPI. This type of saw is perfect for general woodworking applications. If you’re looking for a more precise saw, then you’ll want to choose one with a higher TPI. The next type of dovetail saw is the Japanese dovetail saw, which has 16 TPI. This type of saw is perfect for making very precise cuts.
The last type of dovetail saw is the German dovetail saw, which has 18 TPI. This type of saw is the most precise of all the dovetail saws, and it’s perfect for making extremely intricate cuts.
Now that you know what to look for in a dovetail saw, let’s take a look at some of the best options on the market.
How to use a dovetail saw safely and effectively
Most woodworkers will agree that a dovetail saw is an essential tool in any woodworking shop. This type of saw is perfect for making precise, clean cuts – something that is crucial in any woodworking project. Whether you’re working on a piece of furniture or creating a wooden toys, having a good dovetail saw will make your life a lot easier. There are a few things to keep in mind when using a dovetail saw:
Always make sure that the saw is properly secured before beginning your cut. This will help to prevent any accidents from happening.
Take your time when making your cuts – rushing through the process will only lead to sloppy results.
Always use a saw blade that is sharp and in good condition. A dull blade will make it more difficult to get clean cuts, and it can also be dangerous.
If you’re making a crosscut, you would hold the saw at a 90-degree angle to the workpiece and make your cut. On the other hand, if you’re making a rip cut, you would hold the saw at a 45-degree angle to the workpiece.
Additionally, you’ll want to make sure that you’re using the proper blade for the job. For example, a finer-toothed blade will be better suited for making delicate cuts, while a coarser-toothed blade will be better for making rougher cuts.
Best dovetail saw
One of the best dovetail saws on the market is the Stanley 16-inch FatMax Dovetail Saw. This saw has a blade made of high-carbon steel, which makes it durable and tough enough to handle even the most challenging cuts. The blade is also 16 inches long, which makes it ideal for tougher applications. The handle is made of metal, so it’s durable, but it can be uncomfortable to hold for long periods of time. The saw also has a TPI of 14, making it perfect for making precise cuts.
Another great option is the WEN 3621 16-Inch Variable Speed Scroll Saw. This saw has a blade made of carbon steel, which makes it durable and affordable. The blade is also 16 inches long, making it ideal for tougher applications. The handle is made of wood, so it’s comfortable to hold, but it’s not as durable as other options. The saw also has a variable speed feature, so you can adjust the speed depending on the type of cut you’re making. The TPI on this saw is 18, so it’s perfect for making precise cuts.
No matter what your budget or needs are, there’s a dovetail saw out there that’s perfect for you. So get out there and start woodworking!
How do you sharpen a dovetail saw?
There are a few different ways to sharpen a dovetail saw. You can use a file, which is the traditional method, or you can use a sharpening stone. If you decide to use a file, make sure that it is a triangular file. Start by filing the teeth on one side of the blade, and then move to the other side. Remember to file in the direction of the grain, and be careful not to file too deeply.
If you decide to use a sharpening stone, start by wetting the stone with water. Then, hold the saw at a 20-degree angle against the stone and sharpen each tooth individually. Move the saw back and forth across the stone until the teeth are evenly sharpened.
Once you have sharpened the saw, it is important to protect the blade by oiling it. This will help to prevent rust and keep the blade in good condition. Simply wipe a thin layer of oil onto the blade using a clean cloth.
Conclusion of woodworking dovetail saw
If you’re looking for a versatile and precise saw, then a dovetail saw is the ideal choice. With its sharp teeth and slim blade, it’s perfect for making clean cuts in a variety of materials. Plus, with proper care and maintenance, your dovetail saw will last for years to come. So don’t hesitate to add one to your woodworking arsenal today.