Carpenter tool box

Are you a woodworking enthusiast or just starting your journey in carpentry? A carpenter toolbox is an essential tool that every carpenter must-have. It’s like a treasure box that contains all the essential tools needed to make beautiful crafts and furniture. In this post, we’ll explore what a carpenter toolbox is, its components, types of boxes available in the market, and how to choose the right one for you. So let’s dive into this interesting topic!

Carpenter tool box

A carpenter’s tool box is a container that holds various tools and equipment that are used by carpenters to perform their work. It can come in different shapes and sizes and can be made of various materials, including metal, plastic, or wood.

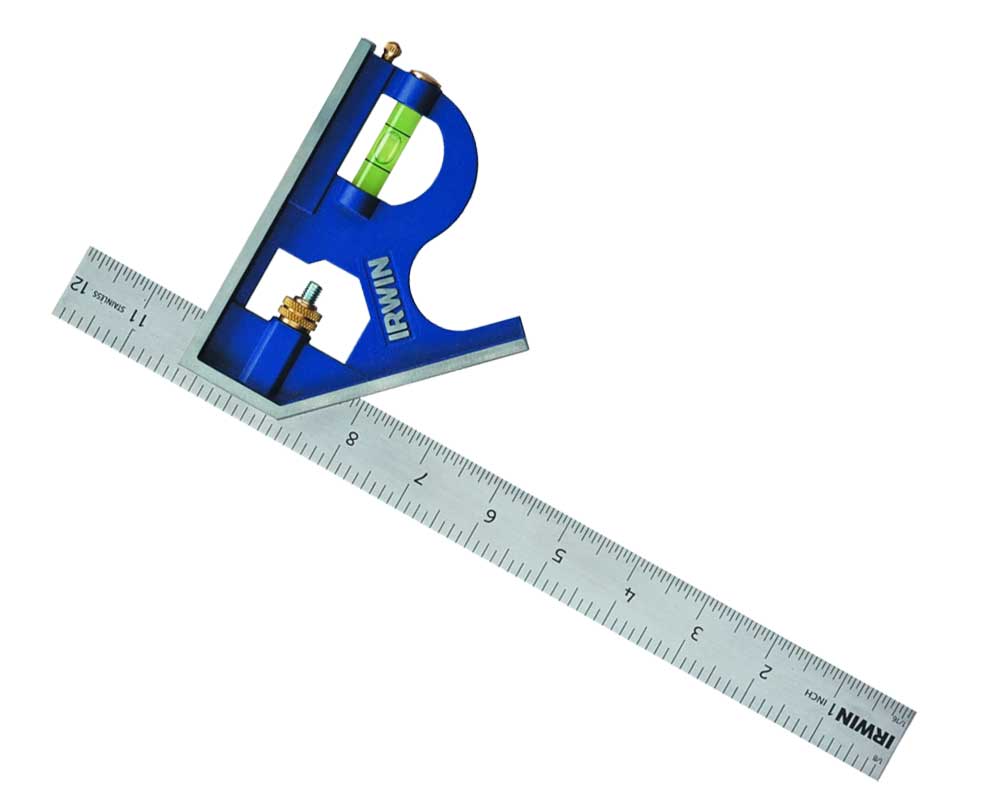
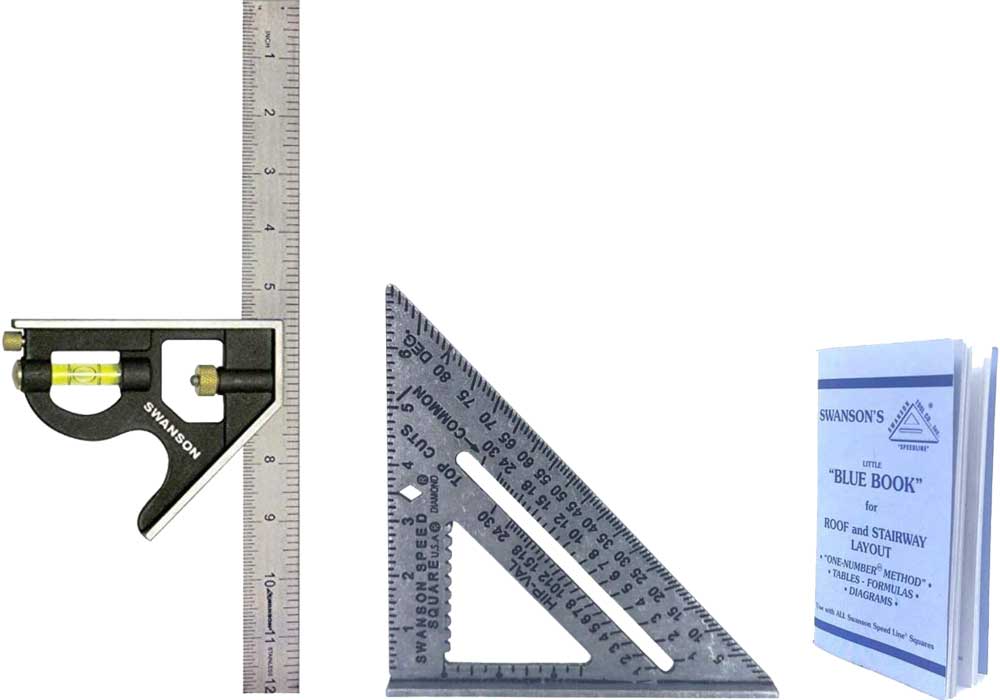
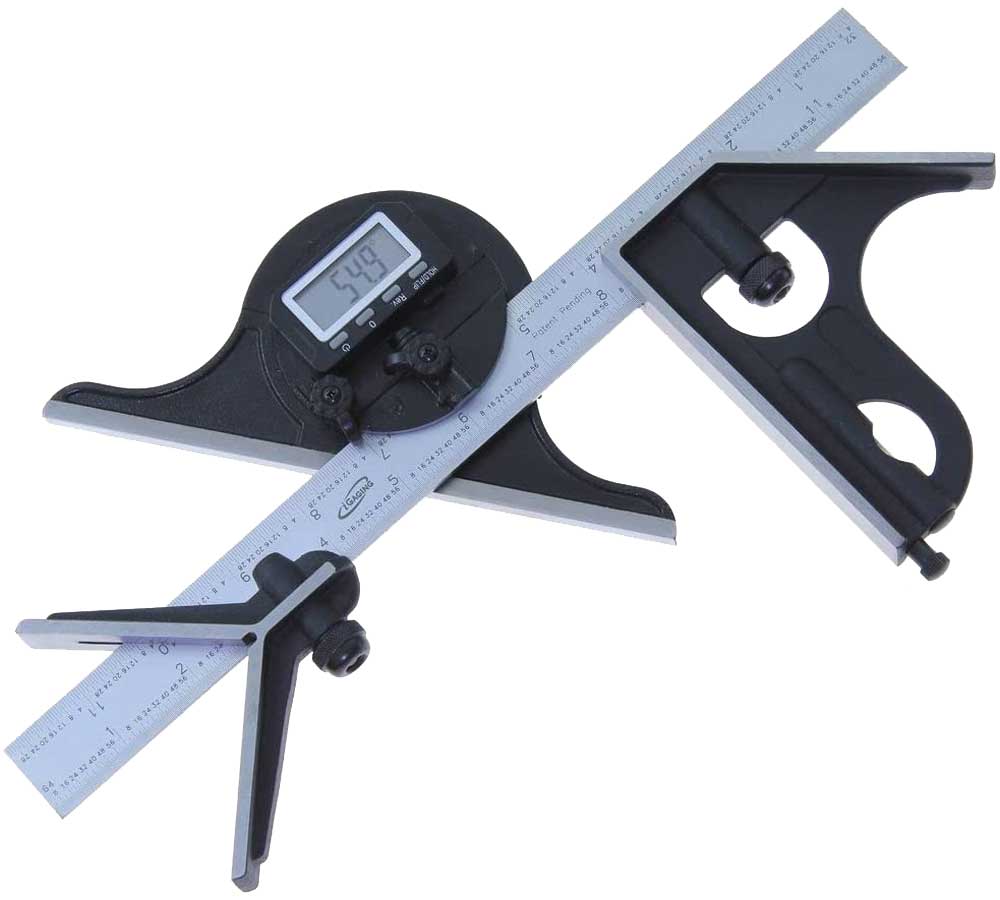
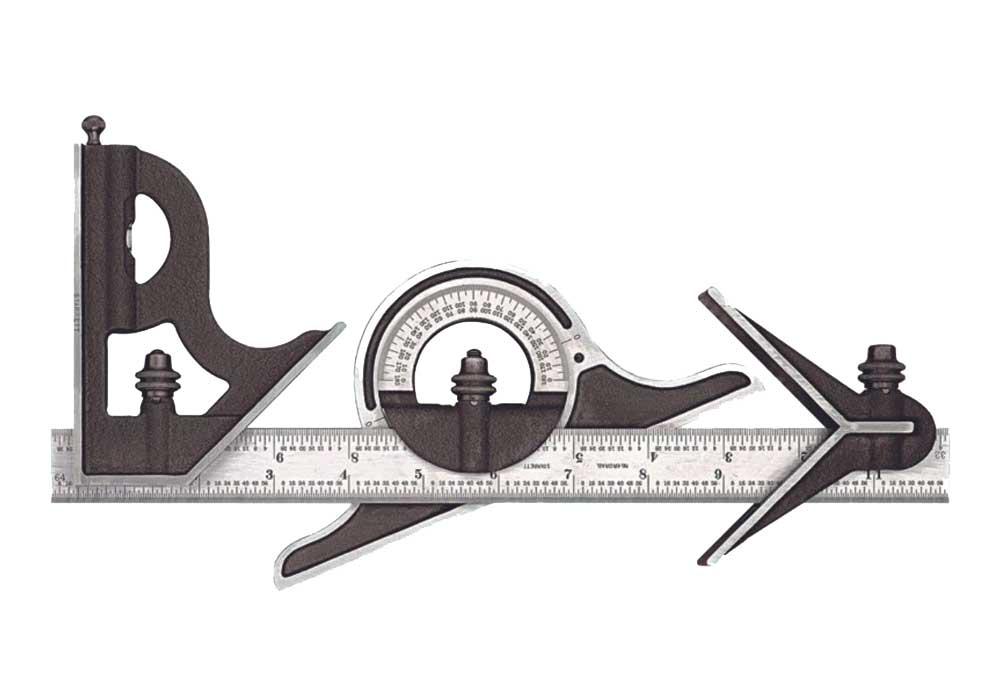
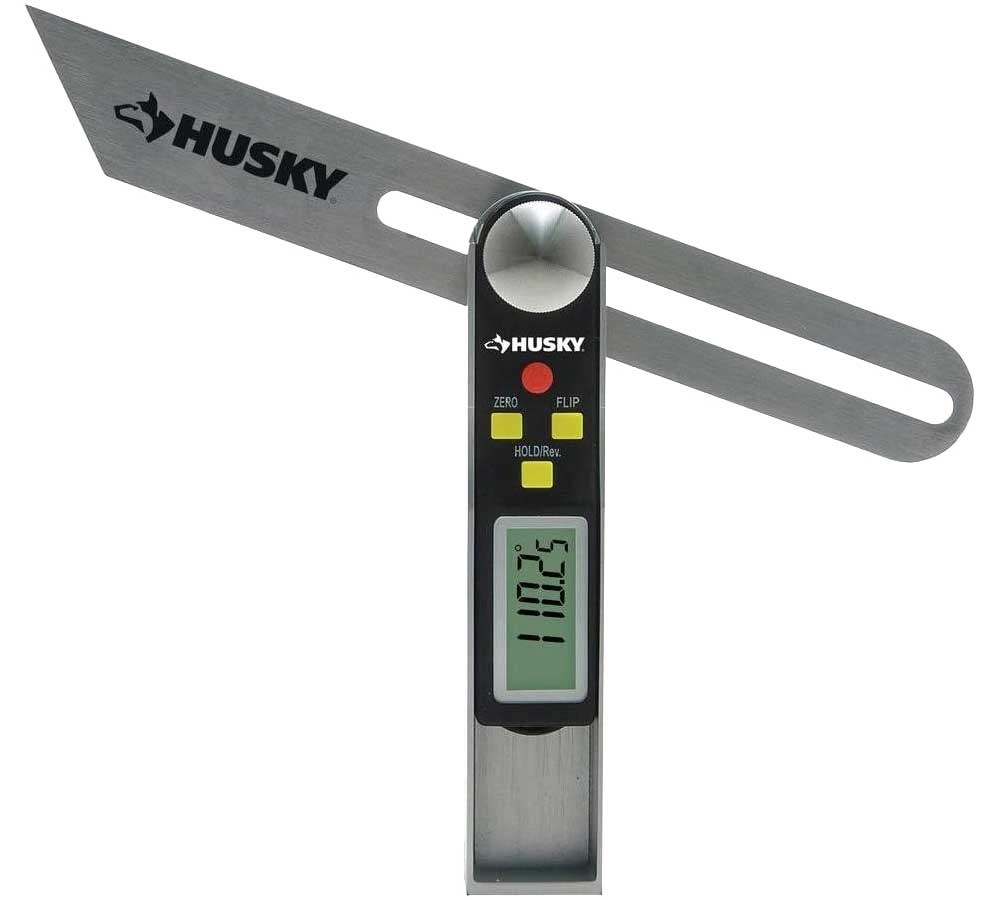
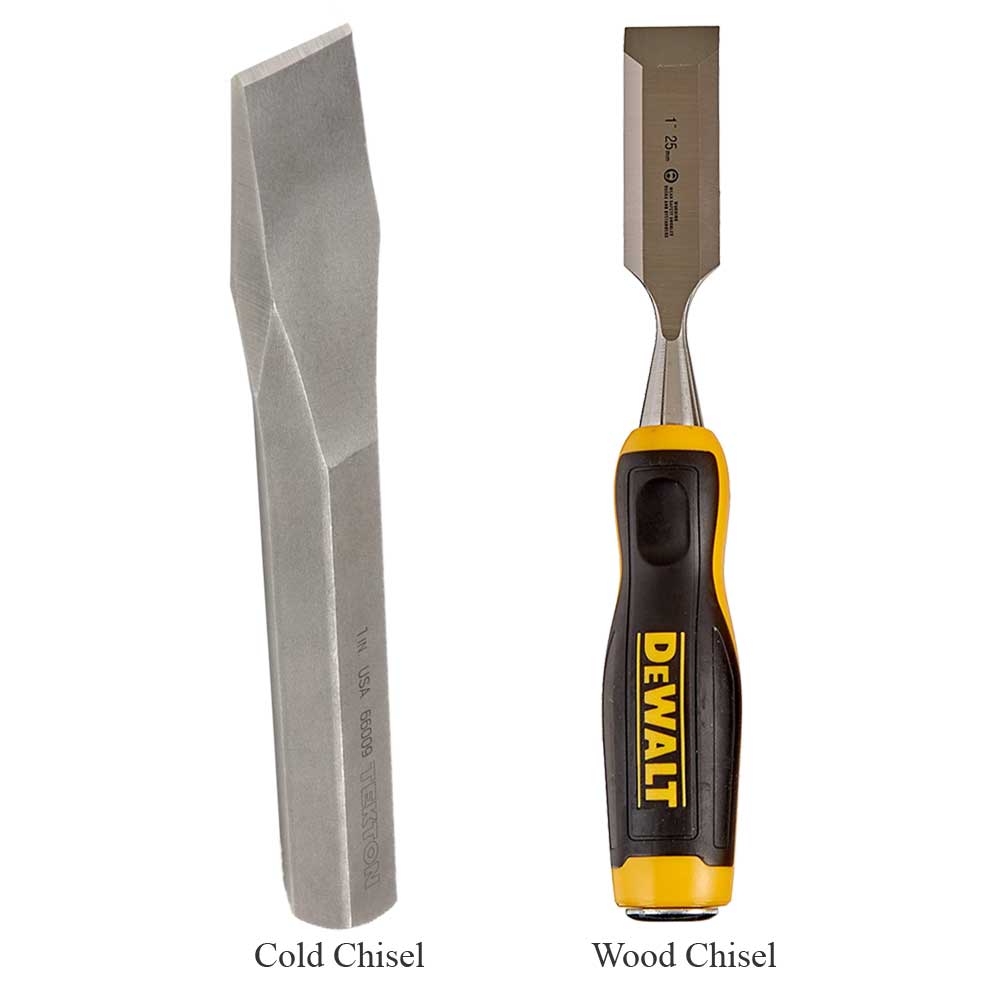
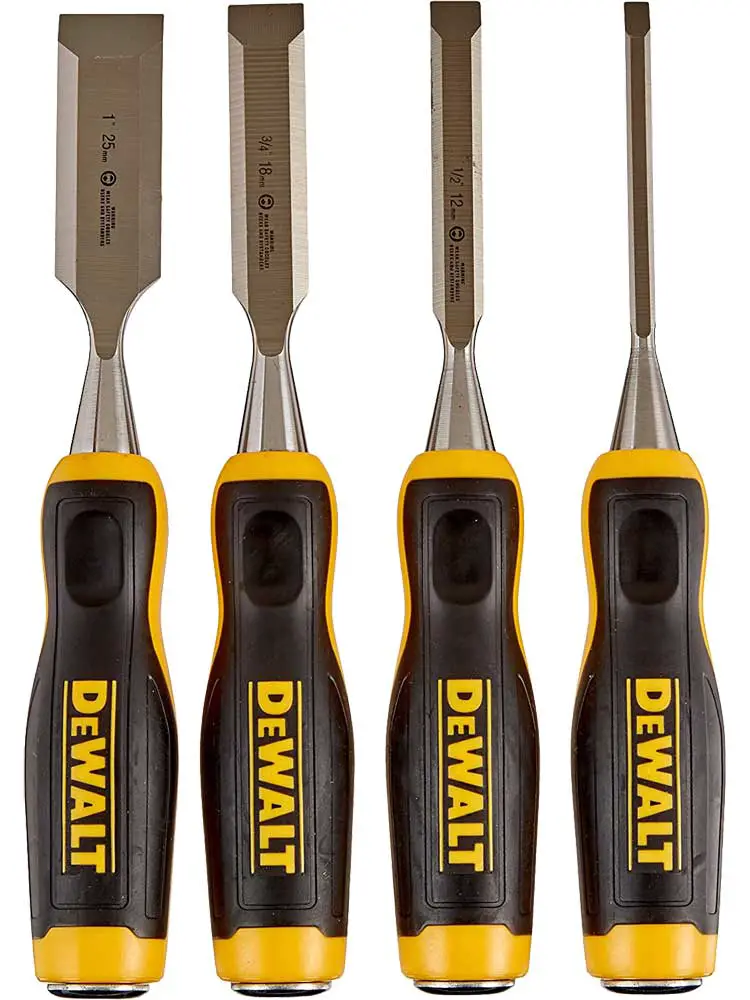
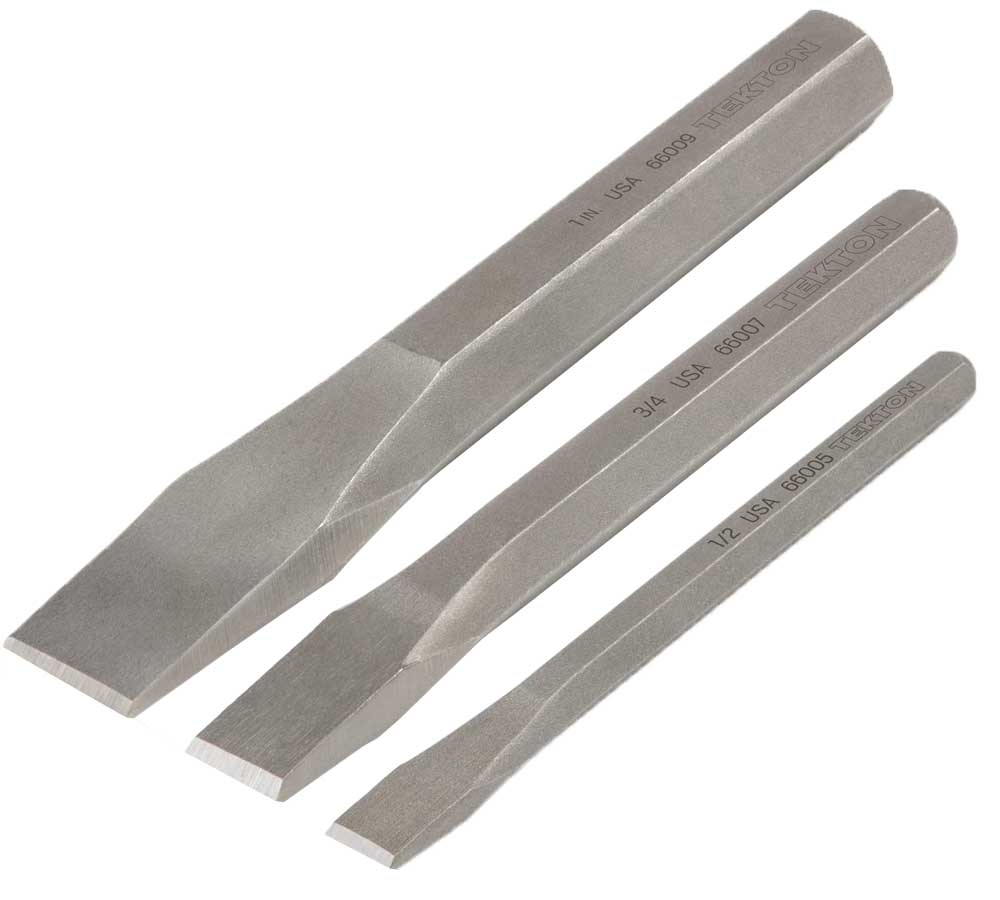
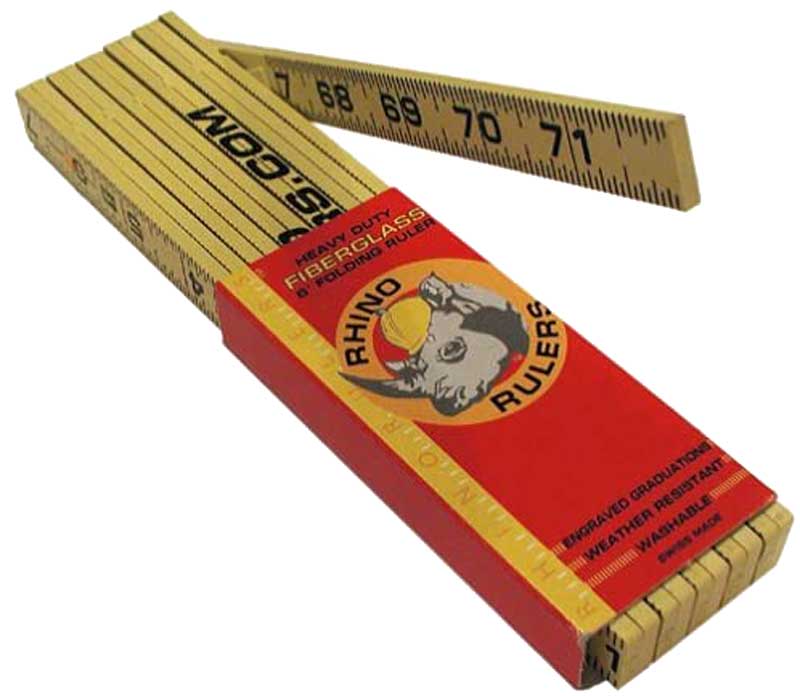
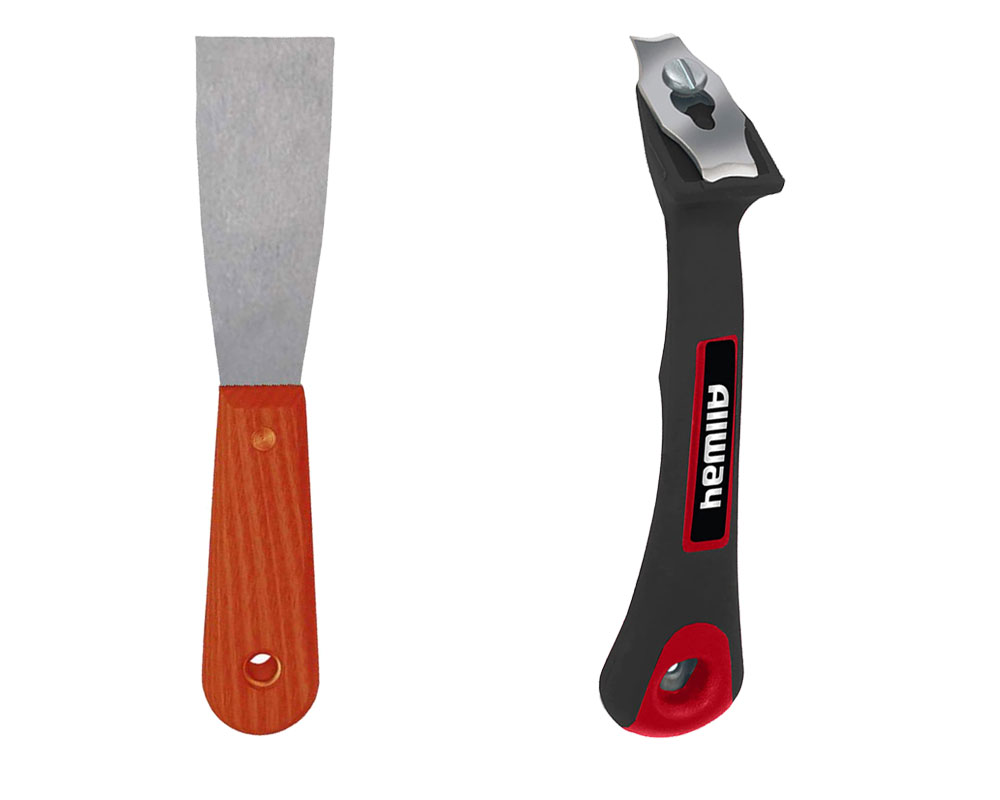
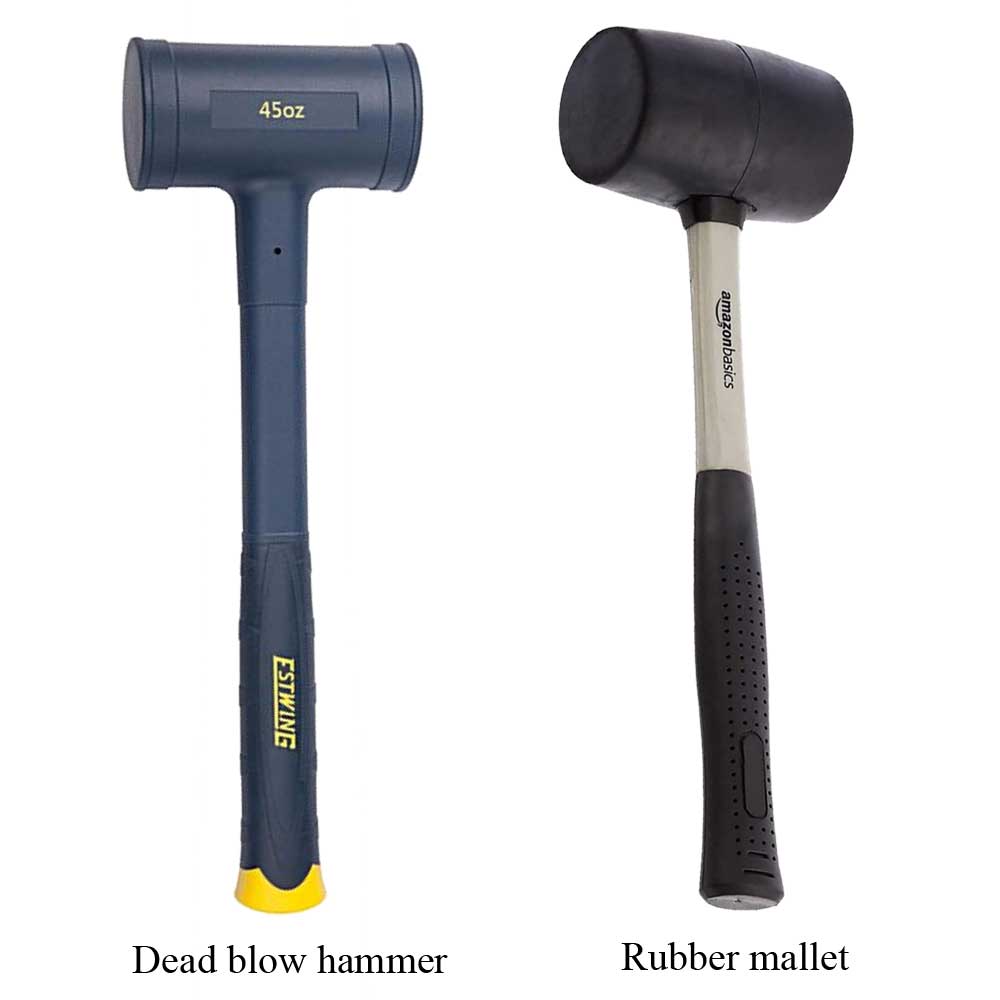
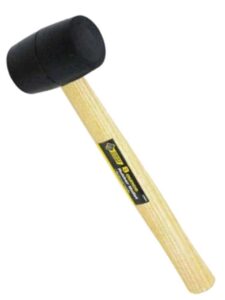
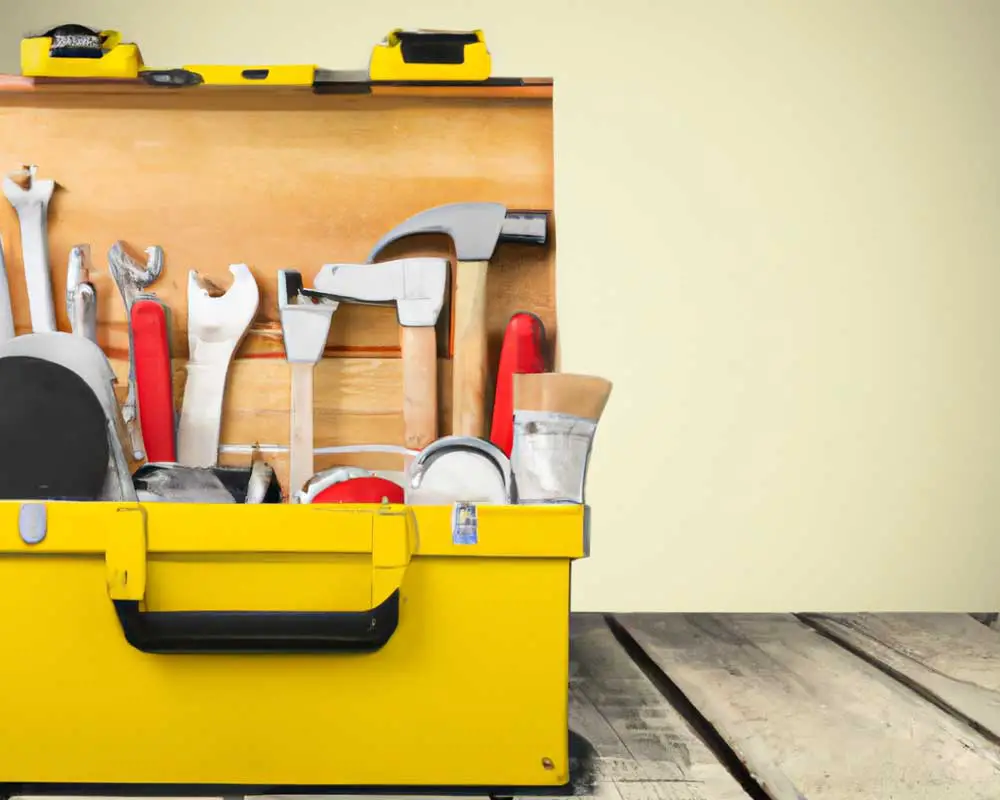
The tools inside a carpenter’s tool box can vary depending on the type of carpentry work being done, but typically include items such as hammers, saws, chisels, screwdrivers, pliers, measuring tapes, levels, squares, clamps, drills, and more.

The different types of carpenter tool boxes

There are many different types of carpenter tool boxes available on the market, each designed for a specific purpose. Here are some of the most common types:

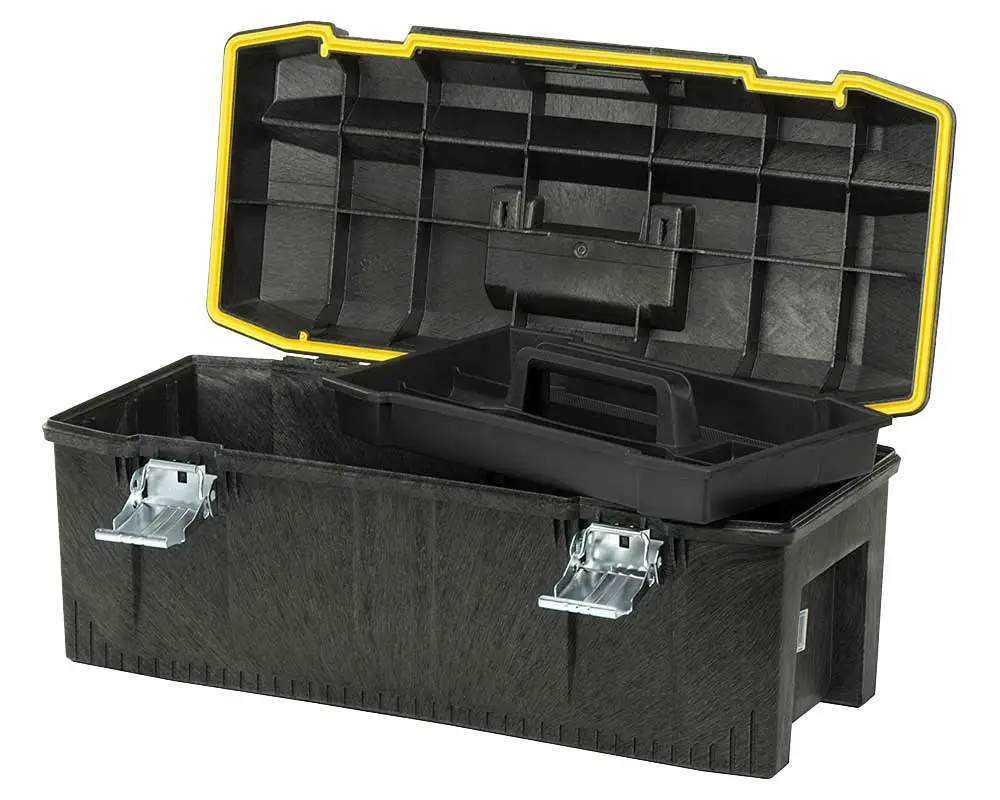
  1. The Standard Tool Box: This is the most basic type of carpenter tool box, and usually consists of one or two compartments for storing tools.
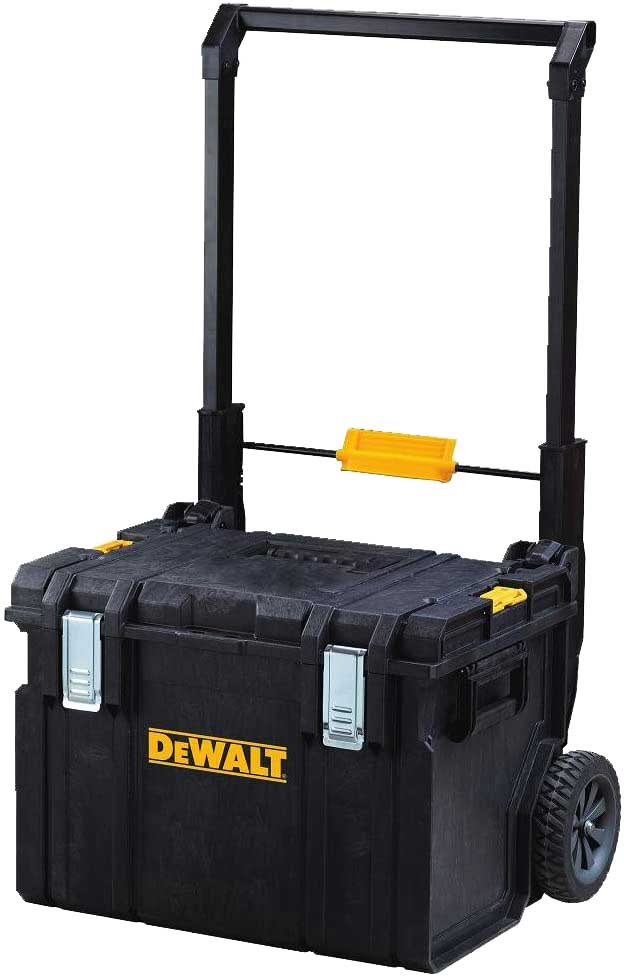
  2. The Portable Tool Box: These are small to medium-sized boxes that are easy to carry around and transport. They are usually made of durable plastic or metal. It typically has wheels and a handle for easy transportation.
  3. The Stackable Tool Box: This type of carpenter tool box is designed to be stacked on top of another tool box, creating a taller storage option.
  4. The Rolling Tool Box: This type of carpenter tool box has wheels and is designed to be rolled around a job site. It is often used in conjunction with a portable tool box.
  5. Chest tool boxes: These are large, heavy-duty boxes that are designed to hold a large number of tools. They usually have multiple compartments and drawers for organizing tools and are made of durable materials like metal.
  6. Workbench tool boxes: These tool boxes are designed to be integrated into a workbench, providing a storage area for tools underneath the work surface.
  7. Tool bags: These are soft-sided tool storage solutions that are made of durable fabric and have multiple pockets for organizing tools. They are lightweight and easy to carry around.
  8. Tool belts: These are wearable tool storage solutions that consist of a belt and various pouches and pockets for holding tools. They are designed to keep tools close at hand while leaving the user’s hands free.

The type of tool box a carpenter chooses will depend on their specific needs and preferences. A portable tool box or tool bag may be ideal for carpenters who need to carry their tools to different job sites, while a chest tool box or workbench tool box may be better suited for those who work in a fixed location.

What to look for when purchasing a carpenter tool box

When purchasing a carpenter tool box, there are several factors to consider to ensure that you choose the right one for your needs. Here are some things to look for:

  1. Size: Consider the size of the tool box and whether it will be able to accommodate all of your tools. You’ll want to choose a tool box that is large enough to hold everything you need but not so large that it becomes cumbersome to transport.
  2. Durability: Look for a tool box that is made of high-quality materials and is built to last. Metal tool boxes are usually more durable than plastic ones, but they can be heavier and more expensive.
  3. Portability: Consider whether you will need to transport your tool box frequently. If so, look for a tool box with wheels or a handle for easy transport.
  4. Organization: Look for a tool box that has compartments or drawers for organizing your tools. This will make it easier to find what you need when you need it.
  5. Security: Consider whether you need a tool box with a lock or other security features to prevent theft or unauthorized access.
  6. Price: Tool boxes can range in price from relatively inexpensive to very expensive. Consider your budget and choose a tool box that fits within it while still meeting your needs.
  7. Brand and Warranty: Choose a reputable brand with a good warranty to ensure that your tool box will be reliable and long-lasting.

Overall, choosing the right carpenter tool box is about finding the right balance between size, durability, portability, organization, security, and price to meet your specific needs.

The best carpenter tool boxes on the market

There are many different types of carpenter tool boxes on the market. Some are better than others. Here is a list of the best carpenter tool boxes on the market:

1. DeWalt ToughSystem DS450 22 in. Mobile Tool Box:

This is a heavy-duty tool box that is made of durable materials and has a capacity of 110 pounds. It features a telescoping handle and heavy-duty wheels for easy transport, and it can be stacked with other DeWalt ToughSystem modules. It also has a lot of compartments to store all of your tools.

2. Stanley 028001L 28-Inch Structural Foam Toolbox:

This is a lightweight yet durable tool box that is made of structural foam and has a capacity of 28 quarts. It features a removable tray and a built-in padlock eye for security.

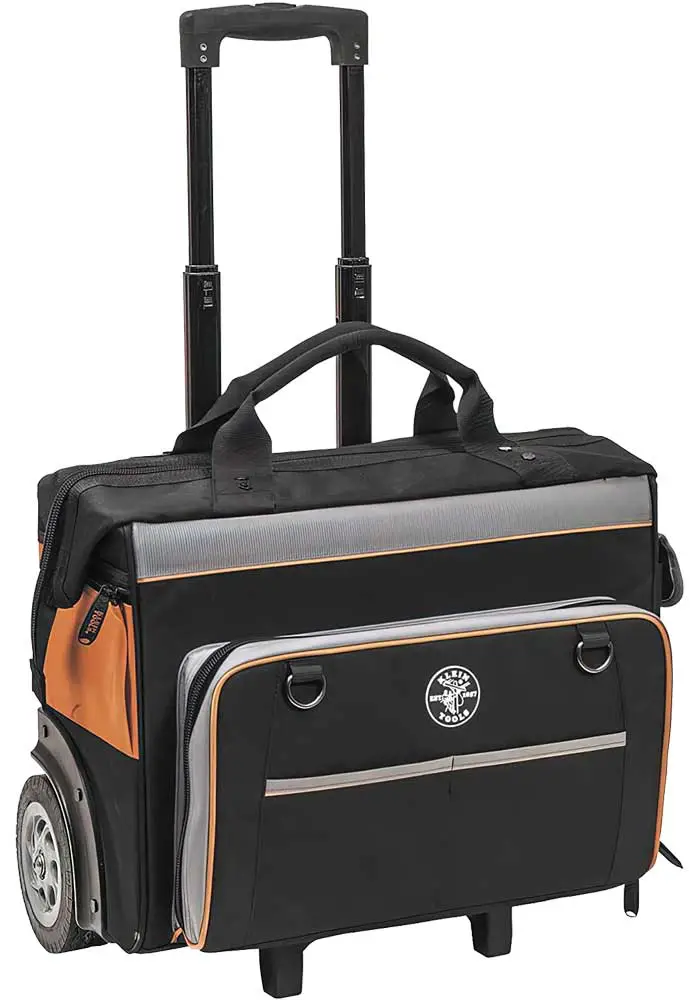
3. Klein Tools 55452RTB Rolling Tool Bag:

his is a versatile tool bag that can hold up to 100 pounds of tools. It features a telescoping handle and wheels for easy transport and has a variety of pockets and compartments for organization.

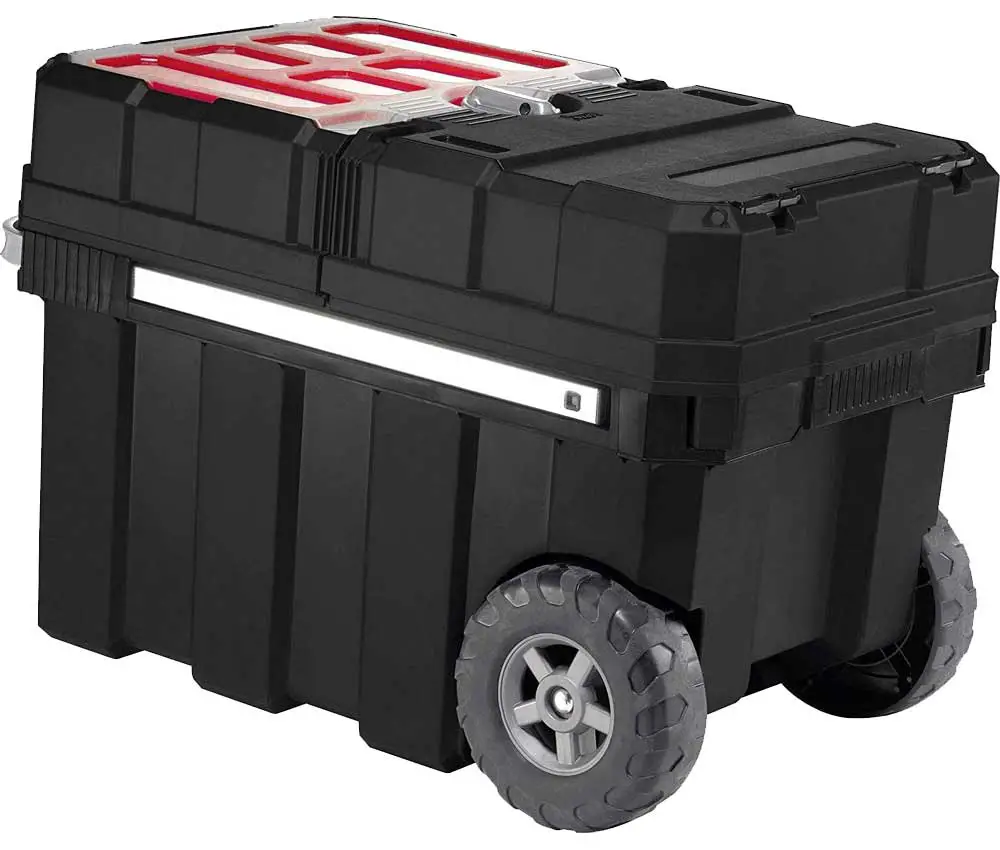
4. Keter Master Pro Masterloader 17191709 Tool Trolley

The Keter New Masterloader Plastic Utility Tool Box is one of the best carpenter tool boxes on the market. It is made out of durable plastic and has a lot of compartments and trays to organize your tools.

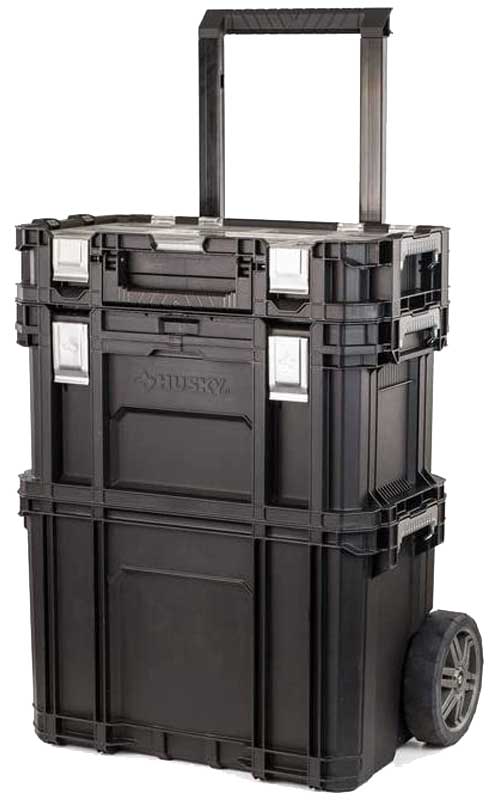
5. Husky 230381 22 in. Connect Rolling System Tool Box

Husky 22 in. Connect Rolling System Tool Box: This is a modular rolling tool box that can be customized to meet your specific needs. It features a telescoping handle and wheels for easy transport and can be stacked with other Husky Connect System units.

Ultimately, the best carpenter tool box for you will depend on your specific needs and preferences. Consider factors such as size, durability, portability, organization, security, and price when choosing a tool box that meets your needs.

How to care for your carpenter tool box

Assuming you are referring to a tool box used by carpenters, here are some tips on how to care for it:

  • Keep the tool box clean and free of sawdust or other debris. This will help extend its life and prevent rusting.
  • Oil the hinges and locks: Use a lightweight oil such as WD-40 to lubricate the hinges and locks on your tool box. This will help keep them working smoothly and prevent rust.
  • Store the tool box in a cool, dry place when not in use. Heat and moisture can damage the tools and cause them to rust.
  • Don’t overload your tool box: Be careful not to overload your tool box with too many heavy tools or accessories. This can cause the tool box to become damaged or difficult to transport.
  • Use the right tool for the job: Avoid using your tool box as a workbench or stepping stool, as this can cause damage to the box and put unnecessary strain on the hinges and locks.
  • Check the tool box regularly for damage: Inspect your tool box regularly for signs of wear and tear or damage. If you notice any cracks, dents, or other damage, address it promptly to prevent further damage.

By following these tips, you can help ensure that your carpenter tool box lasts for years and keeps your tools in good condition.

Conclusion

A carpenter’s tool box is an essential item for any professional or amateur woodworker. It helps to keep tools organized and ready for use, as well as providing a portable solution that allows you to bring the correct tools wherever you go. With a wide range of sizes and styles available, there is sure to be a carpenter’s toolbox that meets your needs – no matter how large or small your projects may be!

Screwing into Plywood End Grain

When it comes to screwing into plywood, there are a few things you need to keep in mind. First of all, you need to make sure that you’re using the right type of screws. Second, you need to be careful not to over-tighten the screws, which can cause the plywood to split.

Finally, when screwing into the end grain of plywood, it’s important to predrill holes first so that the wood doesn’t split. With these tips in mind, let’s take a closer look at each one.

When you screw into the end grain of plywood, it’s important to use a pilot hole so that the screw doesn’t split the wood. You also want to countersink the screw so that the head is flush with the surface of the wood. To do this, you’ll need a drill and a countersink bit.

First, drill a pilot hole using a drill bit that is smaller than your screw. Next, insert your countersink bit into the drill and carefully drill into the center of your pilot hole until it reaches the desired depth. Finally, insert your screw into the pilot hole and tighten it until it is flush with the surface of the plywood.

How to screw insert into plywood perfectly

Can You Screw into End Grain Plywood?

No, you cannot screw into end grain plywood. The fibers in the plywood are oriented perpendicular to the surface of the plywood, making it very difficult to drive a screw into the wood. Additionally, the glue that holds the layers of plywood together is not as strong at the edges of the sheets, so screws tend to pull out more easily.

If you need to attach something to end grain plywood, try using nails or brads instead.

Can You Screw into End Grain?

When it comes to screwing into end grain, there are a few things you need to keep in mind. First of all, you need to make sure that you’re using the right type of screw. Second, you need to make sure that the screw is properly lubricated.

And third, you need to make sure that the screw is driven in at a slow and steady pace. If you’re using the wrong type of screw, then it’s likely that the head will stripped or the shaft will break. This is why it’s important to use screws that are specifically designed for end grain.

For example, some companies make specialised screws that have a shallower head and a stronger shaft. These types of screws are less likely to strip or break when used on end grain. It’s also important to make sure that the screw is properly lubricated before use.

This will help to prevent stripping and breaking, and will also make driving the screw in much easier. The best way to lubricate a screw is with beeswax or another similar substance. Simply rub a small amount of wax onto the threads of the screw before use.

Finally, it’s important to drive the screw in at a slow and steady pace. If you try to drive it in too quickly, then there’s a good chance that it will strip or break. Instead, take your time and turn the screw slowly until it’s fully seated in the wood.

Can I Screw in to Edge of Plywood?

It is not recommended to screw into the edge of plywood as it can cause the wood to split. It is better to predrill holes and then use screws that are long enough to go through the plywood and into the studs behind it.

How Well Do Screws Hold in Plywood?

While screws are not the only method of attaching plywood, they are one of the most popular. This is because they are relatively easy to use and can provide a very strong hold. There are, however, some things to keep in mind when using screws to attach plywood.

First, it is important to choose the right type of screw. There are many different types of screws available, but not all of them will work well for attaching plywood. For example, drywall screws are not meant for attaching plywood and will likely strip out easily.

Instead, look for decking or construction screws that are specifically designed for attaching plywood. These will have a sharper point and a stronger hold. Second, be sure to predrill holes before driving in the screws.

This will help prevent splitting and ensure that the screw goes in straight. It is also a good idea to countersink the holes so that the heads of the screws sit flush with the surface of the plywood. Finally, remember that even with pre-drilling and countersinking, it is still possible to split thin pieces of plywood if you’re not careful.

To avoid this problem altogether, use longer screws (3 inches or longer) and/or washer-head screws whenever possible. By following these tips, you can ensure that your Screws will provide a strong hold in your plywood project!

Screwing into Plywood End Grain

Credit: makezine.com

Nailing into Plywood Edge

If you’re working with plywood, you know that one of the most important parts of the process is nailing into the edge. This can be a tricky task, but with a little bit of know-how, you can make it much easier on yourself. Here are some tips for nailing into plywood edge:

1. Use a nail set. This will help ensure that your nails are driven in at the correct angle and depth. 2. Pre-drill your holes.

This will make it much easier to drive the nails in without splitting the wood. 3. Use finishing nails. These are thinner than regular nails and won’t split the wood as easily.

4. Counter sink your nails slightly below the surface of the wood. This will give them a nice, finished look once they’re painted or stained overtop.

How to Screw into Thin Plywood

If you’re looking to screw into thin plywood, there are a few things you need to keep in mind. First, make sure you have the right type of drill bit. A standard twist drill bit will work fine for most screws, but if you’re using a large or long screw, you may need a pilot hole first.

Second, use a lower speed when drilling and be careful not to overheat the bit or damage the wood. Finally, when driving the screw, use moderate pressure and go slowly at first to avoid stripping the head. With these tips in mind, screwing into thin plywood should be a breeze!

Screwing into End Grain

When it comes to screwing into end grain, there are a few things that you need to keep in mind. First of all, you need to make sure that you’re using the right type of screws. Second, you need to make sure that the screws are properly lubricated.

And finally, you need to be careful not to over-tighten the screws. If you’re not using the right type of screws, then you could end up doing more harm than good. For example, if you use drywall screws or wood screws, then they’re likely to strip out the end grain and leave your project in a worse state than it was before.

Instead, use decking screws or construction screws – these are designed specifically for screwing into end grain and won’t strip out as easily. Once you’ve got the right type of screw, it’s important to lubricate them properly. This will help them go in more smoothly and also prevent them from stripping out the end grain.

You can use any kind of lubricant – WD-40 is a popular choice – but make sure that it’s compatible with whatever finish you’re using on your project. Finally, don’t over-tighten the screws. Just like with any other joint, if you overtighten the screws then they’re likely to strip out or break completely.

So take your time and snug them up just enough so that they’re secure without being overly tight. By following these simple tips, you should be able to successfully screw into end grain without any problems!

Best Way to Fasten Plywood Together

One of the most common questions we get here at The Home Depot is, “What is the best way to fasten plywood together?” There are several ways to do this, but we always recommend using screws. Here’s why:

When you use nails to join plywood, the nails can eventually work their way out and loosen the joint. This is especially true if you’re nailing into end grain. Screws create a much more secure connection that won’t loosen over time.

Another advantage of using screws is that they allow you to disassemble the plywood if you need to. This can be handy if you ever need to make repairs or changes down the road. With nails, once they’re in, they’re in for good.

Finally, screws just look nicer than nails. They create a cleaner finished product that will be more aesthetically pleasing in your space. So there you have it!

Our recommendation for the best way to fasten plywood together is with screws.

Screw Or Nail into End Grain

End grain is the term used for the exposed cuts of wood on the ends of boards. When you look at a piece of lumber, end grain is the part of the wood that was cut perpendicular to the tree’s growth rings. To get a better understanding of what end grain looks like, imagine cutting a log in half lengthwise.

The cut surface that runs along the log’s length is called its face or flat grain, while the newly exposed cross sections are referred to as its end grain. There are two different ways to join two pieces of wood together using screws or nails: with their respective grains running in the same direction (called an edge-to-edge joint), or with one screw or nail driven into each piece’s end grain (an end-to-end joint). While both methods will create a strong connection, there are some key differences between these two types of joints that should be considered when deciding which method to use.

One advantage of using screws or nails in an edge-to-edge joint is that it allows for slight misalignments between the two pieces being joined. This can be helpful when working with less than perfectly straight lumber. However, because screws and nails rely on friction to hold things together, this type of joint is not ideal for applications where there will be significant movement or vibration (such as in furniture).

Additionally, it can be difficult to drive screws or nails into hardwoods without splitting them, so this method is usually only suitable for softer woods. In contrast, an end-to-end joint provides greater holding power and stability than an edge-to-edge connection since each fastener is driven into solid wood (rather than just relying on friction). This makes them ideal for outdoor projects or any situation where there may be some movement or vibration.

And since no two pieces of wood are exactly alike, driving screws or nails into their end grain also helps to create a more visually appealing and unique finished project.

Confirmat Screws for Plywood

If you’re working with plywood, you know that traditional screws can be a real pain. They tend to split the wood, making for a frustrating and time-consuming project. Confirmat screws are specifically designed for use with plywood, and they make the job much easier.

These screws have a wide, flat head that pulls the plywood together as it’s being driven in. This prevents splitting and makes for a much stronger joint. The threads on Confirmat screws are also very sharp, so they grip the wood tightly and don’t slip out.

Confirmat screws come in a variety of lengths to suit your project needs, and they’re available at most hardware stores. If you’re working with plywood, make your life easier by using Confirmat screws – you won’t regret it!

How Close to the Edge of Plywood Can You Drill

When it comes to drilling holes in plywood, there is no definitive answer as to how close to the edge you can drill. It really depends on the type of plywood and the bit that you are using. For example, if you are using a spade bit, then you will be able to get closer to the edge than if you were using a forstner bit.

In general though, it is best to avoid drilling too close to the edge as this could cause the plywood to split or crack.

Can You Screw into Plywood

When it comes to screwing into plywood, there are a few things you need to keep in mind. First, the type of screw you use will make a difference. For example, if you’re using a drywall screw, it’s not going to grip as well as a deck screw would.

Second, the thickness of the plywood will also affect how well the screw holds. Thicker plywood is better for holding screws than thinner plywood. Finally, pre-drilling your holes can help prevent splitting and make it easier to get the screws started.

With these tips in mind, let’s take a look at how to actually screw into plywood. The first step is to determine what type of screw you’ll be using. As mentioned before, different screws have different levels of gripping power.

If possible, try to find a deck screw or another type of heavy duty screw specifically designed for wood projects. Once you’ve got your screws, predrill your holes if you can. This will help prevent the plywood from splitting when you put the screws in later on.

Now it’s time to start putting in those screws! Begin by lining up your drill bit with the hole you drilled earlier (or skipping this step if you didn’t drill any holes). Slowly start driving the drill into the wood until the tip of the drill bit disappears inside completely – don’t overdo it or else you might split the wood!

Conclusion

If you’ve ever tried to screw into plywood end grain, you know it can be a frustrating experience. The screws tend to slip and strip out the wood, making it difficult to get a tight fit. There are a few tricks you can use, however, to make the process easier.

First, predrill your holes with a smaller drill bit. This will help keep the screw from slipping. Second, use a countersink bit to create a pilot hole for the screw head.

This will also help prevent stripping. Finally, use deck screws or construction adhesive instead of drywall screws; they’re stronger and less likely to strip out the wood. With these tips in mind, you should be able to successfully screw into plywood end grain without any problems.

The Best Combination Square for Woodworking: A Comprehensive Guide

A combination square is an indispensable tool for woodworkers of all levels of experience. However, with so many different models and brands on the market, it can be difficult to determine which one is right for you. In this article, we will take a comprehensive look at some of the best combination squares available, and help you decide which one is right for your needs. Whether you are a beginner or a seasoned pro, there is sure to be a model that fits your needs!

History of the combination square

The combination square has its origins in ancient Egypt, where it was used for measuring pyramids and other structures. The tool eventually made its way to Greece and Rome, where it was used by carpenters and stonemasons. In the Middle Ages, the combination square was introduced to Europe, where it became an essential tool for builders and craftsmen.

Today, the combination square is used by woodworkers of all levels of experience and is an indispensable tool for any workshop.

Parts of the combination square

The combination square has three main parts: the head, the blade, and the stock.

The head is the part of the square that contains the rulers or measuring scales. The most common types of heads are those with one straight edge and one ruler, and those with two rulers at 90-degree angles to each other.

The blade is the part of the square that is attached to the head. It is usually made of steel or aluminum, and it is what you use to make your measurements.

The stock is the part of the square that attaches the blade to the head. It is usually made of wood or plastic, and it provides a sturdy base for the blade.

There are also a few other parts that are often found on combination squares, such as a level bubble and a scribe. The level bubble is used to ensure that your square is level, while the scribe can be used to mark lines on your workpiece.

Types of the combination square

There are several types of combination squares available on the market, each with its own advantages and disadvantages. Here is a quick overview of the most popular types:

-Traditional combination square: This type of square is the most basic and simple to use. It consists of a steel ruler with a 90-degree angle at one end, and a head that can be attached at either end of the ruler. This type of square is great for simple tasks such as measuring and marking 90-degree angles, but it is not very precise.

-Digital combination square: This type of square is more expensive than a traditional one, but it is much more precise. It consists of a digital display that shows the measurements, and a head that can be attached at either end of the ruler. This type of square is great for more precise tasks such as measuring small angles and marking very precise lines.

-Folding combination square: This type of square is similar to a traditional one, but it has a folding head that allows for more versatility. It is great for tasks such as measuring inside and outside corners, and marking lines at any angle.

Now that you know the different types of combination squares available, you can decide which one is right for your needs. If you are just starting out in woodworking, a traditional square will suffice. However, if you need more precision, a digital or folding square would be a better choice. Whichever type you choose, make sure to get one that is made from high-quality materials and is durable. With the right combination square, you will be able to tackle any woodworking project with ease!

Combination square uses

There are a few different ways that you can use a combination square:

-marking out lines: you can use the head of the combination square to mark out lines on your wood. This is useful for marking out cutting lines, or for drawing lines that you need to follow when shaping your wood.

-measuring angles: the combination square can also be used to measure angles. This is useful for ensuring that your cuts are at the correct angle, or for checking the angle of existing joints.

-checking for square: finally, you can use the combination square to check whether two pieces of wood are perfectly square. This is essential for ensuring that your project will be stable and look good.

Choosing a combination square

With so many different models and brands on the market, it can be difficult to determine which one is right for you. One of the most important things to consider when choosing a combination square is the blade. The blade is the part of the tool that actually makes contact with your workpiece, so it is important to choose one that is made from high-quality materials. Look for a blade that is made from stainless steel or another durable material. Additionally, make sure that the blade is properly hardened and tempered, as this will help ensure a long lifespan.

Another thing to consider is the handle. The handle is what you will grip when using the tool, so it is important to choose one that is comfortable for you. Some handles are made from wood, while others are made from plastic or metal. Consider how the tool will feel in your hand, and choose a model with a handle that is comfortable for you.

Finally, consider the price. Combination squares are available at a wide range of prices, so it is important to find one that fits your budget. However, remember that the quality of the tool is more important than the price. If you are only going to use the tool occasionally, you may not need to spend as much as someone who is going to use it on a daily basis. However, if you plan on using the tool frequently, it is worth investing in a higher-quality model.

Conclusion

No matter what your needs are, there is sure to be a combination square that is right for you. With so many different models available, it is easy to find one that fits your budget and your needs. By considering the factors discussed above, you can be sure to find the perfect model for your woodworking shop! Have you ever used a combination square? What are your thoughts on them? Let us know in the comments below!

The Best Way to Use a Digital Sliding Bevel Gauge

There are many tools that woodworkers use on a regular basis, and the digital sliding bevel gauge is one of them. This tool is used to measure angles, and it can be very helpful in a variety of situations. In this article, we will discuss the best way to use a digital sliding bevel gauge. We will also provide some tips for getting the most out of this tool!

7 best uses digital sliding bevel gauge

There are many ways to use a digital sliding bevel gauge, but here are seven of the best ways:

First, when you’re trying to get an accurate measurement, using a digital sliding bevel gauge is one of the most effective methods. This is because unlike vernier or dial calipers, the digital readout on a digital sliding bevel gauge is extremely precise. This tool can measure angles within one degree. If you need to make precise cuts or measurements, this is the tool for you.

Second, when you need to make measurements in difficult or tight spaces, a digital sliding bevel gauge can be invaluable. This is because the digital readout on the gauge allows you to take measurements without having to physically touch the object you’re measuring.

Third, if you’re working with materials that are difficult to measure with traditional methods, a digital sliding bevel gauge can be the perfect solution. This is because the digital readout on the gauge is not affected by things like heat or cold, which can throw off traditional measurements.

Fourth, when you need to take multiple measurements in quick succession, a digital sliding bevel gauge can be a lifesaver. This is because the digital readout on the gauge ensures that you’re taking accurate measurements each and every time.

Fifth, if you are working with a piece of wood that is not perfectly straight, you may need to make some adjustments to the digital sliding bevel gauge. You can do this by loosening or tightening the screws on the side of the tool. This will allow you to adjust the angle of the gauge so that it is level with the surface of the wood.

Sixth, when using a digital sliding bevel gauge, it is important to remember that you should always start at zero. This will ensure that you are taking accurate measurements. If you start at any other angle, you may not be able to get an accurate reading.

Finally, when you need to make sure that your measurements are consistent, a digital sliding bevel gauge is the way to go. This is because the digital readout on the gauge means that you can take measurements that are identical every time, which is essential for ensuring accuracy.

Digital sliding bevel gauges are an extremely versatile tool, and these are just five of the best ways to use them. If you’re looking for a reliable, accurate way to take measurements, a digital sliding bevel gauge should be at the top of your list.

3 best digital sliding bevel gauges on the market

There are a few different digital sliding bevel gauges on the market, and it can be difficult to decide which one is right for you. In this section, we will discuss three of the best digital sliding bevel gauges on the market. We hope that this will help you make a decision about which gauge is right for you!

1. General Tools T-Bevel Gauge & Protractor #828

The first digital sliding bevel gauge on our list is the General Tools T-Bevel Gauge & Protractor #828. The blade of this gauge is made from stainless steel, and it is very lightweight. It also has a large LCD display, which makes it easy to read. The General Tools T-Bevel Gauge & Protractor 828 has four large control buttons that provide five functions, including power on/off, reading hold, read reverse angle, flip display, and clear readout. It comes with an automatic shut-off feature that preserves the battery life.

2. General Tools ANGLE-IZER T-Bevel Gauge & Protractor with Bubble #928

The next digital sliding bevel gauge on our list is the General Tools ANGLE-IZER T-Bevel Gauge & Protractor with Bubble #928. This gauge is made from stainless steel, and it is very durable. It also has a large LCD display, which makes it easy to read. The General Tools ANGLE-IZER T-Bevel Gauge also has a built-in level, which can help you ensure that your measurements are accurate.

3. Husky Digital Sliding T-Bevel

The third and final digital sliding bevel gauge on our list is the Husky Digital Sliding T-Bevel. This gauge is made from stainless steel, and it is very durable. It also has a large LCD display, which makes it easy to read.

Conclusion

Overall, the digital sliding bevel gauge is a great tool for any woodworker. It is accurate, easy to use, and perfect for making precise cuts or measurements. If you follow the tips above, you should have no trouble getting the most out of this tool! We hope that this article has helped you learn about the best way to use a digital sliding bevel gauge. We have also provided you with some tips for getting the most out of this tool. Do you have any tips for using a digital sliding bevel gauge or any other questions? Please share them with us in the comments below!

How to Use a Card Scraper for Woodworking: Tips and Tricks

Do you have a card scraper but don’t know how to use it? In this blog post, we will teach you how to use this handy tool for woodworking. A card scraper is a great way to smooth out your woodworking projects and get rid of any unwanted blemishes. We will provide some tips and tricks on how to get the most out of your card scraper. So, whether you are a beginner or an experienced woodworker, read on for more information!

What is a card scraper and what can it be used for in woodworking projects?

A card scraper is a small hand tool that is used to smooth and finish wood surfaces. It consists of a thin blade that is mounted on a wooden or metal handle. The blade is usually made from carbon steel or high-speed steel. Card scrapers are available in a variety of sizes, but the most common size has a blade that is about two inches wide.

Card scrapers are primarily used to remove small imperfections from wood surfaces. They can also be used to create a smooth surface prior to applying a finish. When using a card scraper, it is important to hold the tool at the correct angle. The blade should be held at a 45-degree angle to the wood surface. If the blade is not held at the correct angle, it will not cut properly and may damage the wood surface.

It is also important to use firm and even pressure when using a card scraper. This will ensure that the blade cuts evenly across the surface of the wood. If you apply too much pressure, the blade may dig into the wood and cause damage.

When you are finished using the card scraper, it is important to clean the tool properly. This will help to prevent rusting and keep the blade in good condition. To clean the card scraper, simply wipe it down with a dry cloth.

Now that you know what a card scraper is and how to use it, you can put it to good use on your next woodworking project! Just remember to hold the tool at the correct angle and apply firm, even pressure when using it. And, of course, don’t forget to clean the scraper after each use. With these tips in mind, you’ll be well on your way to creating beautiful, smooth woodworking projects!

How to hold the card scraper for optimum results

When using a card scraper, it is important to hold the tool at the correct angle. The blade should be held at a 45-degree angle to the wood surface. If the blade is not held at the correct angle, it will not cut properly and may damage the wood surface.

How to sharpen the card scraper for best performance

To keep the card scraper in good condition, it is important to sharpen the blade on a regular basis. The best way to sharpen the blade is with a honing stone. First, soak the honing stone in water for about 15 minutes. Then, hold the scraper at a 45-degree angle and run the blade across the honing stone.

It is important to use light pressure when sharpening the scraper. If you use too much pressure, you may damage the blade. Once the blade is sharpened, wipe it down with a dry cloth to remove any metal shavings.

Tips on using the card scraper on different types of wood surfaces

The card scraper can be used on a variety of different wood surfaces. However, there are a few things to keep in mind when using the tool on different types of wood.

First, softer woods such as pine and fir are more susceptible to damage from the card scraper. If you are working with these types of woods, it is important to use light pressure when using the scraper.

Second, harder woods such as maple and oak are less likely to be damaged by the card scraper. However, it is still important to use firm, even pressure when using the tool.

Finally, if you are working with delicate wood surfaces such as veneer, it is important to use extra care when using the card scraper. The veneer is very thin and can be easily damaged by the scraper. To avoid damaging the veneer, it is best to use light pressure and make sure that the blade is sharpened before each use.

Troubleshooting common problems using a card scraper

If you are having trouble using the card scraper, there are a few things you can do to troubleshoot the problem.

First, make sure that the blade is sharpened. If the blade is not sharp, it will not cut properly and may damage the wood surface.

Second, make sure that you are holding the scraper at the correct angle. The blade should be held at a 45-degree angle to the wood surface.

Third, make sure that you are using firm, even pressure when using the scraper. If you apply too much pressure, the blade may dig into the wood and cause damage.

Finally, if you are still having trouble, try using a different type of scraper. There are many different types of scrapers available, so you may find one that works better for your particular project.

With these tips in mind, you should be able to use the card scraper with ease and produce beautiful results on your next woodworking project!

Conclusion

In conclusion, the card scraper is a versatile tool that can be used on a variety of wood surfaces. It is important to hold the scraper at the correct angle and use firm, even pressure when using the tool. The blade should also be kept sharpened for best results. With these tips in mind, you will be well on your way to creating beautiful woodworking projects! Thanks for reading!

If you have any further questions about using a card scraper, please feel free to post them in the comments section below! Happy woodworking!

Wood Chisel vs Cold Chisel: Which One is Right For You?

When it comes to woodworking, there are a few different tools that you will need in your arsenal. One of the most important is the chisel. Chisels come in a variety of shapes and sizes, but two of the most common types are the wood chisel and the cold chisel. So, which one is right for you? In this article, we will compare the two types of chisels and help you decide which one is best for your needs.

Wood Chisel vs Cold Chisel

What is a wood chisel?

A wood chisel is a tool that is used to carve or cut wood. It has a sharp, metal blade that is set at an angle to the handle. This allows you to apply pressure to the chisel and create precise cuts in the wood. Wood chisels are available in a variety of sizes, so you can choose one that is best suited for the project you are working on.

One of the benefits of using a wood chisel is that it is less likely to damage the wood than a power tool. This makes it ideal for delicate projects or for working with expensive wood. However, the downside is that it can be more difficult to control than a power tool.

There are a few things to keep in mind when using a wood chisel:

  • Always sharpen the blade before use. A dull chisel will be more difficult to control and can damage the wood.
  • Apply even pressure when using the chisel. If you apply too much pressure, the blade may slip and damage the wood.
  • Be careful not to overcut. This can cause the wood to split or crack.

Now that you know a little bit more about wood chisels, let’s take a look at cold chisels.

What is a cold chisel?

A cold chisel is a steel tool with a sharp, hardened edge that’s used for metalworking. The name “cold chisel” comes from the fact that it’s used to cut metal that’s cold, as opposed to hot metal. Cold chisels are available in a variety of sizes and shapes, and they’re used for a variety of tasks, from cutting metal to shaping it.

There are two main types of cold chisels:

  • Standard cold chisels: These are the most common type of cold chisels. They have a rectangular cross-section and a blunt end. The rectangular cross-section gives them more strength, making them ideal for cutting through tougher metals.
  • Parallel cold chisels: These have parallel sides and a pointed end. They’re narrower than standard cold chisels, making them better for cutting narrower grooves.

cold chisels are made from a variety of materials, but the most common type is carbon steel. Carbon steel is a strong and durable material that can stand up to a lot of wear and tear. However, it is susceptible to rusting, so it’s important to keep your cold chisel clean and dry.

If you’re looking for a cold chisel that’s more resistant to rust, you might want to consider one made from stainless steel. Stainless steel is a more expensive option, but it’s worth the investment if you’re concerned about rust.

There are a few things to keep in mind when using a cold chisel:

  • Wear gloves: Cold chisels are sharp and can cause cuts. Wear gloves to protect your hands.
  • Use a hammer: Cold chisels are designed to be used with a hammer. Don’t try to use them without one.
  • Apply pressure evenly: When you’re using a cold chisel, apply pressure evenly to avoid chipping the metal.
  • Go slowly: Cold chisels can remove a lot of material quickly, so go slowly and be careful.

6 differences between Wood Chisel and Cold Chisel

Firstly, the wood chisel is the most common type of chisel which is usually used for softer woods, such as pine or cedar. The blade of a wood chisel is usually beveled on one side, which allows you to create clean, precise cuts.

On the other hand, the cold chisel is designed for tougher materials, such as concrete or stone. The blade of a cold chisel is usually flat, which makes it ideal for breaking up hard surfaces.

Secondly, the wood chisel is better for working with small, delicate pieces while the cold chisel is ideal for larger projects.

Thirdly, the wood chisel is less likely to cause damage to the workpiece but the cold chisel can handle tougher materials and is less likely to damage the workpiece.

Fourthly, the wood chisel is typically used for softer woods while the cold chisel is designed for tougher materials.

Fifthly, the blade of a wood chisel is usually beveled on one side while the blade of a cold chisel is usually flat.

Finally, no matter which type of chisel you choose, be sure to use it safely and always wear protective gear when working with any type of tool. Happy woodworking!

Conclusion

In conclusion, it really depends on the project you are working on as to which type of chisel is right for you. If you are working with softwoods, small, delicate pieces, then a wood chisel is the way to go. However, if you are working with tougher materials or a larger project, then a cold chisel is the better choice. No matter which type of chisel you choose, be sure to use it safely and always wear protective gear when working with any type of tool. Happy woodworking!

How to Use a Sliding T Bevel for Precision Woodworking

If you’re a woodworker, then you know the importance of having precise measurements. A Sliding T bevel is one of the most important tools for achieving accuracy when cutting and shaping wood. In this article, we will discuss the different ways that you can use a Sliding T bevel to improve your woodworking projects. We’ll also provide some tips on how to choose the right Sliding T bevel for your needs. So whether you’re a beginner or an experienced woodworker, read on to learn more about using Sliding T bevels!

A sliding T bevel is also known as a T bevel or an adjustable bevel gauge. It is one of the most important tools for woodworkers as it helps to create accurate measurements. This tool can be used in a variety of ways to improve your woodworking projects.

History of Sliding T bevel

The Sliding T bevel is a tool that has been used by woodworkers for centuries. It is one of the most essential tools for achieving accuracy in woodworking projects. The name “Sliding T bevel” comes from the fact that the blade of the tool is able to slide through a slot in the handle. This allows the blade to be adjusted to any angle, which is essential for taking precise measurements.

The first recorded use of the Sliding T bevel dates back to the early Egypt. It is believed that the Egyptians used a similar tool to cut stone blocks for their pyramids. The Sliding T bevel continued to be used throughout history by woodworkers and carpenters. In the 18th century, the Sliding T bevel was patented in England by James Watkinson. The Sliding T bevel is still used today by woodworkers all over the world. It is an essential tool for anyone who wants to achieve precision in their work.

Parts of Sliding T bevel

The Sliding T bevel consists of two parts: the blade and the handle. The blade is the part of the tool that you use to take measurements. The handle is used to adjust the blade so that it is level with the surface of the wood.

There are two types of blades that you can choose from: flat and round. The flat blade is the most common type of blade and is used for taking measurements on flat surfaces. The round blade is used for taking measurements on curved surfaces.

The handle of the Sliding T bevel can be made from different materials, such as wood, plastic, or metal. The most important thing to consider when choosing a handle is that it should be comfortable to hold and easy to grip.

There are two types of measurement systems that you can use with the Sliding T bevel: English and Metric. The English system is used in the United States, while the Metric system is used in most other countries.

Types of Sliding T bevel

There are many different types of Sliding T bevels available on the market, each with their own unique features. The most common type is the standard Sliding T bevel, which features a blade that can be locked into place at any angle. This is perfect for taking precise measurements when cutting or shaping wood.

Another popular type of Sliding T bevel is the adjustable Sliding T bevel. This type of bevel features a blade that can be adjusted to any angle, making it perfect for taking measurements on irregularly shaped pieces of wood.

The last type of Sliding T bevel we will discuss is the digital Sliding T bevel. This type of bevel features a digital display that shows the angle of the blade. This is perfect for taking precise measurements on any type of wood.

Using a sliding t bevel

There are many different ways that you can use a Sliding T bevel. For example, you can use it to find the Angle of Repose – which is the angle at which a pile of material will slide. You can also use it to mark out the angles for dovetails, chamfers, and miters. In short, the Sliding T bevel is a versatile tool that every woodworker should have in their toolkit.

how to choose the right Sliding T bevel

Now that you know what a Sliding T bevel is and what it’s used for, let’s discuss how to choose the right one for your needs. When choosing a Sliding T bevel, you need to consider the size of the blade and the handle. The blade should be long enough to reach the farthest corner of the workpiece. And the handle should be comfortable to grip and easy to control. You also need to consider the material of the blade. For example, if you’re working with softwoods, then a carbon steel blade is a good choice. But if you’re working with hardwoods, then you might want to choose a stainless steel blade.

Taking measurements

Once you have determined the angle of the blade, you need to set the bevel on your workpiece. To do this, you will need to place the blade against the edge of the workpiece and then tighten the screw. Once the bevel is in place, you can start taking measurements.

After placing the bevel, it is important to make sure that the blade is level with the surface of the workpiece. To do this, you will need to use a spirit level. Once the blade is level, it is important to use the correct units of measurement. The most common unit of measurement for woodworking projects is the inch. However, you may also need to use other units of measurement such as the foot or the yard. Once you have taken all of the measurements, you can start cutting or shaping the wood.

One of the most important things to remember when using a Sliding T bevel is to make sure that the blade is locked in place. This can be done by tightening the knob at the end of the blade. Once the blade is locked in place, you can then slide the bevel along the wood to get a precise measurement.

Conclusion

Once you’ve considered all of these factors, you’ll be sure to find the perfect Sliding T bevel for your woodworking needs! With the right tool, you can take your woodworking projects to the next level! So don’t wait any longer, get a Sliding T bevel today and start enjoying the benefits of precision woodworking. Thanks for reading!

Unique Uses for a Zig-Zag Ruler in Woodworking

There are a lot of different tools that can be used in woodworking, and the zig-zag ruler is one of them. This unique ruler can be used for a variety of tasks, from measuring angles to drawing curves. In this article, we will discuss some of the most common uses for the zig-zag ruler in woodworking. We will also provide some tips on how to use it effectively. So if you’re looking for a new tool to add to your arsenal, be sure to check out the zig-zag ruler!

History of the zig-zag ruler

The zig-zag ruler has been around for centuries, and it was originally used by carpenters and masons to measure angles and draw curves. It wasn’t until the 19th century that the zig-zag ruler became a popular tool in woodworking. The first mass-produced zig-zag rulers were made of brass, and they were used to create intricate designs in wood. Today, the zig-zag ruler is still a popular tool in woodworking, and it can be used for a variety of tasks.

Types of the zig-zag ruler

There are a few different types of zigzag rulers available on the market, each with their own unique set of features. The most common type is the steel zigzag ruler, which is great for drawing straight lines and measuring angles. There are also wooden zigzag rulers, which are perfect for use with a jigsaw. And finally, there are plastic zigzag rulers, which are ideal for use with a router. No matter what type of zigzag ruler you choose, be sure to read the instructions carefully before use. This will ensure that you get the most out of your new tool!

What is a zig-zag ruler used for?

The zig-zag ruler is a tool that can be used for a variety of tasks in woodworking. It is a measuring tool. One of the most common uses for the zig-zag ruler is measuring angles. If you’re working on a project that requires precise measurements, then this tool can come in handy. Simply align the ruler with the edge of your workpiece and make a mark at the desired angle. Then, use a protractor to find the exact measurement.

Another common use for the zig-zag ruler is drawing curves. This tool can be used to create both straight and curved lines. To draw a curve, simply place the ruler on your workpiece and trace around the desired shape. For straight lines, you can use the edge of the ruler as a guide.

Finally, the zig-zag ruler can also be used to create perfect 90-degree angles. This is especially useful when you’re working on projects that require precise angles. To do this, simply place the ruler on your workpiece and make a mark at the desired angle. Then, use a square or a set of triangles to find the exact measurement.

Here are a few tips on how to use the zig-zag ruler:

-When measuring angles, be sure to start at the zero mark on the ruler.

-To create precise cuts, use a sharp pencil or knife to score the line before cutting.

-For best results, use a straight edge when drawing curves or other shapes.

With these tips in mind, you’ll be able to get the most out of your zig-zag ruler and complete any woodworking project with ease!

How do you care for a zig-zag ruler?

To ensure your zigzag ruler lasts a long time, it’s important to take care of it properly. Here are some tips on how to do that:

– Store the ruler in a dry place when not in use.

– Keep the ruler clean and free of dirt and debris.

– Inspect the ruler regularly for any damage.

– If the ruler does become damaged, do not use it until it is repaired or replaced.

Conclusion

By following these simple tips, you can help extend the life of your zigzag ruler and ensure that it continues to be a useful tool in your woodworking projects. Thanks for reading! We hope you found this article helpful.

Wood Scraper Tools: Types and Uses

Do you need to remove paint, varnish, or other finishes from wood? Are there any areas on your woodworking projects that need a little extra attention? If so, a wood scraper tool may be the perfect answer for you. In this article, we will discuss the different types of wood scraper tools and their various uses. We’ll also provide some tips for getting the most out of your wood scraper tools. Let’s get started!

Wood Scraper Tools

There are two main types of wood scraper tools: hand scrapers and power scrapers. Hand scrapers are the most common type of wood scraper tool and are typically used for smaller projects. Power scrapers, on the other hand, are more powerful and can be used for larger projects.

Uses for wood scraper tools

Some of the most common uses for wood scraper tools include removing paint, varnish, or other finishes from wood, as well as preparing wood for staining or painting. Wood scraper tools can also be used to remove glue or other adhesives from wood surfaces.

With wood scraper tools, you can quickly and easily remove paint, varnish, or other finishes from wood. These tools can also be used to prepare wood for staining or painting, and to remove glue or other adhesives from wood surfaces. Just be sure to use caution and go slowly when using these powerful tools. And don’t forget to wear protective gloves and eye protection!

Caution

When using a wood scraper tool, it is important to use caution and go slowly. Start with a smaller area and work your way up to larger areas. Be sure to wear protective gloves and eye protection when using wood scraper tools.

How do you scrape wood?

There are a few different ways that you can scrape wood, depending on the type of wood scraper tool that you are using.

One way to scrape wood is to use a hand tool. This involves holding the wood scraper tool in your hand and then moving it across the surface of the wood that you want to scrape.

Another way to scrape wood is to use a power tool. This involves attaching the wood scraper tool to a power drill and then using the drill to spin the scraper around.

The third way to scrape wood is to use a machine. This involves feeding the wood into a machine that will then scrape it for you.

Wood scraper blades

There are many different types of wood scraper blades available on the market. The most common type is the straight blade, which is ideal for general-purpose scraping. For more specific tasks, you may want to consider a curved blade or a V-shaped blade.

When choosing a wood scraper blade, be sure to select one that is made from high-quality steel. This will help to ensure that the blade will maintain its sharpness and will not dull quickly.

In addition to the type of blade, you also need to consider the size of the wood scraper tool. For smaller projects, a mini wood scraper may be all you need. For larger projects, however, you will likely need a full-sized wood scraper.

types of hand scraper woodworking tools

There are many different types of wood scraper tools available on the market, each designed for a specific purpose. Here are just a few of the most popular options:

– Putty knives: These versatile tools can be used for a variety of tasks, including scraping away paint, varnish, and other finishes from wood surfaces.

– Spackle knives: Similar to putty knives, spackle knives are ideal for removing excess spackle or other materials from woodworking projects.

– Chisels: Chisels can be used for a variety of woodworking tasks, including carving, shaping, and of course, scraping away wood finishes.

– Draw knives: Draw knives are specifically designed for removing wood shavings and other materials from woodworking projects.

What is the difference between a hand scraper and a cabinet scraper?

The main difference between a hand scraper and a cabinet scraper is the size. Cabinet scrapers are larger and therefore can cover more area at one time. This makes them perfect for large woodworking projects. Hand scrapers, on the other hand, are smaller and more maneuverable. This makes them ideal for smaller projects or for getting into tight spaces.

There are two types of cabinet scrapers: push and pull. Push scrapers have a blade that is pushed across the wood. This type of scraper is best for removing paint or varnish from wood. Pull scrapers have a blade that is pulled across the wood. This type of scraper is best for removing wood chips or shavings.

There are also two types of hand scrapers: straight and curved. Straight scrapers have a blade that is flat and straight. This type of scraper is best for removing paint or varnish from wood. Curved scrapers have a blade that is curved. This type of scraper is best for getting into tight spaces or for removing wood chips or shavings.

Conclusion

No matter what type of wood scraper tool you choose, always use caution. Scrapers can be very sharp and can cause serious injury if not used properly. Always read the manufacturer’s instructions before using any wood scraper tool. With the right tool, you’ll be able to remove any unwanted material from your woodworking projects – and get the perfect finish every time.

Dead Blow Hammer vs Rubber Mallet: Which Is the Right Tool for You?

If you’re looking for a powerful tool to help you drive nails into hard surfaces, you may be wondering if a dead blow hammer or rubber mallet is the right choice for you. In this article, we will compare and contrast these two tools, so that you can make an informed decision about which one is best for your needs. Both of these tools have their own unique benefits, so read on to learn more!

dead blow hammer vs rubber mallet

Basis on weight

A dead blow hammer is a type of hammer that uses a weighted head to deliver powerful blows. The weight of the head helps to drive nails into hard surfaces with ease. The downside of using a dead blow hammer is that the weight of the head can make it difficult to control, and you may end up damaging your work surface if you’re not careful.

A rubber mallet, on the other hand, is a softer and more lightweight option. The soft head of the rubber mallet helps to prevent damage to your work surface, but it may not be as effective at driving nails into hard surfaces. If you’re working with delicate materials, or if you’re worried about damaging your work surface, a rubber mallet may be the better choice for you.

Do rubber mallets bounce?

One of the key differences between a dead blow hammer and a rubber mallet is that rubber mallets bounce. This can be advantageous if you’re trying to avoid damaging the surface you’re working on, but it also means that you have less control over the tool.

With a dead blow hammer, on the other hand, there is no risk of the tool bouncing off the surface. This gives you more control and allows you to apply more force if necessary.

If you’re planning on using a rubber mallet for your next project, it’s important to choose the right size and weight for the job. A heavier rubber mallet will deliver more force, making it ideal for driving nails into hard surfaces. However, a lighter rubber mallet is easier to control and is less likely to cause damage to your work surface.

So, which is the right tool for you? It depends on your needs. Whichever tool you choose, make sure to use it safely and carefully to avoid damaging your work surface or injuring yourself. Thanks for reading!

Do you have any other questions about dead blow hammers or rubber mallets? Let us know in the comments below! And be sure to check out our other articles for more information on tools and home improvement. Happy hammering!